Texts and Fonts
Texts and fonts are very important aspects of modern graphical user interfaces. It is important to be able to display high quality anti-aliased texts in all the languages that your application supports.
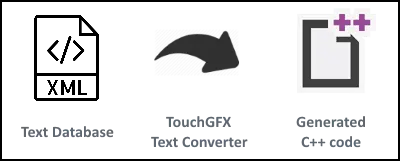
TouchGFX supports the creation and modification of texts and typographies through the Texts View of TouchGFX Designer. TouchGFX Designer outputs text and typography configurations into a database located at assets/texts/texts.xml.
This database, along with font files are fed to the font- and text-converter tools, producing generated C++ code files, that TouchGFX can render.
This article introduces the text and font converter tools and explains how to use the generated texts in an application through code and TouchGFX Designer.
Texts and Typographies
The texts and typographies in a TouchGFX application are stored in the assets/texts/texts.xml database. This database contains the texts with translations and the typographies used in the application. The database is commonly referred to as the "text database".
The texts and typographies can be edited in TouchGFX Designer with the Texts View, which enables easy and convenient editing.
It is, however, possible to edit the typographies and texts directly in the texts.xml and to assist this editing, an XML schema is supplied for validation assets/texts/texts.xsd. Many known text editors have an XML plugin to support XML schema validation, e.g. VS code, Notepad++ or Emacs, Visual Studio. In general it is recommended to use TouchGFX Designer when editing texts and typographies to avoid inconsistencies in typographies and missing translations, which the XML schema cannot validate.
To support working with text translations outside TouchGFX Designer, e.g. using an external translator for translations, the text-converter now has a new stand-alone tool that allows exporting text translations from the text database to an Excel spreadsheet. This Excel spreadsheet can then be shared with external translators. When the translations have been updated, the same tool can be used to import the Excel spreadsheet back into the text database. More about working with Translations.
Further reading
The Text Converter
The text converter is the tool that converts the text information in the text database to an internal C++ format used by TouchGFX applications. The tool is an integrated part of the build tool-chain and will be executed automatically when building the application. The text converter will only generate new C++ code if the translations or text properties in the text database have been modified or new texts or translations has been added.
Note
The text converter converts all the texts specified in the text database into the text format used by TouchGFX. The format is wrapped in an object called TypedText. A TypedText in TouchGFX is a combined entity of the text contents itself and the typography of the text. The typography contains the font and font size of the text and the bits per pixel (bpp) used in anti-aliasing the glyphs of the font.
The text converter generates a file called generated/texts/include/texts/TextKeysAndLanguages.hpp. This file contains an enum TEXTS that references all texts in the text database.
Notice that all entries in the enum are generated from the id stated in each text node in the text database, but with a T_ prepended and converted to uppercase. These enum values are used in applications to initialize TypedTexts.
The TextKeysAndLanguages.hpp also contains an enum LANGUAGES that specifies all the languages that are present in the text database. The naming is the same as in the language column in the text database.
generated/texts/include/texts/TextKeysAndLanguages.hpp
/* DO NOT EDIT THIS FILE */
/* This file is autogenerated by the text-database code generator */

#ifndef TEXT_KEYS_AND_LANGUAGES_HPP
#define TEXT_KEYS_AND_LANGUAGES_HPP


typedef enum {
    GB,
    DE,
    NUMBER_OF_LANGUAGES
} LANGUAGES;


typedef enum {
    T_TEMPERATURE_READOUT,
    T_TEMPERATURE_HEADLINE,
    NUMBER_OF_TEXT_KEYS
} TEXTS;

#endif /* TEXT_KEYS_AND_LANGUAGES_HPP */
Translations
This section gives a brief description of the workflow when exporting and importing text translations.
Consider the scenario where a developer has created an application containing texts and these texts needs to be translated to several different languages. The developer uses an external translator and needs to export the texts so they can be sent to the translator.
To export the texts, the developer uses the new tool, which is located in touchgfx/framework/tools/textconvert/translations.rb. The tool can be run in the TouchGFX Environment. Running the tool without any arguments, will print the following help text:
$ translations.rb
Export and import the text database for translation using e.g. Excel

Usage: translations.rb {export|import} assets/texts/texts.xml translations.xlsx [language]*

Export: Will create the "translations.xlsx" by extracting the texts for
        all languages from the given assets/texts/texts.xml

Import: Will merge the text translations from "translations.xlsx" into
        the given assets/texts/texts.xml. Only the actual texts are
        imported, not alignment and text direction.

If no languages are specified, all languages will be handled,
otherwise only the specified languages are imported/exported.
To export all languages do:
$ translations.rb export assets/texts/texts.xml translations.xlsx
To export specific languages, e.g. English, French and Arabic do:
$ translations.rb export assets/texts/texts.xml translations.xlsx English French Arabic
Now the Excel spreadsheet touchgfx/framework/tools/textconvert/translations.xlsx can be shared with the translator, see example below.
Excel spreadsheet - empty translations
Note
The corresponding Texts View in TouchGFX Designer.
Texts View - empty translations
When the translations are done and returned to the developer they can be imported into the text database.
Excel spreadsheet - updated translations
To import all languages do:
$ translations.rb import assets/texts/texts.xml translations.xlsx
To import specific languages, e.g. French and Arabic do:
$ translations.rb import assets/texts/texts.xml translations.xlsx French Arabic
Now the text database is updated with the translations.
Texts View - updated translations
Recommendations
Exporting texts for translation and importing them again, should be done on the same baseline of the text database, that way potential conflicts are avoided during the import process. If you are using a version control system, e.g. Git, it is recommended to make a branch before exporting and then update this branch with the text translations after they are done and finally merge the branch back to the main branch.
The figure below illustrates an example where Arabic and French translations are imported to a translation branch and merged back to the main branch. It is also shown how you should be careful when making changes to the text database on the main branch while work is done on a translation branch, as merge conflicts will arise.
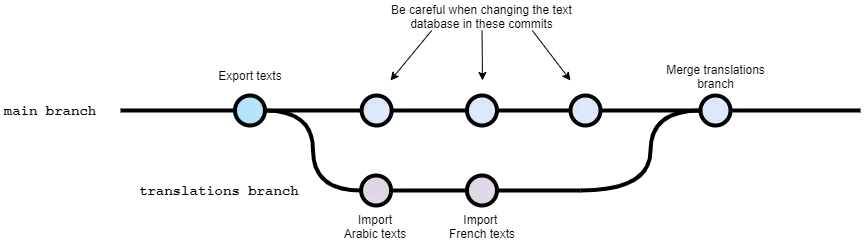
Branch example
Merge conflicts will arise in these cases:
- Deleting a text id in the text database on the main branch
- Adding a text id in the text database on the main branch
- Renaming a text id in the text database on the main branch
The Font Converter
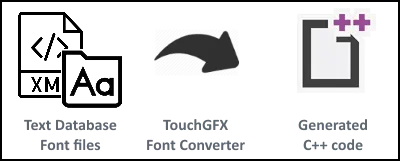
The font converter is a tool that combines the information in font files with information in the text database and generates the characters needed by the application. The output format is an internal C++ format used by TouchGFX applications. The tool is an integrated part of the build tool-chain and will be executed automatically when building the simulator.
The Font Converter accepts
- TrueType (.ttf)
- OpenType (.otf)
Simply place the font in the assets/fonts/ folder and the font will be available for reference in TouchGFX Designer (If the font is added while TouchGFX Designer is running, it must be restarted to update the available fonts).
In TouchGFX Designer, it is also possible to use the fonts installed in Windows, selecting any of these fonts will automatically add them to the assets/fonts/ folder
The Font Converter supports kerning by using the kerning information in the supplied font.
Note
Character Memory Optimization
TouchGFX is optimized for low memory consumption. By analyzing the characters used for a specific typography, the number of generated characters (in internal C++ format) are minimized to the characters that are actually used by the application.
Text memory consumption is also optimized by compacting texts that use common suffixes by enabling the option to remap texts in the Text Configuration.
Wildcards
It is possible to use runtime values as part of texts. This is possible by use of wildcards in the texts. These are specified in the given format <*>, where the * represents an optional helping text which will not be included in the resulting text. It is possible to have up to two wildcards in one text.
All translations for a given text must contain the same number of wildcards. The wildcard values are inserted at runtime in the application C++ code.
Example of wildcard usage: The temperature is <insert_temperature>°
One detail to notice is that due to the character memory optimization (see section above) the only characters that are generated for a specific typography are the ones used in texts having this typography. To force the font generator to include certain characters, you can use "Wildcard Characters" and "Character Ranges" for each typography.
The wildcard format <*> can be escaped by using backslash notation like this: \<not a wildcard\>. This will result in the literal text "<not a wildcard>" being used in the application.
Using Wildcards in TouchGFX Designer
In TouchGFX Designer, wildcards can be added to regular TextAreas. Effectively this now makes the TextArea widget cover the functionality previously covered by the TextAreaWithOneWildcard/TextAreaWithTwoWildcards widgets, although there is no changes to how the code is generated in TouchGFX.
In TouchGFX Designer you can add Wildcards to TextAreas by simply clicking the '+' button Add Wildcard in properties for the selected TextArea. Click the corresponding '-' button to remove wildcards. A well-known example is adding a temperature reading to a TextArea, which could say The temperature is °. In this case it could be an outdoor temperature reading. Here we want to insert a Wildcard that not only displays a static number, but also updates according to temperature readings. The Wildcard will be added to the current position of the in-text caret:
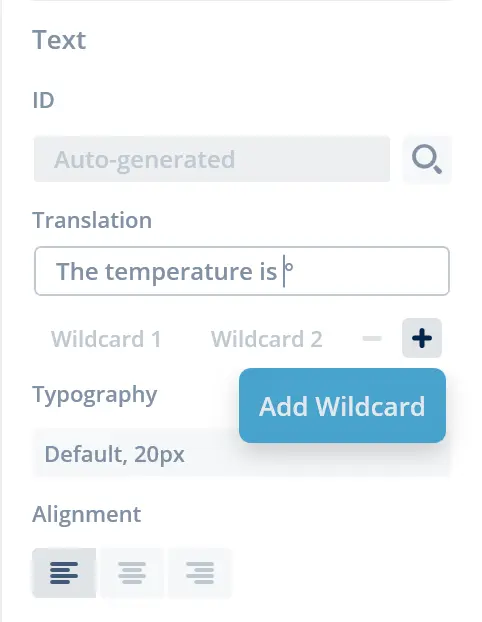
Adding a wildcard to a Text Area widget
Now our text in properties will display The temperature is <value>°, while our text on canvas displays The temperature is °:

Text Area widget with wildcard in TouchGFX Designer
To set up the specific wildcard you can click the corresponding Wildcard button (in this example Wildcard 1), which allows editing the Wildcard we just added.
Here you can choose how you will update the wildcard. Either with predefined resource texts or by dynamic run-time created texts. In both cases, you can update the text at run-time. To use an auto-generated text, click the '+' Create auto-generated text or select an existing text. Use a wildcard buffer if dynamic text is needed. Such a buffer is created by selecting the Use wildcard Buffer check mark. In this case you also need to specify a size (number of characters) of the buffer. If you want to be memory efficient, you need to match the specified size as closely as possible with your actual needed text size. Remember to add one extra space for the string termination (‘\0’).
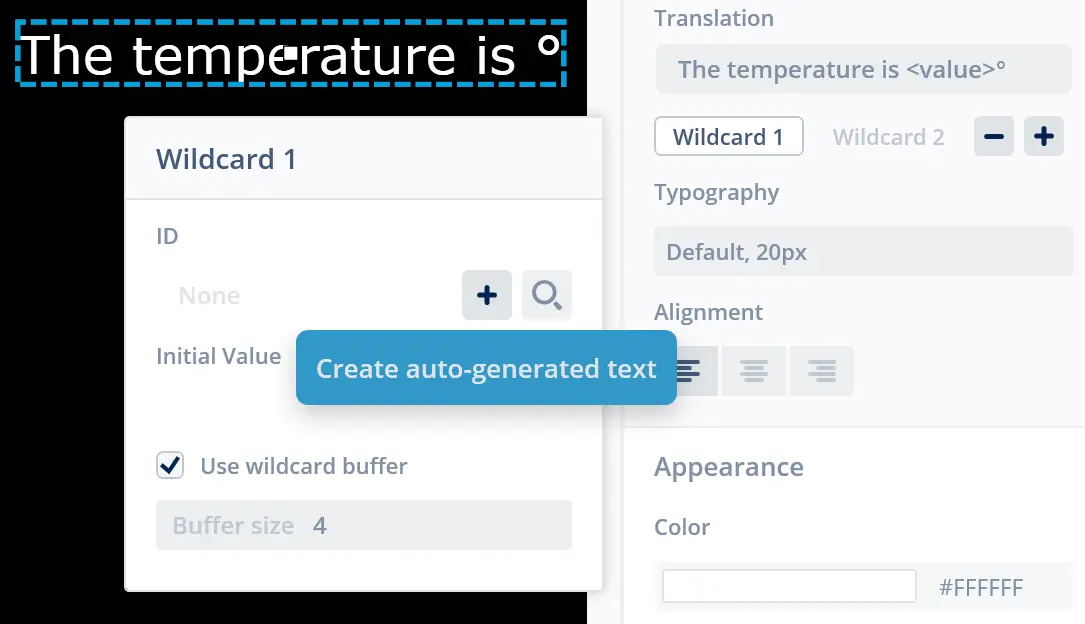
Add auto-generated text to wildcard in TouchGFX Designer
You can also set an initial value for the Wildcard, enabling you to see how the final TextArea could look with a temperature reading:
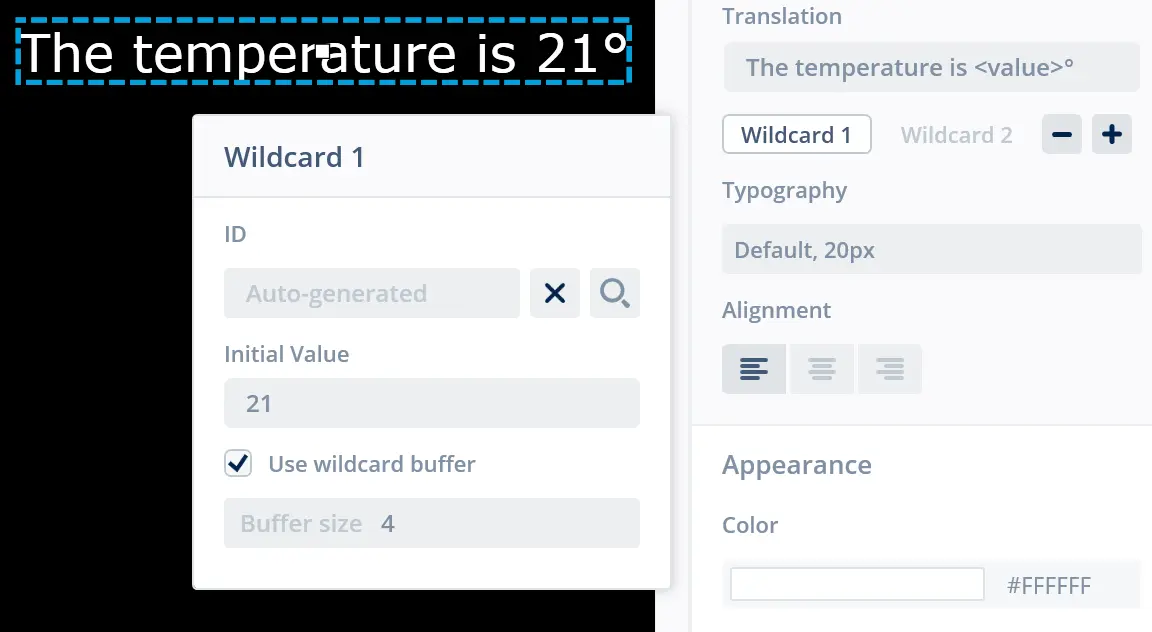
Wildcard settings in TouchGFX Designer
Using Wildcards in User Code
Wildcards can also be added and updated via User Code as shown in the code example below, where a Unicode::UnicodeChar array is managed and updated.
gui/include/gui/some_screen/SomeView.hpp
#include <touchgfx/widgets/TextAreaWithWildcard.hpp>
...
class SomeView : public View<SomePresenter>
{
  TextAreaWithOneWildcard txt;
  Unicode::UnicodeChar txtBuffer[10];
}
gui/src/some_screen/SomeView.cpp
#include <texts/TextKeysAndLanguages.hpp>

void SomeView::setupScreen()
{
  txt.setTypedText(TypedText(T_TEMPERATURE_READOUT));
  txt.setXY(10, 20);
  txt.setWildcard(txtBuffer);
  add(txt);

  updateTxt(5);
}

void SomeView::updateTxt(int newValue)
{
  Unicode::snprintf(txtBuffer, 10, "%d", newValue);
  txt.invalidate();
}
Text Placement
As for all TouchGFX widgets a TextArea is placed on the screen by specifying a position (X and Y) and a dimension (width and height). This is easily done via TouchGFX Designer in the widgets properties, However the rendering of text in TouchGFX Designer is not always 100% acurrate compared to how the text is rendered by TouchGFX.
There are also a few more details and possibilites to be aware of when dealing with texts, decribed in this section.
Alignment
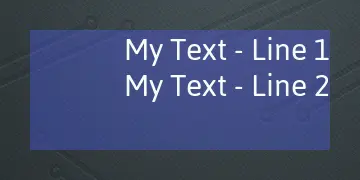
The text inside the TextArea is aligned according to the alignment specified for the chosen text entry in the text database. The text is aligned with respect to the area of the TextArea. In the following screenshots the area of the TextArea is highlighted in blue.
Left aligned text
Center aligned text
Right aligned text
These settings can be set in TouchGFX Designer Texts View.
Font size
As we saw above TouchGFX only includes the characters from a font that are needed by the application. Based on this selection TouchGFX calculates the font height and placement (called the baseline) of the characters. The font height is the height in pixels of a line of text using the font. The baseline is the placement of the letters on that line.
These attributes are available through the Font class if needed at runtime:
The size of the individual characters (glyphs) can be found using the methods on the GlyphNode struct:
The height of a glyph is the number of rows of pixels used when drawing the glyph. The top is the number of lines above the baseline the glyph should be drawn. Note that, the glyph may stay above the base (as '^') or go below the baseline (as 'g').
Here is an example where we have used Verdana in size 100px in the TouchGFX Designer. The application only writes the text "Ac" on the screen:
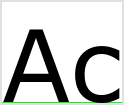
Writing Ac using Verdana in size 100.
The green line shows the position of the baseline. The font height is 101 pixels. The baseline position is 100. The size of the 'A' is 73. The top is also 73. The 'A' is therefore resting on the baseline. The height of 'c' is 57, and the top is 56. The 'c' therefore draws one line further down than the 'A'. These values are part of the Verdana font design.
Here is another example, where we have used the same font, but the application now write the text "Acg" on the screen:
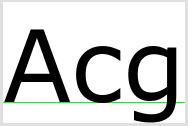
Writing Acg using Verdana in size 100.
The inclusion of the 'g' in the application changes the font. The font height is now 121, but the baseline position is still 100. The line is thus expanded to make room for the 'g' (hangs below the line), but the 'A' and 'c' are positioned vertically as before. The height of 'g' is 77, but the top is only 56, so 21 lines of pixels falls below the baseline.
We have thus seen that the height of a font in TouchGFX is dependent on the included letters. The individual characters are positioned relative to the baseline of the font.
Setting the Correct Width and Height of a TextArea
A TextArea is able to adjust its width and height according to the currently selected text. This is done by calling the TextArea::resizeToCurrentText() method.
Note
When using center/right aligned text you most often do not want to resize the width and height because your text needs to be centered/right aligned in a fixed area. In this case set the width and height manually. This can be done by calling TextArea::setPosition(x, y, width, height), TextArea::setWidth(width) and TextArea::setHeight(height).
If your width and/or height is too small to fit the text, the text will be clipped to the area as can be seen below.
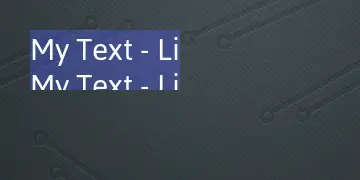
Text cut off by the bounds of the TextArea widget size
Setting the Correct X and Y for a TextArea
To place a TextArea at the correct X and Y position, you need to be aware of the fact that the font used will have some extra spacing above the characters to allow for large characters. This makes it a bit hard to place a TextArea according to a Y position for the upper left corner, since you do not know the exact spacing above your text. One way of placing a text is to specify the position where you believe it should be and then fine tune the position by inspecting the placement in the simulator. This is most often a fairly simple task but it has to be redone if you change the font or font size later on.
A more robust way of doing it is to use text baseline. The baseline is the line upon which most letters "sit" and below which descenders (characters like p and j) extend.
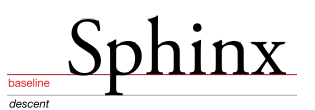
Baseline for text
To set a text baseline use the TextArea::setBaselineY(y) or TextArea::setXBaselineY(x, y). For these methods you do not specify the upper left corner of the TextArea but instead the baseline of the first text line. This will take the font size and spacing into account and set the Y position of the TextArea accordingly.
The baseline functionality is not available in TouchGFX Designer, since TextArea widget placement is easily done via TouchGFX Designer Canvas, and can therefore only be used in User Code.
Note
Automatic Wrapping of Long Text Lines
Sometimes a TextArea contains a text which is very long. By default, such text is simply written as a single line and all text that does not fit inside the TextArea is simply cut off. If instead the text should be automatically wrapped at spaces and re-flowed to fill several lines, simply call:
myTextArea.setWideTextAction(WIDE_TEXT_WORDWRAP); // Default is WIDE_TEXT_NONE
TouchGFX can also add a special character (e.g. …) when there is not enough space available to print the whole string. This is called an ellipsis character.
Available Wide Text Actions
WIDE_TEXT_NONE: No automatic, simply cut the text in the middle of any character that extends beyond the width of the TextArea.WIDE_TEXT_WORDWRAP: Wrap between words, no ellipsis character.WIDE_TEXT_WORDWRAP_ELLIPSIS: Wrap between words, insert ellipsis character after last visible letter, e.g.: "Very long t...".WIDE_TEXT_WORDWRAP_ELLIPSIS_AFTER_SPACE: Wrap between words, ellipsis character only after space "Very long ...".WIDE_TEXT_CHARWRAP: Wrap between any two characters, no ellipsis character, as used in Chinese.WIDE_TEXT_CHARWRAP_ELLIPSIS: Wrap between any two characters, ellipsis character after last visible letter, as used in Chinese.WIDE_TEXT_CHARWRAP_DOUBLE_ELLIPSIS:Wrap between any two characters, double ellipsis after last visible letter, as used in Chinese.
The images below illustrate the different line wrapping modes:

WORDWRAP - WORDWRAP_ELLIPSIS - WORDWRAP_ELLIPSIS_AFTER_SPACE.

CHARWRAP - CHARWRAP_ELLIPSIS - CHARWRAP_DOUBLE_ELLIPSIS
Further reading
This will probably make the TextArea need more vertical space. This can either be achieved by increasing the height of the TextArea in TouchGFX Designer or it can be done in user code as follows:
myTextArea.setWideTextAction(WIDE_TEXT_WORDWRAP);
myTextArea.setWidth(200);
myTextArea.resizeHeightToCurrentText(); // Will set height by wrapping text at 200px long lines
myTextArea.invalidate();
Remember to call myTextArea.invalidate() before resizing myTextArea if you are decreasing the text area size. If not, you will still see part of the old text area, since it is not covered by the new smaller text area.
Setting the ellipsis character
If you select a wide text action different from WIDE_TEXT_NONE and
you want to see the ellipsis character you must also include the
ellipsis character in the font, by specifying the chosen character or
the Unicode number in TouchGFX Designer:
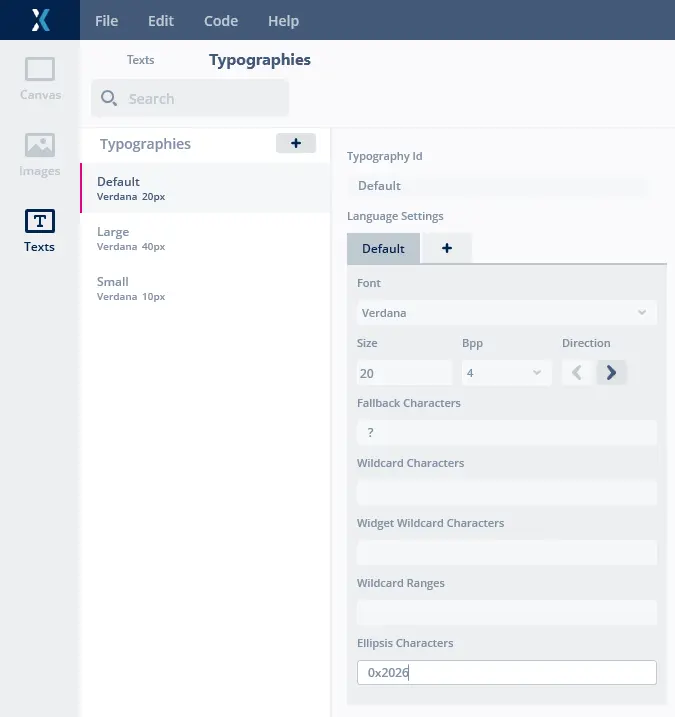
Setting the ellipsis character for a font
The Unicode 0x2026 is the standard horizontal ellipsis.
Text Indentation
The TextArea widget supports indentation of a text. The amount of indentation can be set by calling TextArea::setIndentation.
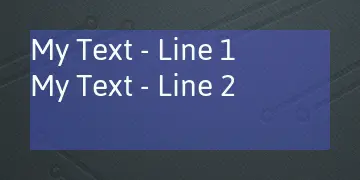
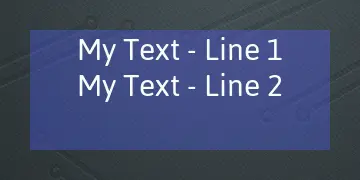
The image below shows two TextAreas showing the same text. The second TextArea uses an indentation of 20 pixels.
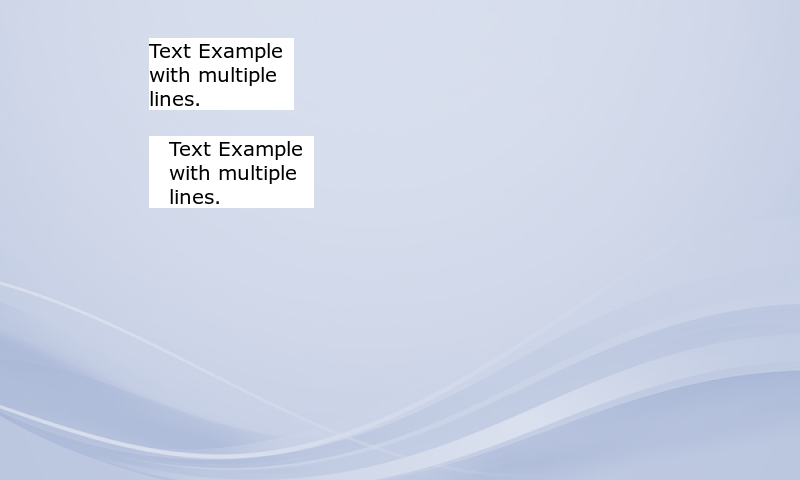
TextArea with indentation of 20 pixels
The code below shows how to set the indentation. The setting is unfortunately not available in TouchGFX Designer.
void Screen1View::setupScreen()
{
    Screen1ViewBase::setupScreen();
    textArea2.setIndentation(20);
}
Manual line-breaks
You can also insert manual line-breaks in the text (ASCII / Unicode character 10). This character will cause the TextArea to change to the next line independent of the WideTextAction setting.
In XML you write the newlines as " ". For example:
<Text Id="__SingleUse_1VW7" Alignment="Left" TypographyId="Default">
<Translation Language="GB">New Text On 3 lines.</Translation>
</Text>
Which produces:
New
Text
On 3 lines.
Switching Language
TouchGFX supports multi language interfaces. The current language used in the interface can be changed by calling the static method Texts::setLanguage:
Texts::setLanguage(GB);
The value GB is found in the LANGUAGES enum in the TextKeysAndLanguages.hpp as shown in the example in The Text Converter section.
After this call, invalidate all widgets that display texts (or simply invalidate the entire screen) and they will display texts in the newly selected language.
In TouchGFX Designer
You can switch between languages, enabling testing for all translations. This is done from General section of the Config view. Here you simply change the startup language of the application by changing the Selected Language.