Dynamic Bitmaps
This section explains how to use Dynamic Bitmaps. Recall that standard bitmaps are compiled into the application and therefore must be available at compile time. The bitmaps are converted from e.g. PNG files and stored in an internal format together with size and format information.
It is also possible to create a bitmap in RAM at runtime. This is called a dynamic bitmap. A dynamic bitmap can be used just as the static bitmaps that are compiled into the application. This means that you can use a dynamic bitmap with e.g. the Image and Button widgets.
Dynamic Bitmap Configuration
When you create a dynamic bitmap the pixel memory is allocated from the bitmap cache. You must therefore configure a bitmap cache before you can create dynamic bitmaps. This is a manual process that cannot be done in TouchGFX Designer or the Generator.
See the article on bitmap caching for configuration instructions.
It is required to define the maximum number of Dynamic Bitmaps used in your application. This maximum is passed to TouchGFX together with the bitmap cache address and size. Here we configure a bitmap cache with up to 4 dynamic bitmaps. You can do this in any file in your application. If you need to do it only once, the file FrontendApplication.cpp is a good candidate:
FrontendApplication.cpp (extract)
#include <gui/common/FrontendApplication.hpp>
#include <touchgfx/Bitmap.hpp>

FrontendApplication::FrontendApplication(Model& m, FrontendHeap& heap)
    : FrontendApplicationBase(m, heap)
{
    // Place cache start address in SDRAM at address 0xC0008000;
    uint16_t* const cacheStartAddr = (uint16_t*)0xC0008000;
    const uint32_t cacheSize = 0x300000; //3 MB, as example
    Bitmap::setCache(cacheStartAddr, cacheSize, 4);
}
If you are using the Windows simulator you must create a bitmap cache here also. On Windows it is easy to declare a big array or use malloc:
FrontendApplication.cpp (extract)
#include <gui/common/FrontendApplication.hpp>
#include <touchgfx/Bitmap.hpp>

FrontendApplication::FrontendApplication(Model& m, FrontendHeap& heap)
    : FrontendApplicationBase(m, heap)
{
#ifdef SIMULATOR
    const uint32_t cacheSize = 0x300000; //3 MB, as example
    uint16_t* const cacheStartAddr = (uint16_t*)malloc(cacheSize);
    Bitmap::setCache(cacheStartAddr, cacheSize, 4);
#else
    // Place cache start address in SDRAM at address 0xC0008000;
    uint16_t* const cacheStartAddr = (uint16_t*)0xC0008000;
    const uint32_t cacheSize = 0x300000; //3 MB, as example
    Bitmap::setCache(cacheStartAddr, cacheSize, 4);
#endif
}
Using a Dynamic Bitmap Example
To use the dynamic bitmap we need a widget to show it. So insert an Image widget in the view (in code or in TouchGFX Designer):
#include <touchgfx/widgets/Image.hpp>
using namespace touchgfx;
class TemplateView : public View
{
private:
    Image image;
}
Using this widget with a dynamic bitmap is a three step process:
- Create the Dynamic Bitmap in the bitmap cache
- Initialize the memory used by the dynamic bitmap
- Assign the bitmap to a Widget
The pixel memory returned by dynamicBitmapCreate() (and
dynamicBitmapCreateL8() / dynamicBitmapCreateCustom()) is not
cleared or initialized in any way. It simply points into the bitmap
cache and contains whatever was there before, e.g. leftover data from
a previously deleted bitmap, or random contents on system startup.
This is one of the most common mistakes when working with dynamic bitmaps: forgetting to initialize the memory results in a bitmap with garbage pixel data being shown on the display, or even data leaking between what looks like unrelated bitmaps.
Always initialize every pixel before the bitmap is used, either by
calling Bitmap::dynamicBitmapClear()
right after creating the bitmap, or by immediately writing your own
image/pixel data into it (e.g. loading an image from a file, see
Loading Images At Runtime).
Create the dynamic bitmap in setupScreen. Here we use the 16bpp format RGB565. If your framebuffer is 24 bit use RGB888. To create a transparent bitmap, use the format ARGB8888.
The address of the pixels in the dynamic bitmap is returned by the
dynamicBitmapGetAddress function, but since dynamicBitmapClear()
already knows the size and layout of the bitmap, you no longer need to
compute the pixel buffer size yourself (which is error prone, since it
depends on both format and bitmap dimensions):
#include <touchgfx/Bitmap.hpp>
void TemplateView::setupScreen()
{
    BitmapId bmpId;

    //Create (16bit) dynamic bitmap of size 100x150
    bmpId = Bitmap::dynamicBitmapCreate(100, 150, Bitmap::RGB565);

    //Clear all pixels; the memory returned above is *not* initialized
    if (bmpId != BITMAP_INVALID)
    {
        Bitmap::dynamicBitmapClear(bmpId);
    }

    //Make Image widget show the dynamic bitmap
    image.setBitmap(Bitmap(bmpId));

    //Position image and add to View
    image.setXY(20, 20);
    add(image);
    ...
}
As explained above, the pixel memory you get from the bitmap cache is
not cleared automatically, so you must clear or overwrite it yourself
before the bitmap is displayed. Bitmap::dynamicBitmapClear() is the
recommended way to do this, it zeroes every pixel (and any CLUT/format
specific data) of the dynamic bitmap in one call, without you having
to know its size or format.
If you want to load your image from a file instead, you can skip the
call to dynamicBitmapClear() and replace it with your loader code,
since the loader will overwrite every pixel anyway. See the article
Loading Images At Runtime.
Dynamic Bitmap Operations
The dynamic bitmap operations are all placed in the Bitmap class.
Creating a Dynamic Bitmap
The following method creates a dynamic bitmap with the width, height and bitmap format specified. The bitmap is only created if enough unused memory is available. The method returns BITMAP_INVALID if the bitmap was not created.
static BitmapId Bitmap::dynamicBitmapCreate(const uint16_t width, const uint16_t height, BitmapFormat format, ClutFormat clutFormat)
This method (and dynamicBitmapCreateL8() / dynamicBitmapCreateCustom())
does not clear or initialize the pixel data of the new bitmap. The
memory simply contains whatever was there before. Call
Bitmap::dynamicBitmapClear() right
after creating the bitmap, or overwrite every pixel yourself, before
using or displaying it.
Clearing a Dynamic Bitmap
Since the pixel data of a newly created dynamic bitmap is uninitialized (see above), it must be cleared or overwritten before use. The following method zeroes all pixel data of a dynamic bitmap:
static void Bitmap::dynamicBitmapClear(BitmapId id)
dynamicBitmapClear() clears the entire bitmap, including any
format specific data such as the CLUT (Color LookUp Table) header of
an L8 bitmap, and it resets the solid area (see below) back to the
same default as when the bitmap was created. Since the method already
knows the size and format of the bitmap, you do not need to compute
the number of bytes to clear yourself, unlike a manual memset() call
on the address returned by dynamicBitmapGetAddress().
If you intend to immediately fill the bitmap with your own pixel data,
e.g. by loading an image from a file or drawing into it, you can skip
calling dynamicBitmapClear() as long as you are certain that every
pixel will be overwritten.
Deleting a Dynamic Bitmap
This method deletes a dynamic bitmap.
static bool Bitmap::dynamicBitmapDelete(BitmapId id)
Get the address of the pixels in a Dynamic Bitmap
The following method returns the address of the dynamic bitmap. This method is used by file loaders to copy image data into the bitmap.
static uint8_t* dynamicBitmapGetAddress(BitmapId id)
Set the solid area of a Dynamic Bitmap
The following method sets the solid rectangle of a dynamic bitmap.
static bool dynamicBitmapSetSolidRect(BitmapId id, const Rect& solidRect)
Read more about the "solid area" concept in the Custom Widgets article.
By default the solid area is set to be the whole bitmap for non-transparent formats like RGB565 and RGB888. It is set to empty for transparent formats like ARGB8888.
Creating a Dynamic Bitmap from memory
It is also possible to create a dynamic bitmap directly from pixel data in flash memory without caching pixel data in RAM. Compared to regular Dynamic Bitmap, cache size does not need to take into account the pixel data:
Note that the pixel address must be 4-byte aligned.
static BitmapId Bitmap::dynamicBitmapCreateExternal(const uint16_t width, const uint16_t height, const void* pixels, BitmapFormat format, uint8_t customSubformat = 0);
Dynamic Bitmap in portrait mode
TouchGFX can run in portrait mode. This is used in situations where the display is mounted rotated 90 degrees from its native orientation. A little extra care is required when using dynamic bitmaps in this mode.
Here is an example project for the STM32F746. It has a display width of 480 pixels and height of 272 pixels. The framebuffer has the same dimensions.
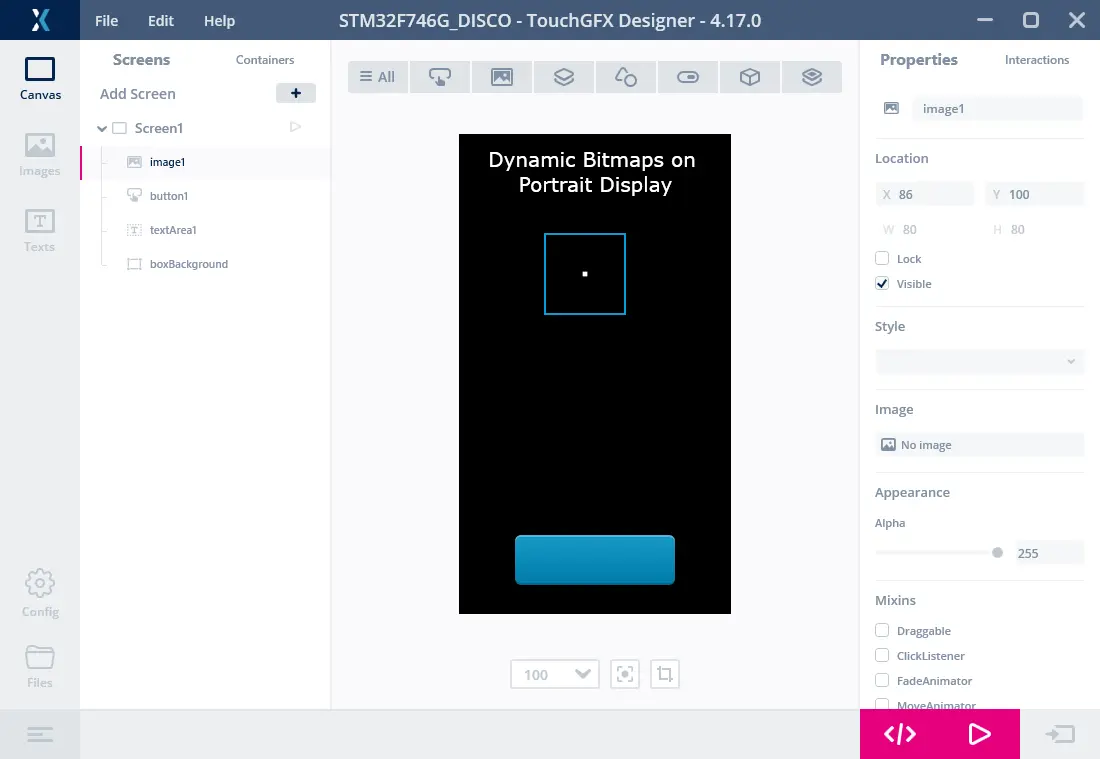
Portrait project
No bitmap has been assigned to the image1 Image widget. We will use it to show a dynamic bitmap.
When using portrait mode the coordinate system is rotated 90 degrees counter clockwise. The (0, 0) coordinate is in the upper left corner near the 'D'. The first byte of the framebuffer (which colors the first pixels on the screen), is in the upper right corner.
The framebuffer is thus not rotated when running in portrait. This is also true for dynamic bitmaps. But the pixels we want to be shown on first line on the display (as mounted) must be drawn on the left edge in the framebuffer.
In the function below, we create a dynamic bitmap and make the upper
row green, and the right edge red. Since we want a solid white base
color rather than just zeroed/black memory, we use memset() directly
here instead of Bitmap::dynamicBitmapClear() (which is only useful
when zeroed/transparent memory is acceptable, e.g. as a starting point
before drawing your own pattern):
Screen1View.cpp (extract)
void Screen1View::setupScreen()
{
    Screen1ViewBase::setupScreen();
    BitmapId bmpId;
    bmpId = Bitmap::dynamicBitmapCreate(100, 100, Bitmap::RGB565);

    if (bmpId != BITMAP_INVALID)
    {
        //set all pixels white
        uint16_t* const bitmapPixels = (uint16_t*)Bitmap::dynamicBitmapGetAddress(bmpId);
        memset(bitmapPixels, 0xFF, 100*100*2);

        //first 200 pixels red, => two column on the right on display
        for (int i = 0; i<200; i++) bitmapPixels[i] = 0xF800;

        //first two pixels in all rows green in bitmap => top two rows on display
        for (int i = 0; i<100; i++)
        {
            bitmapPixels[i*100]     = 0x07E0;
            bitmapPixels[i*100 + 1] = 0x07E0;
        }
    }

    image1.setBitmap(bmpId);
}
The display shows the dynamic bitmap:

Portrait project framebuffer content