动态位图
本节介绍如何使用动态位图。 注意,标准位图会被编译到应用中,因此必须在编译时提供。 位图从PNG等格式的文件转换而来,带有大小和格式信息并以内部格式保存。
此外,还可以在运行时间在RAM中创建位图。 这被称为动态位图。 动态位图的使用与编译到应用中的静态位图相同。 这意味着您可以通过图像和按钮等控件使用动态位图。
动态位图配置
在创建动态位图时,需要从位图缓存分配像素存储空间。 因此,您必须先配置位图缓存,然后才能创建动态位图。 This is a manual process that cannot be done in TouchGFX Designer or the Generator.
参见关于位图缓存的文章获取配置过程。
必须定义应用中使用的动态位图的最大数量。 该最大值与位图缓存地址和大小一起传递到TouchGFX。 这里我们配置的是具有最多4张动态位图的位图缓存。 您可以在应用中的任何文件中执行。 如需只执行一次,文件FrontendApplication.cpp是个不错的选择:
FrontendApplication.cpp (extract)
#include <gui/common/FrontendApplication.hpp>
#include <touchgfx/Bitmap.hpp>

FrontendApplication::FrontendApplication(Model& m, FrontendHeap& heap)
    : FrontendApplicationBase(m, heap)
{
    // Place cache start address in SDRAM at address 0xC0008000;
    uint16_t* const cacheStartAddr = (uint16_t*)0xC0008000;
    const uint32_t cacheSize = 0x300000; //3 MB, as example
    Bitmap::setCache(cacheStartAddr, cacheSize, 4);
}
如果您使用Windows模拟器,则还必须在此创建位图缓存。 在Windows上,可以容易的声明大阵列或使用malloc:
FrontendApplication.cpp (extract)
#include <gui/common/FrontendApplication.hpp>
#include <touchgfx/Bitmap.hpp>

FrontendApplication::FrontendApplication(Model& m, FrontendHeap& heap)
    : FrontendApplicationBase(m, heap)
{
#ifdef SIMULATOR
    const uint32_t cacheSize = 0x300000; //3 MB, as example
    uint16_t* const cacheStartAddr = (uint16_t*)malloc(cacheSize);
    Bitmap::setCache(cacheStartAddr, cacheSize, 4);
#else
    // Place cache start address in SDRAM at address 0xC0008000;
    uint16_t* const cacheStartAddr = (uint16_t*)0xC0008000;
    const uint32_t cacheSize = 0x300000; //3 MB, as example
    Bitmap::setCache(cacheStartAddr, cacheSize, 4);
#endif
}
使用动态位图示例
为了使用动态位图,我们需要一个控件来显示它。 So insert an Image widget in the view (in code or in TouchGFX Designer):
#include <touchgfx/widgets/Image.hpp>
using namespace touchgfx;
class TemplateView : public View
{
private:
    Image image;
}
此控件和动态位图的使用过程分为三步:
- 在位图缓存中创建动态位图
- 清空动态位图使用的存储空间
- 将位图分配给控件
在setupScreen中创建动态位图。 这里我们使用16bpp格式RGB565。 如果帧缓冲为24位,则使用RGB888。 如需创建透明位图,使用格式ARGB8888。
通过dynamicBitmapGetAddress函数返回动态位图中像素的地址:
#include <touchgfx/Bitmap.hpp>
void TemplateView::setupScreen()
{
    BitmapId bmpId;

    //Create (16bit) dynamic bitmap of size 100x150
    const int width = 100;
    const int height = 150;
    bmpId = Bitmap::dynamicBitmapCreate(100, 150, Bitmap::RGB565);

    //set all pixels white
    if (bmpId != BITMAP_INVALID)
    {
       memset(Bitmap::dynamicBitmapGetAddress(bmpId), 0xFF, width*height*2);
    }

    //Make Image widget show the dynamic bitmap
    image.setBitmap(Bitmap(bmpId));

    //Position image and add to View
    image.setXY(20, 20);
    add(image);
    ...
}
您从位图缓存获得的像素存储空间未清空,建议立即将其清空或重写。
如需从文件加载图像,可以用loader代码替代对memset的调用。 请参考文章在运行时间加载图像
动态位图操作
动态位图操作全部位于Bitmap类中。
创建动态位图
以下方法用指定的宽度、高度和位图格式创建动态位图。 仅当有足够大的未使用存储空间时,才能创建位图。 如果未创建位图,该方法返回BITMAP_INVALID。
static BitmapId Bitmap::dynamicBitmapCreate(const uint16_t width, const uint16_t height, BitmapFormat format, ClutFormat clutFormat)
删除动态位图
此方法删除动态位图。
static bool Bitmap::dynamicBitmapDelete(BitmapId id)
获取动态位图中像素的地址
以下方法返回动态位图的地址。 文件加载器使用此方法将图像数据复制到位图中。
static uint8_t* dynamicBitmapGetAddress(BitmapId id)
设置动态位图的实心区域
以下方法设置动态位图的实心矩形。
static bool dynamicBitmapSetSolidRect(BitmapId id, const Rect& solidRect)
请阅读Custom Widget一节中关于“实心区域”概念的更多内容。
对于像RGB565和RGB888这样的非透明格式,将实心区域默认设置为整个位图。 对于像ARGB8888这样的透明格式,将实心区域设置为空。
Creating a Dynamic Bitmap from memory
It is also possible to create a dynamic bitmap directly from pixel data in flash memory without caching pixel data in RAM. Compared to regular Dynamic Bitmap, cache size does not need to take into account the pixel data:
Note that the pixel address must be 4-byte aligned.
static BitmapId Bitmap::dynamicBitmapCreateExternal(const uint16_t width, const uint16_t height, const void* pixels, BitmapFormat format, uint8_t customSubformat = 0);
竖屏模式的动态位图
TouchGFX能以竖屏模式运行。 这适用于显示屏自其原始方向旋转90度后安装的情况。 在该模式下使用动态位图时,需要格外小心。
下面是STM32F746的项目示例。 它的显示屏宽度为480像素,高度为272像素。 帧缓冲具有相同大小。
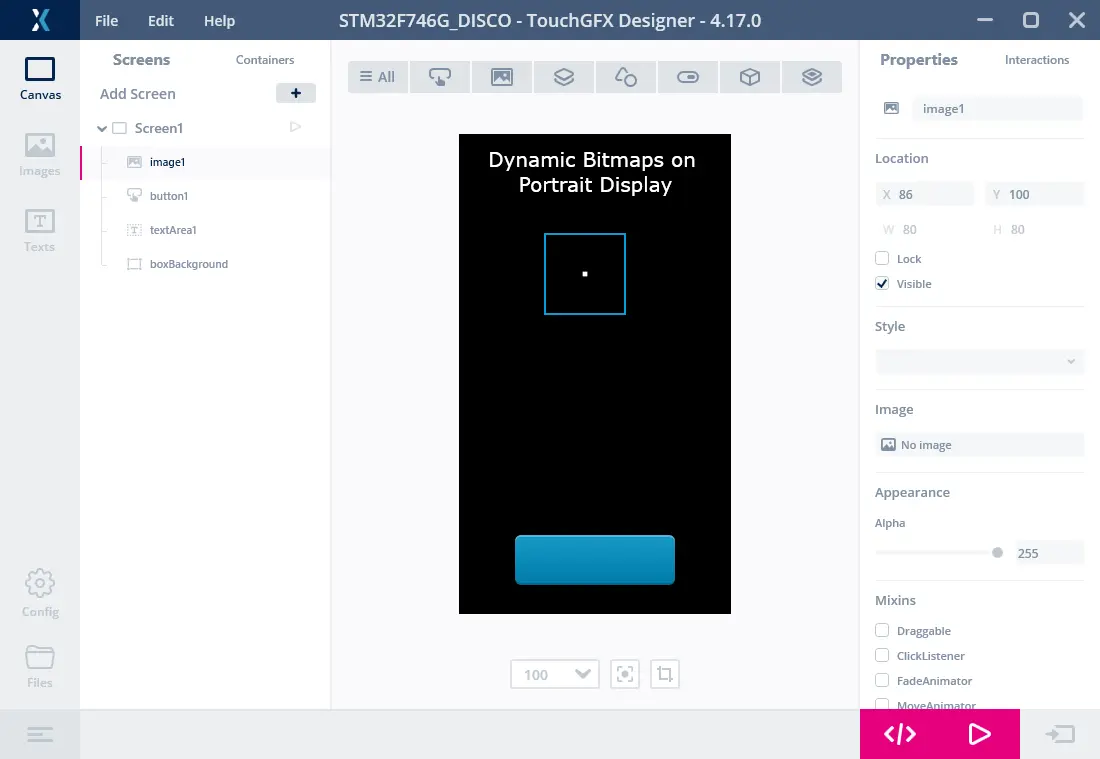
竖屏项目
没有为image1图像控件分配位图。 我们将使用它显示动态位图。
在使用竖屏模式时,坐标系沿逆时针方向旋转90度。 (0, 0) 坐标位于“D”附近的左上角。 帧缓冲的第一个字节(将屏幕上第一个像素着色),位于右上角。
因此,当以竖屏模式运行时,不旋转帧缓冲。 对于动态位图也是如此。 但是,要在显示屏上第一行显示的像素必须绘制在帧缓冲的左边缘。
在下面的函数中创建动态位图,使上面一行为绿色且右边缘为红色:
Screen1View.cpp (extract)
void Screen1View::setupScreen()
{
    Screen1ViewBase::setupScreen();
    BitmapId bmpId;
    bmpId = Bitmap::dynamicBitmapCreate(100, 100, Bitmap::RGB565);

    if (bmpId != BITMAP_INVALID)
    {
        //set all pixels white
        uint16_t* const bitmapPixels = (uint16_t*)Bitmap::dynamicBitmapGetAddress(bmpId);
        memset(bitmapPixels, 0xFF, 100*100*2);

        //first 200 pixels red, => two column on the right on display
        for (int i = 0; i<200; i++) bitmapPixels[i] = 0xF800;

        //first two pixels in all rows green in bitmap => top two rows on display
        for (int i = 0; i<100; i++)
        {
            bitmapPixels[i*100]     = 0x07E0;
            bitmapPixels[i*100 + 1] = 0x07E0;
        }
    }

    image1.setBitmap(bmpId);
}
显示屏显示动态位图:

竖屏项目帧缓冲内容