Images View
The Images View is used to manage the images used in a TouchGFX application (located under the assets\images folder).
It includes 2 sections: the Tree View (left side) and the Table View (right side).
The default configuration values for an image can be changed in the Default Image Configuration in the Config View.
Images View in TouchGFX Designer
Tree View
The Tree View provides an overview of the images and folders present in your application. The width of the Tree View can be changed by dragging the grid-splitter thumb to suit your needs.
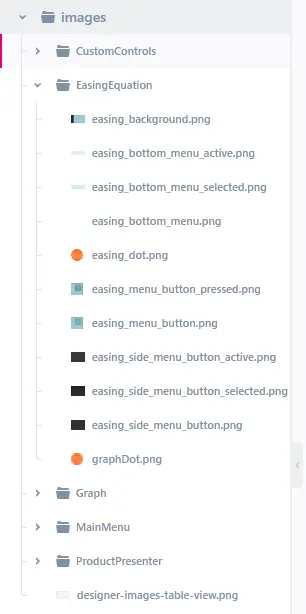
The Tree View in Images View
You can add images to the assets\images folder by clicking the "+" button on the top right of the Images View, or by dragging the images directly to the Tree View from the File Explorer. Images added to the assets\images folder will automatically show up in the Image Manager.
Clicking on a folder node will show the images in that folder in the Table View (clicking on the root folder “images” will show all images in the application, including images located in subfolders).
Clicking on an image node will also show the other images under the same folder in the Table View and select it such that its properties can be changed in the right side properties view.
Clicking the chevron next to a folder will collapse or expand the folder.
Clicking the chevron on the right of the Tree View will collapse or expand the Tree View.
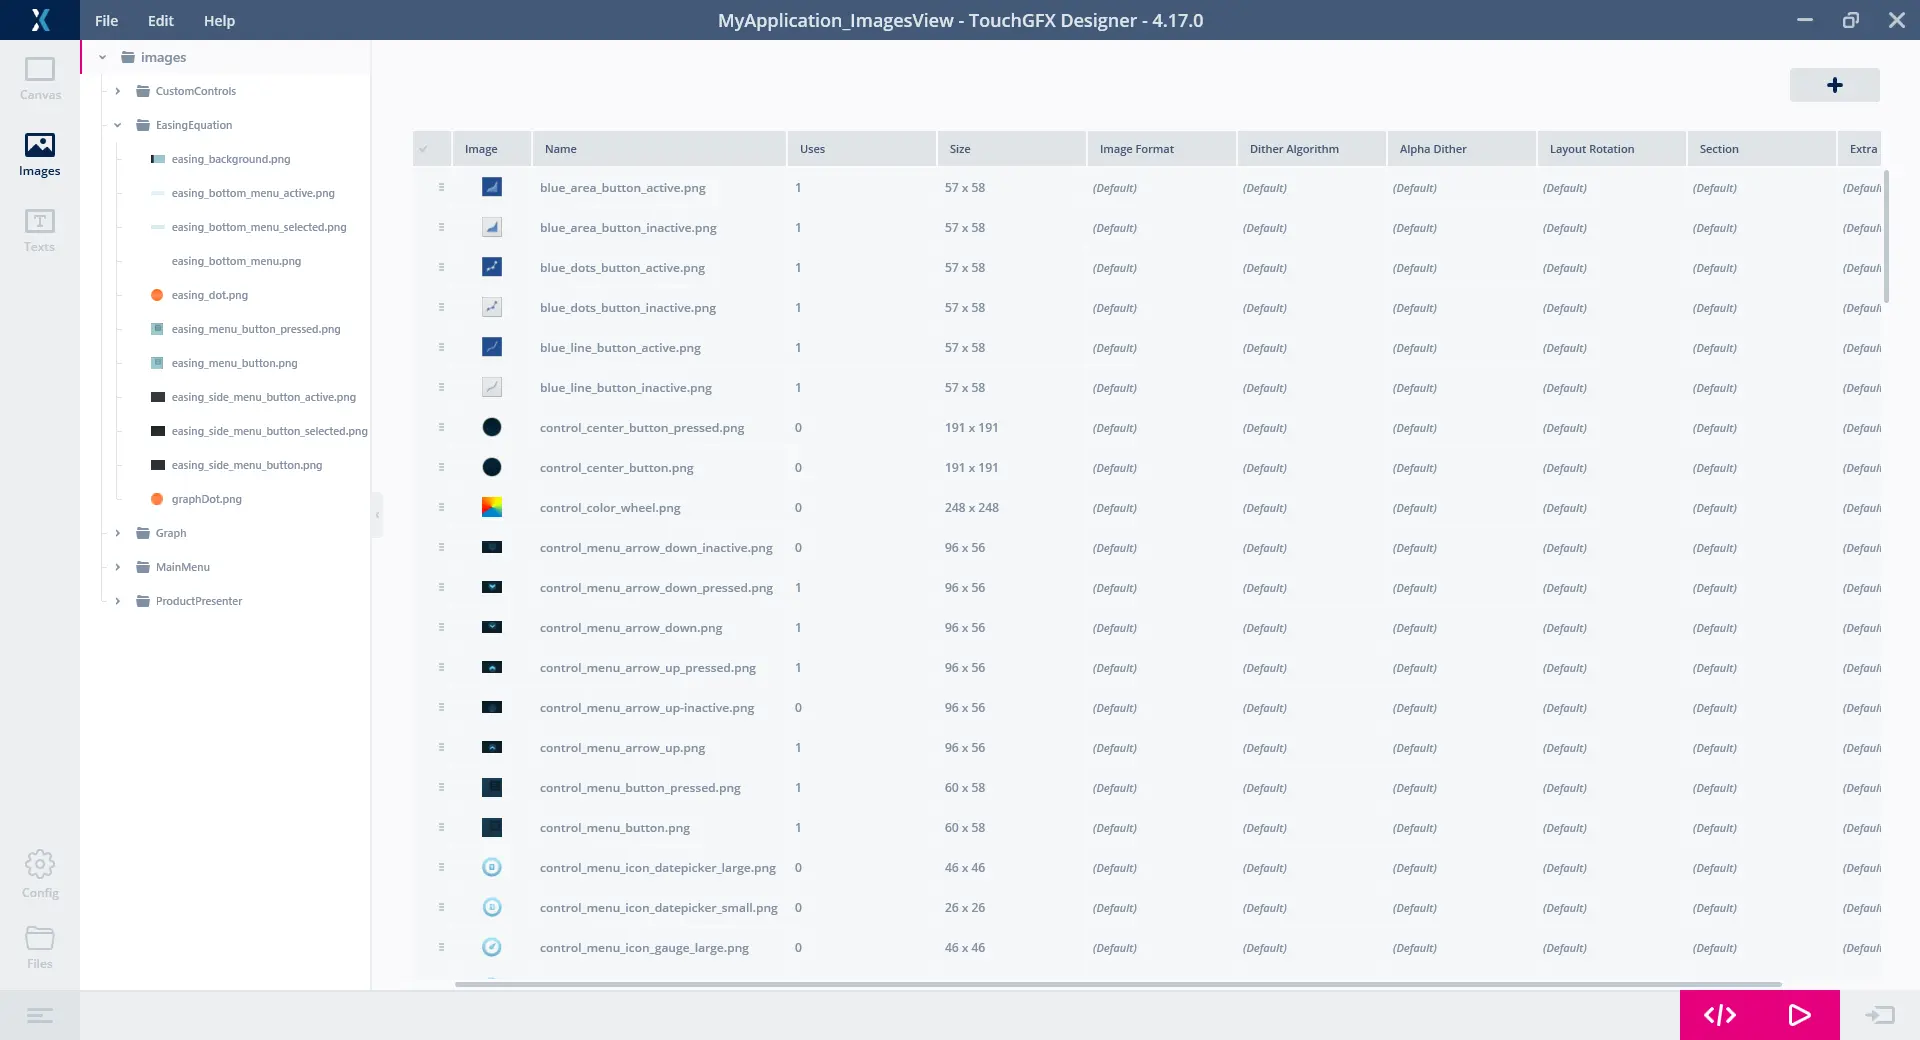
Table View
The Table View shows a list of the images located under the currently selected folder and contains different columns corresponding to different properties for an image.
One or more image can be selected by setting a checkmark in the first column of the desired image's row. The change of properties will be applied to all selected images.
When the value of a cell is grayed out, it means that the default value is used. When an explicit value has been set on an Image, for example changing the default Image Format value to ARGB8888, the cell will darken. The default values can be set within the Config View.

The Table View in Images
Image:
The preview of the image. Hovering over an image preview will show the preview in an increased size. Clicking the preview will open the image in the default application associated with .png images (for example paint.net).
Name:
The name of the image in the folder.
Uses:
The number of times the image has been used.
Size:
The Width and Height of an image.
Image Format:
Format of an image. Available options vary on what is supported by the hardware.
Dither Algorithm:
Sets the dither algortihm used for the selected image.
- 0 - No dither: no dithering is applied to the image. This is the setting with the highest performance since no alteration is made. However, depending on the image, the quality of the image may also degrade visually at lower color depths.
- 1 - Floyd-Steinberg: diffuses the error to neighboring pixels, resulting in fine-grained dithering but sacrificing sharpness.
- 2 - Jarvis, Judice and Ninke: diffuses the error to pixels one step further away compared to Floyd-Steinberg, resulting in coarser dithering but a sharper image. The slowest of the 3 error-diffusion dithering algorithms.
- 3 - Stucki: based on minimized average error dithering but faster and cleaner.
Alpha Dither:
Sets whether or not to use the dither algorithm through the alpha channel.
Layout Rotation:
Algorithm dither used of an image. Available options vary on the selected color depth of the project.
Section:
The memory location where the image is stored on the target hardware. The available sections depend on the TouchGFX Board Setup that the project was created with.
Extra Section:
When using L8 image formats you can choose to store the color table in a different memory location. The available sections depend on the TouchGFX Board Setup that the project was created with.
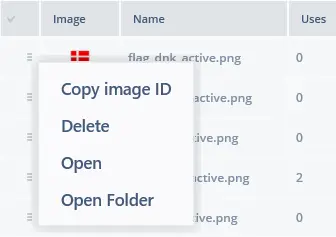
The dropdown menu in the first cell of the Table View in Images
Multiple images can be selected with the checkmark box in the first cell on the left of the Table View. This cell also contains a dropdown menu with four options:
- Copy image id
Copy the id of the image which can be referenced in code - Delete
Delete the image in the associated folder - Open
Open the image in the default application associated with .png images - Open folder
Open the folder contaning the image in the File Explorer
This dropdown menu can also be opened by right-clicking on an Image's corresponding Line.