Mixins
A Mixin is a class that extends the functionality of a widget to, for example, be able to animate movement or a change in their alpha value. The Move Animator and Fade Animator mixins are the basis of TouchGFX Designer Interactions being able to generate code that animates movement and alpha change. These mixins can be added to a widget either through TouchGFX Designer or manually in User Code.
The Move and Fade Animators optionally uses easing equations to detail the progression of the animation. Read more about easing equations in the end of this section.
Move Animator
The Move Animator mixin makes the widget capable of animating a movement from its current position to a specified end position. The movement in both the X and Y direction can be described by supplying EasingEquations.
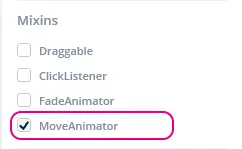
In TouchGFX Designer, the mixin can be applied by enabling it in the properties for the given widget in the "Mixins" section, as shown in the image below.
The Move Animator mixin will automatically be applied to a widget if an Interaction that moves the widget has been created.
Enabling the Move Animator mixin changes the declaration signature of the generated widget as seen below, where a Box has had the Move Animator mixin enabled.
touchgfx::MoveAnimator< touchgfx::Box > box;
Using Move Animator in User Code
When a widget has had the Move Animator mixin applied to it, the widget now has the capability of animating its movement from one position to another. In this section a demonstration of how to use this new functionality is shown.
After enabling the Move Animator mixin in TouchGFX Designer on a Box widget, the method startMoveAnimation becomes available for use.
This methods takes five arguments in the following order
- endX: the X position relative to its parent that the widget should move to.
- endY: the Y position relative to its parent that the widget should move to.
- duration: the time in ticks the movement in the X and Y axis should take.
- xProgressionEquation: the EasingEquation that should be used for the movement in the X axis.
- yProgressionEquation: the EasingEquation that should be used for the movement in the Y axis.
Below an example of a movement to the coordinates X: 0, X: 0 over a duration of 40 ticks, using a linear EasingEquation in both X and Y axis.
box.startMoveAnimation(0, 0, 40, EasingEquations::linearEaseNone, EasingEquations::linearEaseNone);
Callback Implementation in User Code
When a Move Animator mixin has completed an animation, a callback is emitted. In this section a demonstration of how to implement this callback is shown.
After enabling the Move Animator mixin in TouchGFX Designer on a Box widget, the next step is to add declarations for a callback and a function to handle the event in the Screen header class file that inherits from the base class where the Box widget is located.
Screen1View.hpp
class Screen1View : public Screen1ViewBase
{
public:
    Screen1View();
    // Declaring callback handler for move animation ended on a Box
    void boxMoveAnimationEndedHandler(const touchgfx::MoveAnimator<Box>& comp);

protected:
    // Declaring callback type of MoveAnimator<Box>
    Callback <Screen1View, const touchgfx::MoveAnimator<Box>&> boxMoveAnimationEndedCallback;
};
Then the callback declaration and function to handle the event need to be bound to the view object.
Screen1View.cpp
Screen1View::Screen1View() :
  // In constructor for callback, bind to this view object and bind which function to handle the event.
  boxMoveAnimationEndedCallback(this, &Screen1View::boxMoveAnimationEndedHandler) { }
Next step is to tell the Box widget which callback to use when its move animation has ended, this is done in setupScreen() to ensure that the callback is set every time the screen is entered.
Screen1View.cpp
void Screen1View::setupScreen()
{
  // Add the callback to box
  box.setMoveAnimationEndedAction(boxMoveAnimationEndedCallback);
}
Last step is to implement the function, boxMoveAnimationEndedHandler, that handles the callback. For good practice we check that the Box which move animation has ended is actually the 'box'
Screen1View.cpp
void Screen1View::boxMoveAnimationEndedHandler(const touchgfx::MoveAnimator<touchgfx::Box>& b)
{
    if (&b == &box)
    {
        //Implement what should happen when move animation on 'box' has ended here.
    }
}
API reference
Further reading
Fade Animator
The Fade Animator mixin makes the widget capable of animating its alpha value to fade from its current alpha value to a specified end alpha value. The rate of fading can be described by supplying an EasingEquation.
Note
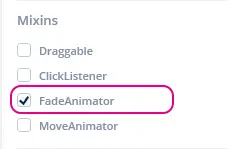
In TouchGFX Designer, the mixin can be applied by enabling it in the properties for the given widget in the "Mixins" section, as shown in the image below.
The Fade Animator mixin will also automatically be applied to a widget if an Interaction that fades the widget over a duration larger than zero has been added.
Enabling the Fade Animator mixin changes the declaration signature of the generated widget as seen below, where a Box has had the Fade Animator mixin enabled.
touchgfx::FadeAnimator< touchgfx::Box > box;
Using Fade Animator in User Code
When a widget has had the Fade Animator mixin applied to it, the widget now has the capability of animating its alpha value from one setting to another. In this section a demonstration of how to use this new functionality is shown.
After enabling the Fade Animator mixin in TouchGFX Designer on a Box widget, the method startFadeAnimation becomes available for use.
This method takes three arguments in the following order:
- endAlpha: the alpha value the widget should be when animation is completed.
- duration: the time in ticks the animation to the new alpha value setting should take.
- alphaProgressionEquation: the EasingEquation that should be used for the rate of change to the alpha value.
Below an example of an alpha value change to 0 over a duration of 40 ticks, using a linear EasingEquation.
box.startFadeAnimation(0, 40, EasingEquations::linearEaseNone);
The linearEaseNone easing equation is the default, so you don't have to
supply that as argument.
Callback Implementation in User Code
When a Fade Animator mixin has completed an animation, a callback is emitted. In this section a demonstration of how to implement this callback is shown.
After enabling the Fade Animator mixin in TouchGFX Designer on a Box widget, the next step is to add declarations for a callback and a function to handle the event in the Screen header class file that inherits from the base class where the Box widget is located.
Screen1View.hpp
class Screen1View : public Screen1ViewBase
{
public:
    Screen1View();
    // Declaring callback handler for fade animation ended on a Box
    void boxFadeAnimationEndedHandler(const touchgfx::FadeAnimator<Box>& comp);

protected:
    // Declaring callback type of FadeAnimator<Box>
    Callback <Screen1View, const touchgfx::FadeAnimator<Box>&> boxFadeAnimationEndedCallback;
};
Then the callback declaration and function to handle the event need to be bound to the view object.
Screen1View.cpp
Screen1View::Screen1View() :
  // In constructor for callback, bind to this view object and bind which function to handle the event.
  boxFadeAnimationEndedCallback(this, &Screen1View::boxFadeAnimationEndedHandler) { }
Next step is to tell the Box widget which callback to use when its move animation has ended, this is done in setupScreen() to ensure that the callback is set every time the screen is entered.
Screen1View.cpp
void Screen1View::setupScreen()
{
  // Add the callback to box
  box.setFadeAnimationEndedAction(boxFadeAnimationEndedCallback);
}
Last step is to implement the function, boxFadeAnimationEndedHandler, that handles the callback. For good practice we check that the Box which fade animation has ended is actually the 'box'
Screen1View.cpp
void Screen1View::boxFadeAnimationEndedHandler(const touchgfx::FadeAnimator<touchgfx::Box>& b)
{
    if (&b == &box)
    {
        //Implement what should happen when fade animation on 'box' has ended here.
    }
}
API reference
Further reading
ClickListener
The Click Listener mixin makes the widget capable of responding to touch input by extending the widget with a callback.
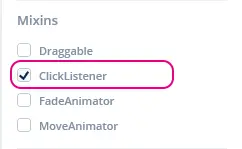
In TouchGFX Designer, the mixin can be applied by enabling it in the properties for the given widget in the "Mixins" section, as shown in the image below.
Enabling the Click Listener mixin changes the declaration signature of the generated widget as seen below, where a Box has had the Click Listener mixin enabled.
touchgfx::ClickListener< touchgfx::Box > box;
Callback Implementation in User Code
When a Click Listener mixin receives a touch event, a callback is emitted. In this section a demonstration of how to implement this callback is shown.
After enabling the Click Listener mixin in TouchGFX Designer on a Box widget, the next step is to add declarations for a callback and a function to handle the event in the Screen header class file that inherits from the base class where the Box widget is located.
The callback should declare three things: which class type to bind to, which widget the callback originates from and the type of event that occurs. In this example it is Screen1View, const Box& and const ClickEvent&
Screen1View.hpp
class Screen1View : public Screen1ViewBase
{
public:
    Screen1View();
    // Declaring callback handler for Box
    void boxClickHandler(const Box& b, const ClickEvent& e);

protected:
    // Declaring callback type of box and clickEvent
    Callback<Screen1View, const Box&, const ClickEvent&> boxClickedCallback;
};
Then the callback declaration and function to handle the event need to be bound to the view object.
Screen1View.cpp
Screen1View::Screen1View() :
    // In constructor for callback, bind to this view object and bind which function to handle the event.
    boxClickedCallback(this, &Screen1View::boxClickHandler) { }
Next step is to tell the Box widget which callback to use when it is touched, this is done in setupScreen() to ensure that the callback is set every time the screen is entered.
Screen1View.cpp
void Screen1View::setupScreen()
{
    // Add the callback to box
    box.setClickAction(boxClickedCallback);
}
Last step is to implement the function, boxClickHandler, that handles the callback. For good practice we check that the Box which initiated the callback is actually the 'box'
Screen1View.cpp
void Screen1View::boxClickHandler(const Box& b, const ClickEvent& evt)
{
    if (&b == &box)
    {
        //Implement what should happen when 'box' is touched/clicked here.
    }
}
API reference
Further reading
Draggable
The Draggable mixin makes the widget capable of being dragged around via touch input.
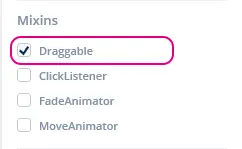
In TouchGFX Designer, the mixin can be applied by enabling it in the properties for the given widget in the "Mixins" section, as shown in the image below.
Enabling the Draggable mixin changes the declaration signature of the generated widget as seen below, where a Box has had the Click Listener mixin enabled.
touchgfx::Draggable< touchgfx::Box > box;
API reference
Further reading
Easing Equations
By default the Move and Fade animations uses a linear progression between two values. For example, if we change an alpha value from 0 to 100 in 50 steps, the alpha value will go through the steps 0, 2, 4, 6, 8, ..., 98, 100. The rate of change will be the same in all steps.
The linear progression can look a bit simple or unnatural, and the UI can often be improved by using another algorithm. TouchGFX comes with 30 algorithms each with different characteristics. The list of all the easing equations can be found in the API reference (see link at the end of this section).
The easing equations are implemented as static functions in the EasingEquations class. These functions can easily be passed to the MoveAnimator when you start an animation:
box.startMoveAnimation(0, 0, 40, EasingEquations::cubicEaseIn, EasingEquations::cubicEaseIn);
The first easing argument is the easing equation used for the movement in x (horizontal), the second for the movement in y. Be aware, if you only pass one function it will be used for the x movement and the linear progression will be used for the y movement.
Cubic movement
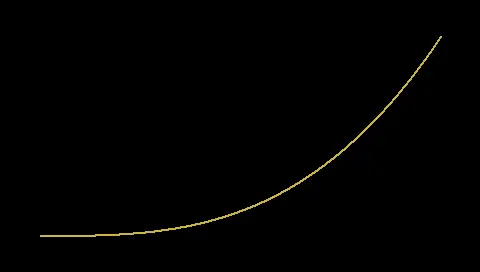
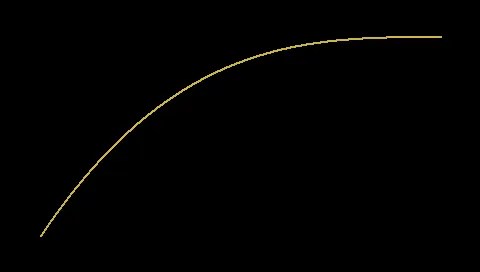
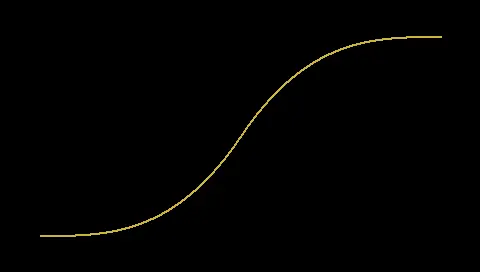
The Cubic easing equations are popular in user interfaces. It is available in three editions in TouchGFX. It is important to use the correct. The images below shows the three variants. In all cases we have time on the horizontal axis (0-400) and the value of the easing equation upwards (0-200):
The cubicEaseIn is very good when you animate something that is already visible on the display out of the screen. The slow start looks very natural. It gains speed and get out of the display within a short time.
The cubicEaseOut is very good when you animate something in to the screen. It slows down as it approaches the final position, but has a high initial off-screen speed.
The cubicEaseInOut is a combination of the cubicEaseIn and cubicEaseOut. It starts slow and ends slow. This is a natural choice when moving elements on the screen.
For some short quick movements on screen (like a toggle button), the linear movement can look better because of the simplicity.
