NeoChrom / NeoChromVG上でのTouchGFXの使用
このセクションでは、NeoChrom GPUグラフィック・アクセラレータを搭載したハードウェア上でTouchGFXを使用する方法について説明します。 このグラフィック・アクセラレータは、テクスチャ・マッピング、画像のスケーリングや回転などの操作性能を著しく向上します。 これはつまり、高いフレームレートを維持しながら、より高度なUIを構築できるということです。
NeoChromグラフィックス・アクセラレータは、現在、STM32U5x7、STM32U5x9、STM32H7R7/S7、およびSTM32N6マイクロコントローラで利用可能です。 開発ボードはすべてのファミリに用意されています。

STM32U5A9 Discoveryボード
NeoChromアクセラレータは、ソース・コードやSTM32CubeMXでは、GPU2Dという名前で知られています。
NeoChromとNeoChromVG
STM32U5G9の導入により、NeoChromアクセラレータが更新され、機能が追加されました。 この機能が向上したアクセラレータは、NeoChromVGといいます。 また、このアクセラレータには、ハードウェア・アクセラレーションによるベクタ・グラフィックスを可能にする拡張機能が搭載されています。
| マイクロコントローラ | アクセラレータ |
|---|---|
| STM32U599/A9 | NeoChrom |
| STM32U5F7/G7 | NeoChromVG |
| STM32U5F9/G9 | NeoChromVG |
| STM32H7R7/S7 | NeoChrom |
| STM32N6 | NeoChrom |
NeoChromのグラフィック機能
NeoChromアクセラレータは、基本のビットマップ転送(画像描画)、ブレンディング、スケーリング、回転、およびテクスチャ・マッピングを実行できます。 このような操作はすべて、NeoChromを内蔵したマイクロコントローラ上で実行されるTouchGFXによって自動的に利用されます。
NeoChromに固有の機能の詳細については、こちらを参照してください。
ベクタ・グラフィックス
この新しいNeoChromVGアクセラレータは、ベクタ・グラフィックスを高速化できます。 この機能は、TouchGFXでSVG画像を描画するときに使用されます。 GPU2Dグラフィックス・アクセラレータには、ステンシル・バッファと呼ばれる追加のバッファが必要です。 このバッファは、フレームバッファと同じサイズですが、ピクセル当たり1バイトだけです。
たとえば、フレームバッファが24bppで480 x 480の場合、ステンシル・バッファは480 x 480 = 230,400バイトである必要があります。 最適な性能を得るため、このステンシル・バッファを高速SRAMに割り当てることが重要です。
ステンシル・バッファはTouchGFX Generatorによって割り当てられます。 こちらのガイドを参照してください。
NeoChromによる描画時間の改善
次の例では、DMA2Dやソフトウェアによる描画と比較してNeoChromがもたらす高速化について説明します。 Designerを使用して、2つのプロジェクトを作成しました。 最初のプロジェクトは、ボックスのバックグラウンド上に画像を表示します。 2つ目のプロジェクトは、ボックスのバックグラウンド上にTextureMapperウィジェットを表示します。 このウィジェットはすべてのフレームで再描画されます。 どちらの場合でも、ビットマップは128x128のサイズ、ARGB8888フォーマットで、内部Flashに格納されます。 フレームバッファは、RGB565フォーマットです。
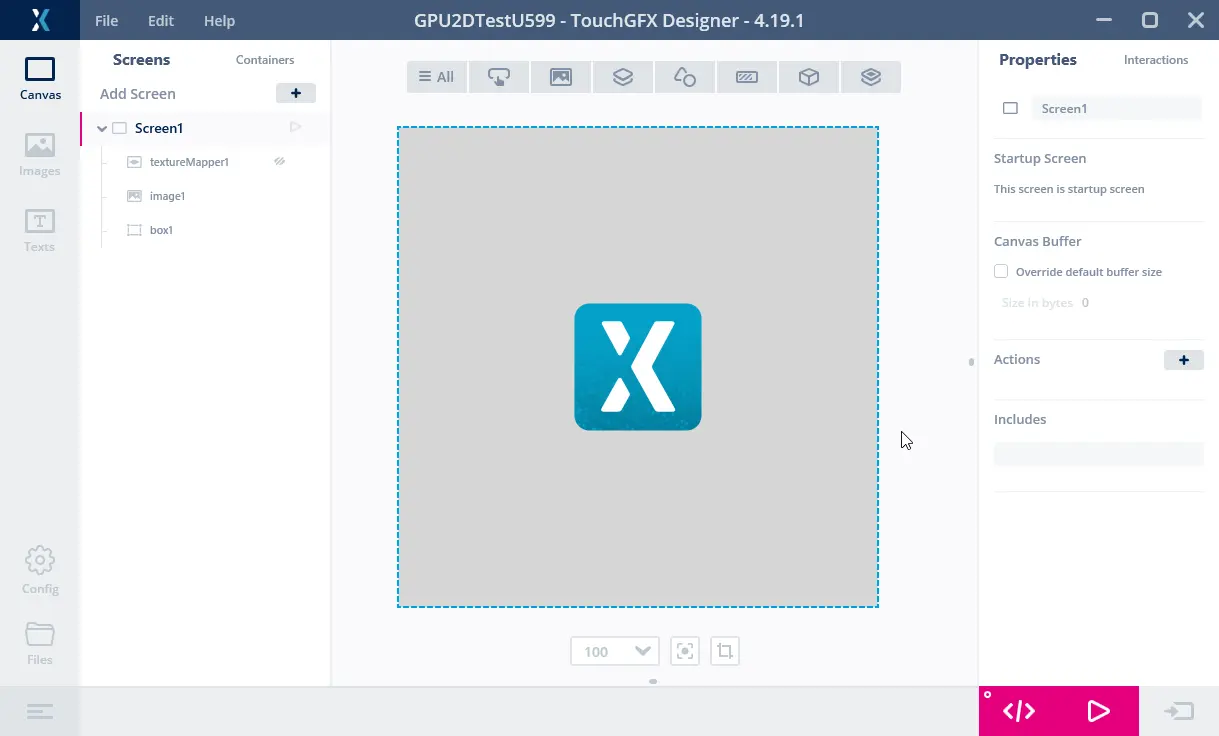
Imageプロジェクト
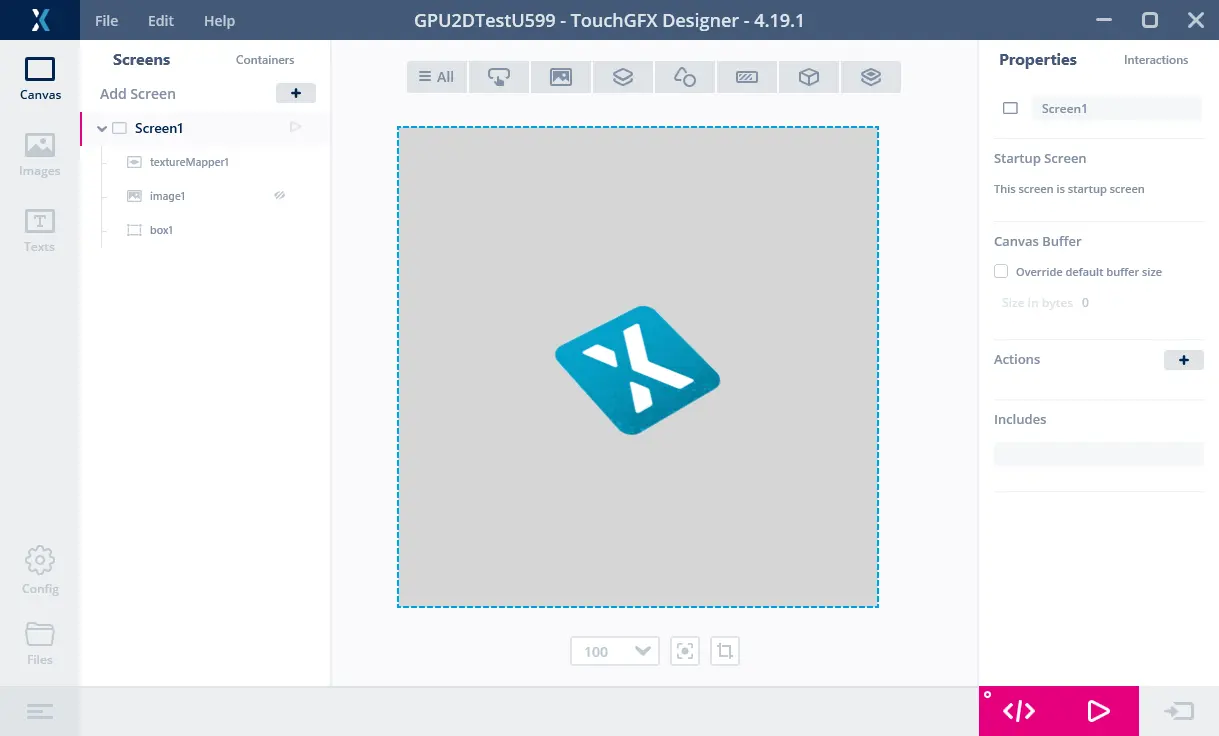
TextureMapperプロジェクト
両方のプロジェクトをSTM32F746およびSTM32U5A9 Discoveryボードで実行しました。
GPIOをロジック・アナライザに接続して、描画時間を測定しました。

STM32F746でImageプロジェクトを実行
上図は、STM32F746で実行されているときの、フレームレートと描画時間を示しています。 チャネル00は、VSYNC信号を示しています。 59.2 Hzのフレームレートに対応した、16.9 msのフレーム間隔(A1~A2)で表示されていることがわかります。 チャネル01は描画時間を示しており、描画時(B1~B2)は高くなります。 したがって、画像の描画時間は1.3 msです。 STM32F746では画像描画は高速で実行されます。

STM32F746でTextureMapperプロジェクトを実行
上図は、STM32F746で実行中のTextureMapperプロジェクトです。 TextureMapperの描画時間は4.5 msです。 TextureMapperウィジェットは、Imageの場合よりも大幅に時間がかかります。

STM32U5A9でImageプロジェクトを実行
ここでは、STM32U5A9 DiscoveryキットがImageプロジェクトを実行しています。 STM32U5A9 Discoveryキットのディスプレイは、81.6 Hzのフレームレートに対応した12.26 msのディスプレイ・フレーム間隔で表示されています。 画像の描画時間は0.7 msです。 STM32F746キットの場合よりも、Imageウィジェットが高速であることがわかります。

STM32U5A9でTextureMapperプロジェクトを実行
TextureMapperの描画時間は1.7 msです。 TextureMapperも、STM32F746よりもSTM32U5A9上で実行する方が高速になります。
描画時間のまとめ
次の表に、描画時間を示します。
| 要素 | STM32F746 | STM32U5A9 | 速度向上 |
|---|---|---|---|
| 周波数 | 200 MHz | 160 MHz | 0.8 |
| Image | 1.3 ms | 0.7 ms | ~2x |
| TextureMapper | 4.5 ms | 1.7 ms | ~3x |
クロック周波数が低くとも、STM32U5A9は、特にTextureMapperの場合に、STM32F746と比べてはるかに優れた性能を発揮します。
これらの測定は、内部Flash内の画像と、STM32F746の場合は外部SDRAMのフレームバッファを使用して行われます。 STM32U5A9の場合、フレームバッファは内部SRAMにあります(これが通常のシナリオです)。 画像を外部Flashに移動するとき、STM32F746はQSPI Flash(4bitバス)を使用しているため遅くなります。一方、STM32U5A9はそれよりも高速のOSPI Flash(8bitバス)を使用しています。
STM32F746 Discoveryキットは、内部RAMで480x272 RGB565フレームバッファを使用して実行できます。 これにより性能は向上しますが(Imageは1.03 msまで短縮)、これはSTM32F746の標準設定ではありません。内部SRAMの大半がフレームバッファ用に使用されるため、他のアプリケーション・コンポーネントに使用できるRAMはほとんど残らないからです。 単一フレームバッファでの実行もまた、すべてのアプリケーションに適しているわけではありません。
より豊富なユーザ・インタフェース
描画パフォーマンスの向上により、より高度なアニメーションを組み込んだユーザ・インタフェースを作成できます。 たとえば、スケーリングや回転が多用されたエレメントなどです。 STM32F746の場合、ディスプレイのリフレッシュ時間は16.8 msでした。 つまり、アプリケーションは、60 fpsのフレームレートを維持するために、描画時間をこの値より低く保持する必要があります。 したがって、画面上では、その複雑さの場合、最大3.75個(16.8 ms / 4.48 ms)のテクスチャ・マッパーが使用可能です。または、サイズが247 x 247の単一の大型のテクスチャ・マッパー(ピクセル数が同じで、描画時間もほぼ同じ)が可能です。 同じ画面リフレッシュレートでSTM32U5A9 CPUを使用すると仮定すると、14.36個(16.8 ms / 1.17 ms)のテクスチャ・マッパー、またはサイズが485 x 485の単一のテクスチャ・マッパーを使用できます。
次の図は、それぞれSTM32F746およびSTM32U5A9で実行される2つのアプリケーションを示しています。 ここでは、中央に近づくにつれて要素が拡大され、遠ざかると縮小される、カルーセルのようなメニューを作成することを意図しています(ここでは、すべての要素に対して同じテクスチャを使用しています)。
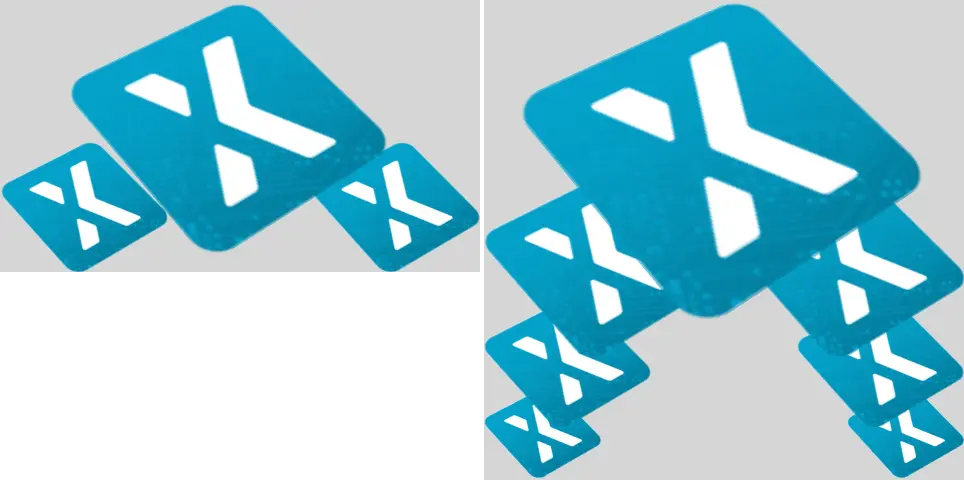
480x272ピクセルのディスプレイのSTM32F746(左)と480x480ディスプレイでテクスチャ・マッパー・ベースのカルーセル・プロジェクトを実行するSTM32U5A9(右)
STM32F746は、3つのアイコン、つまり、係数1.9で拡大された大きいアイコン1つと、2つの小さいアイコンを表示できます。 STM32U5A9は、7つのアイコンを表示できます。 最大のアイコンは、係数2.7で拡大されています。
STM32F746で、3つのアイコンを持つアプリケーションの描画時間は14.38 msです。 STM32U5A9で、7つのアイコンを持つアプリケーションの描画時間は14.93 msです。 よって、どちらのUIも60 fpsで動作できますが、STM32U5A9はより高い解像度ではるかに多くのコンテンツを表示できます。
アクセラレータ・ベクタ・グラフィックス
この新しいNeoChromVGアクセラレータは、ベクタ・グラフィックスを高速化できます。 これにより、アプリケーションの新しいクラスの可能性が開かれ、ビットマップではなく、ベクタ・ベースのグラフィックスが中心的な役割を担うことになります。
その一例がマップ・アプリケーションです。 マップはビットマップから作成できますが、非常に大きなストレージや特定のマップ・セクションの事前ダウンロードが必要な場合がよくあります。
次のビデオは、STM32U5G9で実行されるアプリケーションのデモです。 このアプリケーションでは、ベクタ定義(さまざまな色で塗りつぶされ、ストロークされた複数のポリゴン)から描画されたマップをズーム、回転、パンしています。 このビデオは色深度が16bppの800 x 480ディスプレイの全画面で実行されています。
STM32U5G9でムービング・マップを表示。
SVG
NeoChrom GPU significantly improves SVG rendering performance. SVG rendering is partially accelerated with NeoChrom GPU and fully accelerated with NeoChromVG GPU. TouchGFX automatically leverages the available hardware.
The example below shows the performance improvements when using NeoChrom GPU. In the example, an SVG image of size 152x152 pixels is rendering on an STM32F746 (software rendering), an STM32H7S7 and an STM32N657 (NeoChrom GPU), and an STM32U5G9 (NeoChromVG GPU).

サイズが152 x 152ピクセルの簡単なSVG画像描画
次の表に、SVG画像の描画時間を示します。
| MCU | アクセラレータ | Render time | Hardware | Core frequency | Framebuffer strategy |
|---|---|---|---|---|---|
| STM32F746 | Chrom-ART | 4.12 ms | STM32F746G-DK | 216 MHz | Double in external SDRAM |
| STM32U5G9 | NeoChromVG | 0.97 ms | STM32U5G9J-DK2 | 160 MHz | Double in internal SRAM |
| STM32H7S8 | NeoChrom | 2.80 ms | STM32H7S78-DK | 600 MHz | Double in external PSRAM |
| STM32N657 | NeoChrom | 0.78 ms | STM32N6570-DK | 800 MHz | Double in internal SRAM |
The measurements are performed using the TBSs available in TouchGFX Designer, using their default configuration. On the STM32H7S78-DK and STM32N6570-DK the GPU is driven at half the core frequency. On the STM32U5G9J-DK2 the GPU is running at the core frequency. As a result, the table shows that the STM32N657 is rendering the SVG faster than the STM32U5G9 despite the latter having NeoChromVG GPU. This difference mainly due to GPU frequency rather than inherent GPU capability: when GPU frequency is taken into account, NeoChromVG GPU remains faster and more efficient for vector rendering compared to NeoChrom GPU — and both outperform pure software rendering.
Further reading
Read more about using SVG in TouchGFX here: SVG.
ベクタ・フォント
NeoChromおよびNeoChromVGもベクタ・フォントの描画を加速します。 ベクタ・フォントを使用する方法については、記事「ベクタ・フォント」を参照してください。
プロジェクトの作成
CubeMXとTouchGFX Generatorは、NeoChromに対応しています。 STM32CubeMXでは、このアクセラレータはGPU2Dというコード名で知られています。 GPU2DがSTM32CubeMXのTouchGFXの設定で有効になっている場合にのみ、GPU2DアクセラレータはTouchGFXで使用可能です。 TouchGFX Designerに付属のTouchGFX TBS(テンプレート・プロジェクト)のいずれかを使用する場合は、これはすでに有効になっています。 独自のカスタム・プロジェクトを作成する場合は、以下に示すように、GPU2Dアクセラレータを必ず有効にしてください。
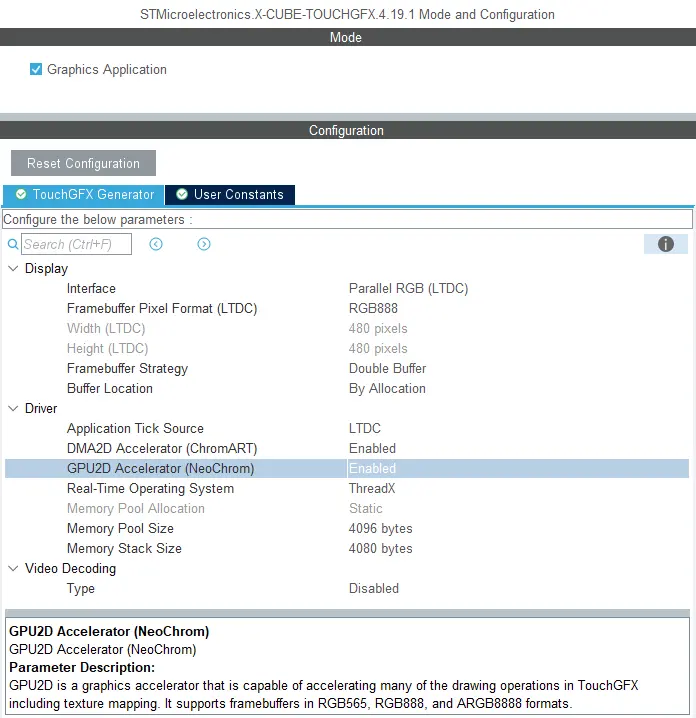
STM32CubeMXでのGPU2D(NeoChrom GPU)の有効化
GPU2Dを有効化したら、STM32CubeMXの[Generate Code]を押します。 これにより、対象の設定コードが再生成されます。 TouchGFX Designerでプロジェクトを開き、そこでもコードを生成します(F4)。
TouchGFX Designerによりアセット(画像、フォント、テキスト)と、対象の設定に適合するシミュレータ・コードが生成されます。 これで、コードをコンパイルする準備ができました。
TouchGFX Designerからプロジェクトを開始している場合は、何らかのハードウェア設定を変更する必要がないかぎり、STM32CubeMXを開く必要はありません。
フレームバッファのフォーマット
NeoChrom GPUは、すべてのマイクロコントローラ上ですべてのカラー・フォーマットをネイティブ・サポートするわけではありません。 サポートされるフレームバッファのフォーマットを以下の表に示します。
| マイクロコントローラ | RGB565(16bpp) | RGB888(24bpp) | ARGB8888(32bpp) |
|---|---|---|---|
| STM32U5x7/x9 | ネイティブでサポート | ネイティブでサポート | ネイティブでサポート |
| STM32H7R7/S7 | ネイティブでサポート | GFXMMUを使用* | ネイティブでサポート |
| STM32N6 | ネイティブでサポート | サポートされません* | ネイティブでサポート |
* これらの制約については次の章で説明します。
RGB888フレームバッファ(24bpp)使用時のSTM32H7R7/S7とSTM32N6の制約
STM32H7R7/S7とSTM32N657のNeoChrom GPUへの内部バスは24bppをサポートしません。 現時点でSTM32N6に対する回避策はありませんが、STM32H7R7/S7については、GFXMMUを使用して24bppフレームバッファをサポートすることが可能です。 このシナリオでは、GFXMMUを使用して32bppのレンダリングを24bppフレームバッファに変換します。 これによりTouchGFXは32bppフレームバッファであるかのように動作し、そしてGFXMMUがピクセル・データを24bppフレームバッファへの書き込み時に変換します。 このセットアップの例を確認するには、TouchGFX DesignerからSTM32H7S78_24bpp TBSをダウンロードしてください。ここではGFXMMUセットアップを使用して24bppフレームバッファを有効にしています。 このセットアップの使用時にはRGB888の不透明な画像アセットを扱うことができないことを注意してください。 24bppフレームバッファの色深度を全て活用するためには、代わりに不透明な画像フォーマットとしてARGB8888を選択する必要があります。
STM32H7R7/S7で24bppフレームバッファを有効化するための詳細手順
このガイドでは、24bppフレームバッファを使用するためにSTM32H7R7/S7のプロジェクトを変換する方法について、手順を追って説明します。 この手順は、16bppフレームバッファですでに動作しているプロジェクトに実装されていることを想定しています。 32bppフレームバッファのプロジェクトにこの手順を実装する場合は、ステップ6をスキップできます。
- STM32CubeMXを開き、アプリケーション・コンテキストに対してGFXMMUを有効にします。 GFXMMUは[Multimedia]タブにあります。
- 2つのパッキング・バッファを有効にして、両方のパッキング・モードとしてGFXMMU_PACKING_MSB_REMOVEを選択します。 フレームバッファごとに1つのバッファが必要なので、単一のフレームバッファ設定に必要なバッファは1つだけです。 注: エミュレートされたフレームバッファを使用する場合、最初のバッファはそれ向けに予約されます。 このため、エミュレートされたフレームバッファも使用する場合は、32bppから24bppへの変換には最初のバッファを使用できません。
- 上記で有効にしたバッファの物理アドレスを設定します。 この物理アドレスは、RAM内で24bppフレームバッファが配置される場所を示します。
- デフォルトのアルファを0xFFに設定します。
- LTDC設定の[Layer Settings]を開きます。これも[Multimedia]タブの下にあります。
- [Layer 0 - Pixel Format]をARGB8888に設定します。
- [Layer 0 - Color Frame Buffer Start Address]をGFXMMU仮想バッファのいずれかに設定します。
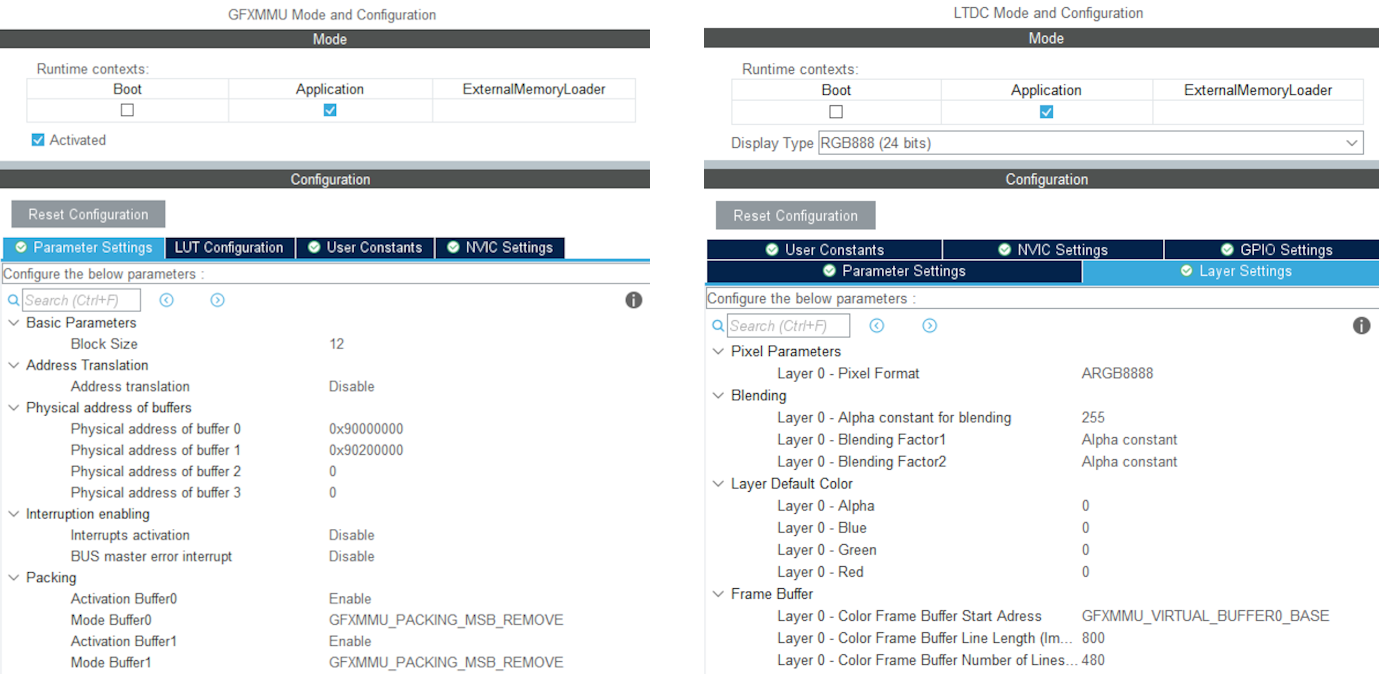
24bppフレームバッファを使用するSTM32H7S78-DKのGFXMMUとLTDCの設定例
- [X-CUBE-TOUCHGFX]を開きます。これは[Middleware and Software Packs]にあります。
- [Buffer Location]を[By Address]に設定し、開始アドレスにGFXMMU_VIRTUAL_BUFFERx_BASEと書き込みます。 「x」を、ステップ2で選択したパッキング・バッファ数に置き換えます。
- STM32CubeMXでコードを生成します。
- main.cのMX_LTDC_Init関数に以下のコードを追加して、LTDCの画像フォーマット設定をオーバーライドします。
/* USER CODE BEGIN LTDC_Init 2 */
// Reconfigure pixelformat since TouchGFX project generator does not allow setting different format for LTDC and
// remaining configuration. This way TouchGFX runs 32BPP mode but the LTDC accesses the real framebuffer in 24BPP
pLayerCfg.PixelFormat = LTDC_PIXEL_FORMAT_RGB888;
if (HAL_LTDC_ConfigLayer(&hltdc, &pLayerCfg, 0) != HAL_OK)
{
  Error_Handler();
}
/* USER CODE END LTDC_Init 2 */ - TouchGFXHAL.cppを開きます。これはTouchGFX/targetの下のプロジェクト・ディレクトリにあります。
- まだ存在していない場合は、マイクロコントローラに対するHALファイルのインクルードを追加します。 STM32H7R7/S7であれば、次のように指定します。
#include "stm32h7rsxx_hal.h" - 次の行を追加して、GFXMMUの処理を可能にします。
extern GFXMMU_HandleTypeDef hgfxmmu; - 仮想フレームバッファへのポインタを宣言します。 たとえば、次のようになります。
static uint16_t* tft = 0; - TouchGFXHAL::setTFTFrameBufferの実装を変更し、TouchGFXフレームワークはGFXMMUを介して仮想アドレスを使用するように、TFT LTDCコントローラに真のフレームバッファ・アドレスを指定します。 使用するパッキング・バッファがバッファ0とバッファ1だとすると、次のような実装になります。
void TouchGFXHAL::setTFTFrameBuffer(uint16_t* address)
{
    tft = address;
    if (tft == (uint16_t*)GFXMMU_VIRTUAL_BUFFER0_BASE)
    {
        TouchGFXGeneratedHAL::setTFTFrameBuffer((uint16_t*)hgfxmmu.Init.Buffers.Buf0Address);
    }
    else
    {
        TouchGFXGeneratedHAL::setTFTFrameBuffer((uint16_t*)hgfxmmu.Init.Buffers.Buf1Address);
    }
} - TouchGFXHAL::getTFTFrameBuffer()の実装を次のように変更します。
uint16_t* TouchGFXHAL::getTFTFrameBuffer() const
{
    return tft;
} - TouchGFX Designerでプロジェクトを開きます。
- [Config] -> [Default Image Configuration]に移動して、[Opaque Image Format]でARGB8888を選択します。
- TouchGFX Designerでコードを生成します。
これでプロジェクトは24bppフレームバッファで実行されますが、TouchGFXでのレンダリングはまだ32bppのままです。 このため、16bppやネイティブの24bppと比べると当然ながらパフォーマンスは低くなります。 しかしながら、STM32H7R7/S7ではネイティブの24bppを選択できないため、24bppが必要な場合はこれが利用可能な最善の解決策になります。
フレームバッファが外部RAMにある場合のSTM32U5の制約
STM32U5マイクロコントローラ・ファミリのNeoChromアクセラレータは、外部メモリへの書き込み時に高効率を得るための専用の書き込みバッファを搭載していません。 このため、NeoChromアクセラレータは、外部メモリが接続されているバスに何回もの「小規模」の書き込みを実行します。 これにより、同じバス上でピクセルを読み出すディスプレイ・コントローラとの間でバスの競合問題が発生します。 したがって、STM32U5でNeoChromアクセラレータを使用する場合には、内部RAMのみにフレームバッファを配置することを推奨します。 フレームバッファを外部RAMに配置する必要がある場合には、NeoChromアクセラレータを使用しないことを推奨します。 Chrom-ARTアクセラレータなら使用できます。
テクスチャ・キャッシュ
The STM32U5 MCU family with the NeoChrom accelerator uses a second data cache (DCACHE2) to optimize the access to texture in external RAM. This cache can also cache the internal SRAM. This is the default behavior for the second data cache.
There is generally no big benefit of caching the SRAM (it is already fast) and it is better to reserve the cache for the slower external memories (OSPI flash). Caching also requires cache maintenance operations (cache invalidation) to be performed when the CPU writes to the cached areas of SRAM.
For these reasons TouchGFX assumes that caching of SRAM is disabled for the second cache.
Since version 6.11 CubeMX generates these lines:
static void MX_DCACHE2_Init(void)
{
  hdcache2.Instance = DCACHE2;
  hdcache2.Init.ReadBurstType = DCACHE_READ_BURST_INCR;
  if (HAL_DCACHE_Init(&hdcache2) != HAL_OK)
  {
    Error_Handler();
  }
   __HAL_RCC_SYSCFG_CLK_ENABLE();
   HAL_SYSCFG_DisableSRAMCached();
}
Make sure you have the two last lines, if you do not use CubeMX.
NeoChromの制約
NeoChromおよびNeoChromVGグラフィックス・アクセラレータは、TouchGFXでL8画像フォーマット(L8_RGB565、L8_RGB888、L8_ARGB8888)をサポートしていません。 NeoChrom/NeoChromVGのいずれかを搭載するマイクロコントローラで実行されるTouchGFXアプリケーションで、これらの画像フォーマットを使用すると、DMA2Dを使用して画像が描画されます。 これらのフォーマットをScalableImageまたはTextureMapperで使用する場合、ソフトウェア・フォールバックを使用します。
したがって、NeoChrom/NeoChromVGアクセラレータを搭載したマイクロコントローラでは、L8画像を使用しないことを推奨します。
NeoChromグラフィック・アクセラレータは、NeoChromVGと比較して、「Non-zeroフィル・ルール」で描画されたグラフィック要素に最適ではないアンチエイリアシングを作成します。 これは、フィル・ルールを「nonzero」として指定できるSVGファイルで発生する可能性があります。 回避策は、「evenodd」フィル・ルールを使用することですが、すべての描画に有効なわけではありません。