믹스인
Mixin(이하 믹스인)이란 예를 들어 위치 변경이나 알파 값 변경을 애니메이션 처리할 수 있도록 위젯의 기능을 확장하는 클래스를 말합니다. Move Animator 믹스인과 Fade Animator 믹스인은 TouchGFX Designer 상호작용에서 위치 변경과 알파 값 변경을 애니메이션 처리하는 코드를 생성하는 데 반드시 필요합니다. 이 두 가지 믹스인은 TouchGFX Designer를 통해, 혹은 사용자 코드에서 직접 위젯에 추가할 수 있습니다.
The Move and Fade Animators optionally uses easing equations to detail the progression of the animation. Read more about easing equations in the end of this section.
Move Animator
위치 변경 애니메이터는 위젯이 현재 위치에서 지정된 마지막 위치까지 이동하는 것을 애니메이션 처리할 수 있는 믹스인입니다. X 및 Y축 방향의 위치 변경은 EasingEquation을 통해 설명할 수 있습니다.
이 믹스인은 TouchGFX Designer의 해당 위젯 속성을 사용해 아래 이미지와 같은 “Mixins” 섹션에서 활성화하면 적용됩니다.
Move Animator 믹스인은 위젯의 위치를 변경하는 상호작용이 생성되면 해당 위젯에 자동으로 적용됩니다.
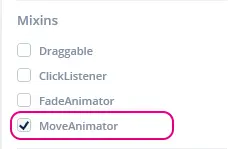
TouchGFX Designer에서 활성화된 Move Animator 믹스인
Move Animator를 활성화하면 아래와 같이 생성된 위젯의 선언 서명(signature)이 바뀝니다. 여기에서 Box의 Move Animator 믹스인이 활성화됩니다.
touchgfx::MoveAnimator< touchgfx::Box > box;
사용자 코드에서 Move Animator 사용하기
Move Animator 믹스인이 위젯에 적용되면 해당 위젯이 현재 위치에서 다른 위치로 이동하는 것을 애니메이션 처리할 수 있습니다. 이 섹션에서는 이러한 새 기능을 사용하는 방법에 대한 데모를 소개합니다.
TouchGFX Designer의 Box 위젯에서 Move Animator 믹스인을 활성화하면 startMoveAnimation 메소드를 사용할 수 있게 됩니다. 이 메소드는 다음과 같은 순서로 5가지 인수를 갖습니다.
- endX: 부모와 관련하여 위젯이 이동해야 하는 X 위치입니다.
- endY: 부모와 관련하여 위젯이 이동해야 하는 Y 위치입니다.
- duration: X축과 Y축으로 이동하는 데 걸리는 시간(tick)입니다.
- xProgressionEquation: X축으로 이동하는 데 사용되는 EasingEquation입니다.
- yProgressionEquation: Y축으로 이동하는 데 사용되는 EasingEquation입니다.
아래는 X축과 Y축에서 linear EasingEquation을 사용하여 40tick 시간 동안 X: 0, Y: 0 좌표로 이동하는 예제입니다.
box.startMoveAnimation(0, 0, 40, EasingEquations::linearEaseNone, EasingEquations::linearEaseNone);
사용자 코드를 통한 콜백 구현
Move Animator 믹스인이 애니메이션을 완료하면 콜백이 실행됩니다. 이 섹션에서는 이러한 콜백을 구현하는 방법에 대한 데모를 소개합니다.
TouchGFX Designer의 Box 위젯에서 Move Animator 믹스인을 활성화했다면 이제 Box 위젯이 위치한 기본 클래스에서 상속하는 스크린 헤더 클래스 파일에 콜백 선언과 이벤트 처리 함수를 추가해야 합니다.
Screen1View.hpp
class Screen1View : public Screen1ViewBase
{
public:
    Screen1View();
    // Declaring callback handler for move animation ended on a Box
    void boxMoveAnimationEndedHandler(const touchgfx::MoveAnimator<Box>& comp);

protected:
    // Declaring callback type of MoveAnimator<Box>
    Callback <Screen1View, const touchgfx::MoveAnimator<Box>&> boxMoveAnimationEndedCallback;
};
그런 다음 콜백 선언과 이벤트 처리 함수를 View 객체로 바인딩해야 합니다.
Screen1View.cpp
Screen1View::Screen1View() :
  // In constructor for callback, bind to this view object and bind which function to handle the event.
  boxMoveAnimationEndedCallback(this, &Screen1View::boxMoveAnimationEndedHandler) { }
다음 단계에서는 이동 애니메이션이 종료되었을 때 사용할 콜백을 Box 위젯에게 알려주는 것 입니다. 이 작업은 setupScreen() 파일에서 작성하며, 해당 스크린으로 전환될 때마다 콜백이 설정되도록 해야 합니다.
Screen1View.cpp
void Screen1View::setupScreen()
{
  // Add the callback to box
  box.setMoveAnimationEndedAction(boxMoveAnimationEndedCallback);
}
마지막으로 콜백을 처리할 boxMoveAnimationEndedHandler 함수를 구현합니다. 효과적인 연습이 될 수 있도록 위치 변경 애니메이션을 마친 Box가 실제로 해당하는 ‘box’인지 확인합니다.
Screen1View.cpp
void Screen1View::boxMoveAnimationEndedHandler(const touchgfx::MoveAnimator<touchgfx::Box>& b)
{
    if (&b == &box)
    {
        //Implement what should happen when move animation on 'box' has ended here.
    }
}
API 참조
Further reading
Fade Animator
Fade Animator는 위젯이 알파 값을 현재 값에서 지정된 마지막 값으로 변경하여 페이드 효과를 애니메이션 처리할 수 있는 믹스인입니다. 페이드 속도는 EasingEquation을 통해 설명할 수 있습니다.
Note
이 믹스인은 TouchGFX Designer의 해당 위젯 속성을 사용해 아래 이미지와 같은 “Mixins” 섹션에서 활성화하면 적용됩니다.
Fade Animator 믹스인은 0보다 큰 시간 동안 위젯을 페이드 처리하는 상호작용이 추가되면 해당 위젯에 자동으로 적용됩니다.
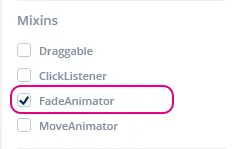
TouchGFX Designer에서 활성화된 페이드 애니메이터 믹스인
Fade Animator를 활성화하면 아래와 같이 생성된 위젯의 선언 서명이 바뀝니다. 여기서 Box의 Fade Animator 믹스인이 활성화됩니다.
touchgfx::FadeAnimator< touchgfx::Box > box;
사용자 코드에서 Fade Animator 사용하기
Fade Animator 믹스인이 위젯에 적용되면 해당 위젯이 알파 값을 현재 설정에서 다른 설정으로 애니메이션 처리할 수 있습니다. 이 섹션에서는 이러한 새 기능을 사용하는 방법에 대한 데모를 소개합니다.
TouchGFX Designer의 Box 위젯에서 Fade Animator 믹스인을 활성화하면 startFadeAnimation 메소드를 사용할 수 있게 됩니다. 이 메소드는 다음과 같은 순서로 세 가지 인수를 갖습니다.
- endAlpha: 애니메이션 종료 시 위젯에 설정되어야 하는 알파 값입니다.
- duration: 애니메이션이 새로운 알파 값 설정까지 걸리는 시간(tick)입니다.
- alphaProgressionEquation: 알파 값 변경 속도에 사용되는 EasingEquation입니다.
아래는 linear EasingEquation을 사용하여 40tick 시간 동안 알파 값을 0으로 변경하는 예제입니다.
box.startFadeAnimation(0, 40, EasingEquations::linearEaseNone);
linearEaseNone erasing equation 이 기본값이기 때문에 인수로 이 값을 제공할 필요가 없습니다.
사용자 코드를 통한 콜백 구현
Fade Animator 믹스인이 애니메이션을 완료하면 콜백이 실행됩니다. 이 섹션에서는 이러한 콜백을 구현하는 방법에 대한 데모를 소개합니다.
TouchGFX Designer의 Box 위젯에서 Fade Animator 믹스인을 활성화했다면 이제 Box 위젯이 위치한 기본 클래스에서 상속하는 스크린 헤더 클래스 파일에 콜백 선언과 이벤트 처리 함수를 추가해야 합니다.
Screen1View.hpp
class Screen1View : public Screen1ViewBase
{
public:
    Screen1View();
    // Declaring callback handler for fade animation ended on a Box
    void boxFadeAnimationEndedHandler(const touchgfx::FadeAnimator<Box>& comp);

protected:
    // Declaring callback type of FadeAnimator<Box>
    Callback <Screen1View, const touchgfx::FadeAnimator<Box>&> boxFadeAnimationEndedCallback;
};
그런 다음 콜백 선언과 이벤트 처리 함수를 View 객체로 바인딩해야 합니다.
Screen1View.cpp
Screen1View::Screen1View() :
  // In constructor for callback, bind to this view object and bind which function to handle the event.
  boxFadeAnimationEndedCallback(this, &Screen1View::boxFadeAnimationEndedHandler) { }
다음 단계에서는 이동 애니메이션이 종료되었을 때 사용할 콜백을 Box 위젯에게 알려주는 것 입니다. 이 작업은 setupScreen() 파일에서 작성하며, 해당 스크린으로 전환될 때마다 콜백이 설정되도록 해야 합니다.
Screen1View.cpp
void Screen1View::setupScreen()
{
  // Add the callback to box
  box.setFadeAnimationEndedAction(boxFadeAnimationEndedCallback);
}
마지막으로 콜백을 처리할 boxFadeAnimationEndedHandler 함수를 구현합니다. 효과적인 연습이 될 수 있도록 Fade Animator을 마친 Box가 실제로 해당하는 ‘box’인지 확인합니다.
Screen1View.cpp
void Screen1View::boxFadeAnimationEndedHandler(const touchgfx::FadeAnimator<touchgfx::Box>& b)
{
    if (&b == &box)
    {
        //Implement what should happen when fade animation on 'box' has ended here.
    }
}
API 참조
Further reading
Click Listener
Click Listener는 콜백을 사용해 위젯을 확장하여 위젯이 터치 입력에 응답할 수 있도록 설정하는 믹스인입니다.
이 믹스인은 TouchGFX Designer의 해당 위젯 속성을 사용해 아래 이미지와 같은 “Mixins” 섹션에서 활성화하면 적용됩니다.
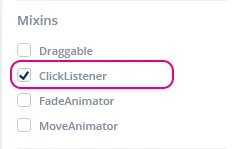
TouchGFX Designer에서 활성화된 Click Listener 믹스인
Click Listener 믹스인을 활성화하면 아래와 같이 생성된 위젯의 선언 서명이 바뀝니다. 여기서 Box의 Click Listener 믹스인이 활성화됩니다.
touchgfx::ClickListener< touchgfx::Box > box;
사용자 코드를 통한 콜백 구현
Click Listener 믹스인이 터치 이벤트를 수신하면 콜백이 실행됩니다. 이 섹션에서는 이러한 콜백을 구현하는 방법에 대한 데모를 소개합니다.
TouchGFX Designer의 Box 위젯에서 Click Listener 믹스인을 활성화했다면 이제 Box 위젯이 위치한 기본 클래스에서 상속하는 스크린 헤더 클래스 파일에 콜백 선언과 이벤트 처리 함수를 추가해야 합니다.
콜백은 바인딩할 클래스 유형, 콜백이 시작되는 위젯, 그리고 발생하는 이벤트 유형, 세 가지를 선언해야 합니다. 아래 예제에서 Screen1View, const Box& 및 const ClickEvent&가 여기에 해당합니다.
Screen1View.hpp
class Screen1View : public Screen1ViewBase
{
public:
    Screen1View();
    // Declaring callback handler for Box
    void boxClickHandler(const Box& b, const ClickEvent& e);

protected:
    // Declaring callback type of box and clickEvent
    Callback<Screen1View, const Box&, const ClickEvent&> boxClickedCallback;
};
그런 다음 콜백 선언과 이벤트 처리 함수를 View 객체로 바인딩해야 합니다.
Screen1View.cpp
Screen1View::Screen1View() :
    // In constructor for callback, bind to this view object and bind which function to handle the event.
    boxClickedCallback(this, &Screen1View::boxClickHandler) { }
다음 단계에서는 터치 되었을 때 사용할 콜백을 Box 위젯에게 알려주는 것 입니다. 이 작업은 setupScreen() 파일에서 작성하며, 해당 스크린으로 전환될 때마다 콜백이 설정되도록 해야 합니다.
Screen1View.cpp
void Screen1View::setupScreen()
{
    // Add the callback to box
    box.setClickAction(boxClickedCallback);
}
마지막으로 콜백을 처리할 boxClickHandler 함수를 구현합니다. 효과적인 연습이 될 수 있도록 콜백을 시작한 Box가 실제로 해당하는 ‘box’인지 확인합니다.
Screen1View.cpp
void Screen1View::boxClickHandler(const Box& b, const ClickEvent& evt)
{
    if (&b == &box)
    {
        //Implement what should happen when 'box' is touched/clicked here.
    }
}
API 참조
Further reading
Draggable
Draggable은 터치 입력을 통해 위젯을 드래그할 수 있도록 설정하는 믹스인입니다.
이 믹스인은 TouchGFX Designer의 해당 위젯 속성을 사용해 아래 이미지와 같은 “Mixins” 섹션에서 활성화하면 적용됩니다.

TouchGFX Designer에서 활성화된 Draggable 믹스인
Draggable 믹스인을 활성화하면 아래와 같이 생성된 위젯의 선언 서명이 바뀝니다. 여기서 Box의 Click Listener 믹스인이 활성화됩니다.
touchgfx::Draggable< touchgfx::Box > box;
API 참조
Further reading
Easing Equations
By default the Move and Fade animations uses a linear progression between two values. For example, if we change an alpha value from 0 to 100 in 50 steps, the alpha value will go through the steps 0, 2, 4, 6, 8, ..., 98, 100. The rate of change will be the same in all steps.
The linear progression can look a bit simple or unnatural, and the UI can often be improved by using another algorithm. TouchGFX comes with 30 algorithms each with different characteristics. The list of all the easing equations can be found in the API reference (see link at the end of this section).
The easing equations are implemented as static functions in the EasingEquations class. These functions can easily be passed to the MoveAnimator when you start an animation:
box.startMoveAnimation(0, 0, 40, EasingEquations::cubicEaseIn, EasingEquations::cubicEaseIn);
The first easing argument is the easing equation used for the movement in x (horizontal), the second for the movement in y. Be aware, if you only pass one function it will be used for the x movement and the linear progression will be used for the y movement.
Cubic movement
The Cubic easing equations are popular in user interfaces. It is available in three editions in TouchGFX. It is important to use the correct. The images below shows the three variants. In all cases we have time on the horizontal axis (0-400) and the value of the easing equation upwards (0-200):

The cubicEaseIn easing equation. Moving slowly in the beginning, ending fast.
The cubicEaseIn is very good when you animate something that is already visible on the display out of the screen. The slow start looks very natural. It gains speed and get out of the display within a short time.

The cubicEaseOut easing equation. Moving fast in the beginning, ending slow.
The cubicEaseOut is very good when you animate something in to the screen. It slows down as it approaches the final position, but has a high initial off-screen speed.

The cubicEaseInOut easing equation. Moving slowly in the beginning, also ending slow.
The cubicEaseInOut is a combination of the cubicEaseIn and cubicEaseOut. It starts slow and ends slow. This is a natural choice when moving elements on the screen.
For some short quick movements on screen (like a toggle button), the linear movement can look better because of the simplicity.