External Events as Triggers
This section describes how to use external events, such as physical buttons, as triggers in TouchGFX Designer.
Application requirements to respond to input from peripherals, such as physical buttons, requires that GPIO pins on the MCU are configured in accordance with board schematics.
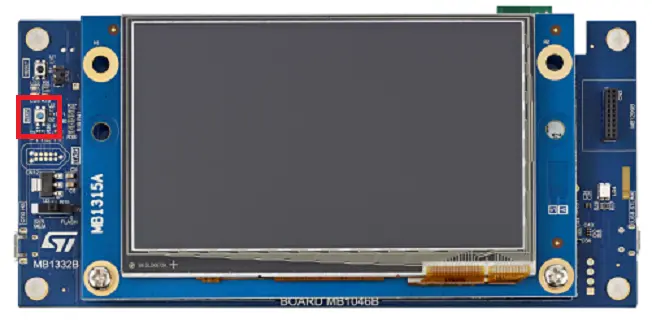
In this example the H7B3I-DK is used to show how to make the UI react to the press of a physical button. This example uses polling, while EXTI could also be used instead.
The schematic can be downloaded here at: st.com
Tip
Board Bringup
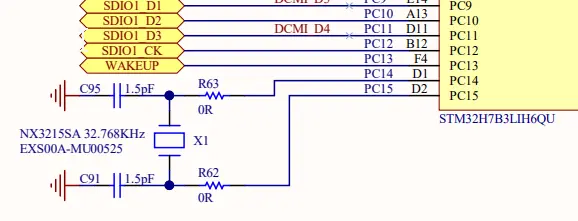
The following images depict a part of the schematics for the STM32H7B3I-DK board, and the examples that follow use STM32CubeMX to configure the appropriate GPIO port and pin as an input to read the state of the button.
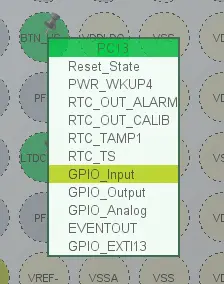
Start a new application based on the STM32H7B3I-DK TouchGFX board setup. According to the User Button is attached to GPIO Port C Pin 13 (PC13).
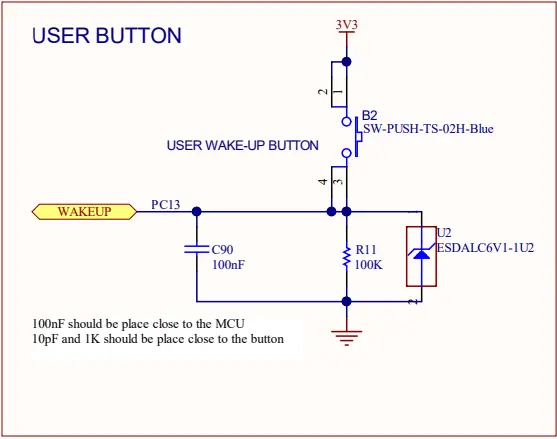
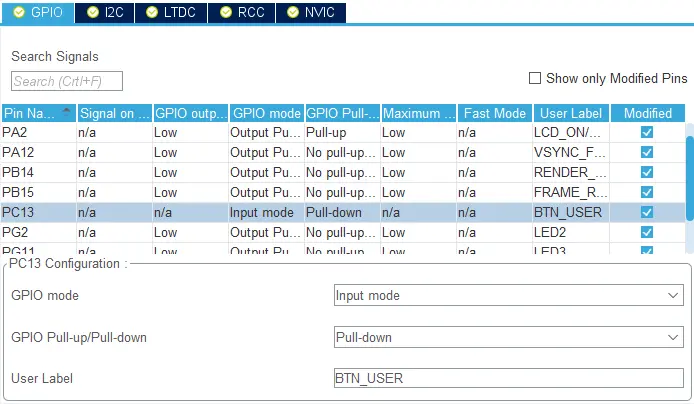
In STM32CubeMX PC13 can be configured as an input and configured as a pull-down in the GPIO section of the System Core category.
The following code has been generated by STM32CubeMX based on the name given to it in the Pinout View.
#define MCU_ACTIVE_GPIO_Port GPIOI
#define VSYNC_FREQ_Pin GPIO_PIN_12
#define VSYNC_FREQ_GPIO_Port GPIOA
#define BTN_USER_Pin GPIO_PIN_13
#define BTN_USER_GPIO_Port GPIOC
#define LED2_Pin GPIO_PIN_2
#define LED2_GPIO_Port GPIOG
#define LCD_INT_Pin GPIO_PIN_2
static void MX_GPIO_Init(void)
  __HAL_RCC_GPIOJ_CLK_ENABLE();
  __HAL_RCC_GPIOI_CLK_ENABLE();
  __HAL_RCC_GPIOA_CLK_ENABLE();
  __HAL_RCC_GPIOC_CLK_ENABLE();
  __HAL_RCC_GPIOD_CLK_ENABLE();
  __HAL_RCC_GPIOH_CLK_ENABLE();
  __HAL_RCC_GPIOB_CLK_ENABLE();
  ...
    /*Configure GPIO pin : BTN_USER_Pin */
  GPIO_InitStruct.Pin = BTN_USER_Pin;
  GPIO_InitStruct.Mode = GPIO_MODE_INPUT;
  GPIO_InitStruct.Pull = GPIO_PULLDOWN;
  HAL_GPIO_Init(BTN_USER_GPIO_Port, &GPIO_InitStruct);
  }
TouchGFX HAL Development
A part of the rendering cycle of TouchGFX engine is to check for possible input
Once the input state can be read (external event), TouchGFX HAL can now read this event as part of the rendering cycle through the ButtonController interface.
#include <platform/driver/button/ButtonController.hpp>
class H7B3ButtonController : public touchgfx::ButtonController
{
    virtual void init() {  }
    virtual bool sample(uint8_t& key)
    {

      if (HAL_GPIO_ReadPin(GPIOC, GPIO_PIN_13) != GPIO_PIN_RESET)
      {
        key = 1;
        return true;
      }
      return false;
    }
private:

};

...
H7B3ButtonController bc;
void touchgfx_init()
{
  ...
  hal.initialize();
  hal.setButtonController(&bc);
}
TouchGFX Designer
To use a value sampled by the ButtonController in interactions from the TouchGFX designer a name/value-mapping must be created in the .touchgfx project file.
"PhysicalButtons": [],
    "PhysicalButtons": [
      {
        "Key": 1,
        "Name": "BTN_USER"
      }
    ],
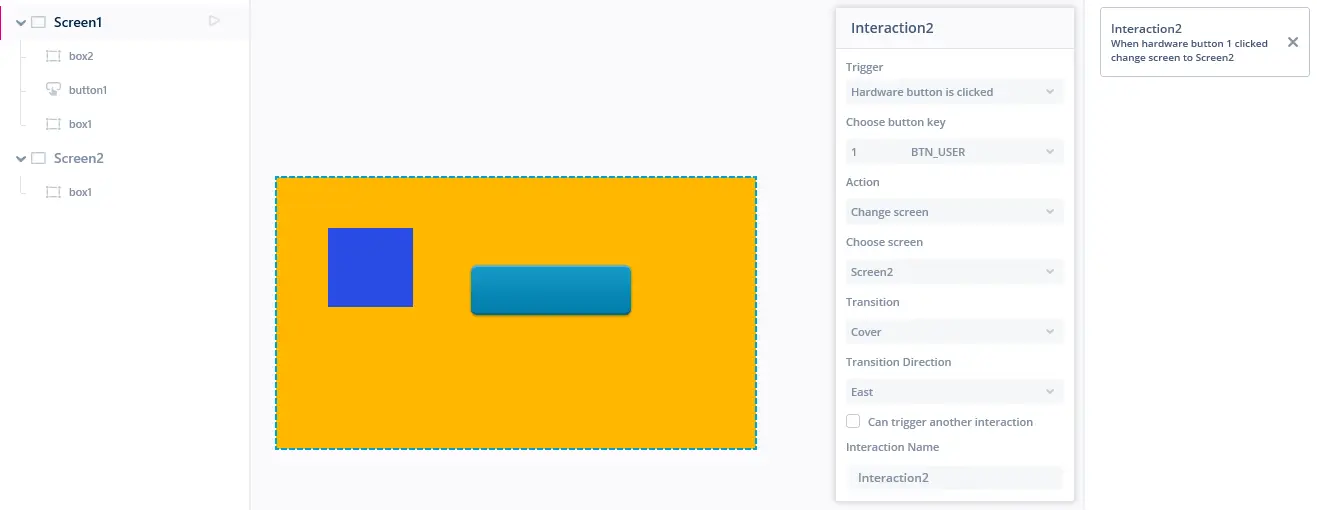
"Hardware Button is clicked" is now available as a trigger when creating an interaction. Selecting the "Key"/"Name" pair defined in the .touchgfx file allows users to specify an action, such as "Change screen".
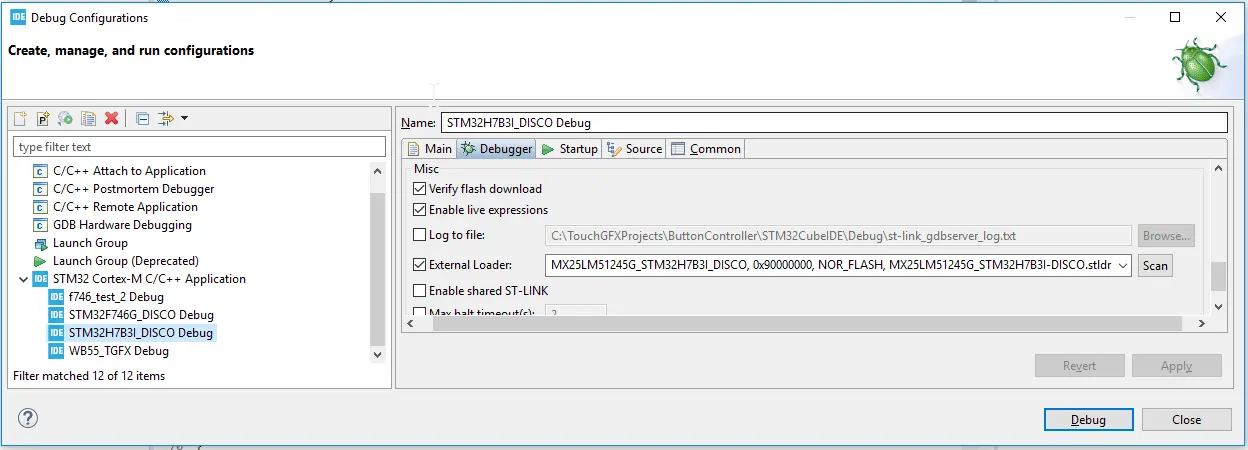
Running on target
After pressing "Generate code" in the designer, open the STM32CubeIDE project, configure the debug configuration.