Development Introduction
Main Activities
A TouchGFX project involves a set of activities that you will be addressing during the development phase. The effort in each of them are dependent on what the goal of your project is. If you are doing a UI prototype you can use premade code for major parts of the application and thus speed up your project development by skipping most of these activities. If you are doing a full project based on a custom made board, you will be addressing each of these activities in your project.

A TouchGFX projects main activities
Main Components
Your TouchGFX project is made up of five main software and hardware components. Each of the activities will generate one of the main component for your TouchGFX project. The TouchGFX Engine is not an output of any main activity, this is the starting point for your TouchGFX project and is available when you have downloaded and installed.

A TouchGFX projects main components
The following sections will give an overview of each of the activities and components. Each of the activities are further described in full details in this chapters remaining sections.
Hardware Selection
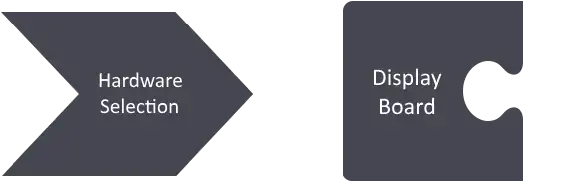
This activity is the initial activity in your TouchGFX project. Selecting the hardware on which your application will run. Deciding on which hardware components you need and what influences these have on your TouchGFX application. When you are done with this step you have a Display Board available for your TouchGFX project.
Prototyping
If you are doing a UI prototype an STM32 Evaluation Kit will be the perfect choice to get up and running quickly. Here there are no considerations to be done about the hardware components, how to connect to the board or similar issues. In this case the Hardware Selection activity is only a matter of selecting an available STM32 Evaluation kit, which is the best match with your final product in terms of MCU performance, memory setup and display size.
Custom Hardware
If you are creating your own hardware solution there are a lot of choices to be made and issues to consider. The section Hardware Selection will help you in this task, answering a lot of questions and describe how your choices influence a TouchGFX application.
Often in your project you will not have the final hardware ready before late in the project. In this case it is very common to select an STM32 Evaluation Kit that resembles your final board and use this in the first steps of UI Development. If you do not have such board, you can also start out by just using the TouchGFX Simulator that runs on your PC.
A full description of this step can be found in the Hardware Selection section.
Board Bring Up
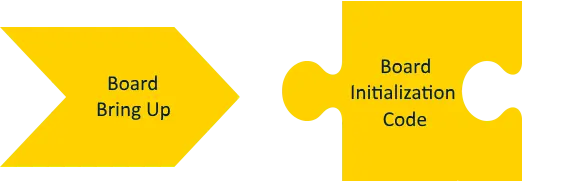
This activity is a central task to enable TouchGFX to be executed on your board. The output component is called Board Initialization Code which is a general initialization code that setup your MCU and all peripherals, preparing it for application execution. This initialization code is independent of TouchGFX, it is only handling pure hardware setup.
STM32CubeMX
The main tool for this activity is STM32CubeMX. It helps you configuring the MCU and generate general startup code. For peripherals, such as external RAM and Display, you will add initialization code and specific peripheral drivers yourself. It is also possible to do the entire Board Initialization Code without use of STM32CubeMX, but is not recommended unless you have expert knowledge on STM32 and board bring up.
TouchGFX Board Setups (TBSs)
If you are doing a UI Prototype or just want to try out TouchGFX you can base your application on an existing TouchGFX Board Setup (TBS) for one of the standard STM32 Evaluation Kits available in TouchGFX Designer. These include all the Board Initialization Code needed. The TBSs are based on a STM32CubeMX configuration, so it is possible for you to modify the configuration if you want to experiment or add access to more peripherals.
A full description of this step can be found in the Board Bring Up section.
TouchGFX AL Development

This activity is key in making the TouchGFX Engine run on top of your fully initialized Display Board (Display Board + Board Initialization Code). The output component is called TouchGFX Abstraction Layer (AL) and is a software layer that is an abstraction of your hardware and enables the TouchGFX Engine to run on your board.
TouchGFX Generator
The main tool in this activity is TouchGFX Generator which is a STM32CubeMX plugin that allows you to configure and generate most of the TouchGFX AL code. You will most probably also write some part of the TouchGFX AL in code by yourself. The TouchGFX Generator will assist you in this step by creating empty functions for you to implement.
It is important to notice that for your TouchGFX AL to work it is important that your Board Initialization Code is done correctly and that the MCU, External RAM, Display and so on is configured correctly.
If you are doing a UI Prototype or just want to try out TouchGFX you can base your application on an existing TouchGFX Board Setup (TBS) for one of the standard STM32 Evaluation Kits available in TouchGFX Designer. This includes all the TouchGFX AL code you need. The TBSs are based on a CubeMX and TouchGFX Generator configuration, so it is possible for you to modify the configuration if you want to experiment later on.
A full description of this step can be found in the TouchGFX AL Development section.
UI Development

This activity is where you probably will spend most of your project development time. Here you will create the User Interface code that will make up the visible part of your TouchGFX project, the component which is called the TouchGFX UI Application.
TouchGFX Designer
The main tools in this activity are TouchGFX Designer and your favorite IDE or text editor. In TouchGFX Designer you will setup, design and create the screens in your application and generate main parts of the UI Application as C++ code. For the application logic (handling events, communicating with the non-UI part of the system) you will use an IDE or text editor to write C++ code, that coexists and interacts with the generated code from TouchGFX Designer.

TouchGFX Board Setups
If you are doing a UI Prototype or just want to try out TouchGFX and do not want to spend time doing the other activities, you can either base your application on the PC based TouchGFX Simulator or you can use one of the existing TouchGFX Board Setup (TBS) for one of the standard STM32 Evaluation Kits. In any case you are ready to start developing your UI Application right away.
Demos and Examples
If you just want something to run or want to be inspired you can select one of the TouchGFX demos or examples which can be found when creating a new project in TouchGFX Designer. IF you do so, nothing has to be done, just compile, flash and run.
Custom Hardware
If you have already done all the other activities and thus have a running board ready for a TouchGFX Application you can either start from scratch or select one of the examples or demo. If the resolutions of your custom board and the example match then they should run on your custom board as well.
A full description of this step can be found in the UI Development section.
Workflow
As you can see TouchGFX development involves a lot of activites and tools. It is, however, important to notice that you do not need to do them all at once, and you do not necessarily need your Display Board, Board Initialization Code and TouchGFX AL before starting your UI development. This can be done using STM32 Evaluation Kits or the TouchGFX Simulator.

TouchGFX Designer workflow
Generated Code and User Code
In each of the three software activities, Board Bring Up, TouchGFX AL Development and UI Development, you will use tools that generate code for you. Common for these tools is that they do not generate all the code you need, you will be adding user written code to the project as well. For all three tools you can go back and forth between using the tool and writing code. The generated code and the user code are independent and can be updated separately.
Sometimes you will also be switching back and forth between the activities and thus using different tools. This is often the case when doing TouchGFX AL Development, where you have a very simple TouchGFX UI to test your TouchGFX AL. There is, however, no problem shifting between activities, as the tools, the generate code and your user code coexists and can be updated without any problem.
Change of Compiler/IDE
During the activities you will have to compile your code for your target board. The compilers supported by TouchGFX are IAR, ARMCC, ARMCLANG and GCC(STM32CubeIDE). The toolchain selected for your TouchGFX project is configured in STM32CubeMX, so if you want to change it you should open the TouchGFX project .ioc file in STM32CubeMX and change the toolchain setting. When selecting an TouchGFX Board Setup (TBS) in TouchGFX Designer it will have one toolchain preselected, so you will only find a project file for one of the toolchains. As the AT comes with an .ioc as well, you can open it and change the toolchain to match your needs.