Using the L8 Image Format to Reduce Memory Consumption
Images in the L8 format take up less flash storage and are faster to draw than e.g. ARGB8888.
An image in L8 format consists of a color palette and a pixel array: The color palette lists up to 256 different colors specified in either 16-bit format RGB565, 24-bit format RGB888, or 32-bit format ARGB8888. The pixel array consists of one byte for each pixel. This byte is an index into the color palette (list of colors), pointing out the color for the pixel. The TouchGFX framework draws an L8 image by reading the pixels one-by-one, looking up the colors in the palette and writing these to the framebuffer. This happens automatically and is accelerated by the STM32 Chrom-ART hardware accelerator, if available on the hardware.
8-bit per pixel means that one L8 image can use 256 different colors. Another L8 image can use 256 other colors, since the two images each have their own palette.
Pixels are one byte (8-bit) each. The size of the pixels is therefore width x height bytes. The palette colors can be 16-bit, 24-bit, or 32 bit colors. Each color definition will therefore take up 2, 3, or 4 bytes.
Solid images should be stored in L8_RGB888. If the image is transparent the 32-bit format (ARGB8888) must be used:
| Format | Framebuffer format | Supports transparent pixels | Supported by DMA2D |
|---|---|---|---|
| L8_RGB565 | 16-bit RGB565 | No | No |
| L8_RGB888 | 24-bit RGB888 | No | Yes |
| L8_ARGB8888 | Both | Yes | Yes |
The L8 format with a RGB565 palette is not supported by DMA2D. This means that drawing images in this format is not hardware accelerated. This format should therefore not be used unless you are on a platform without DMA2D (for example the STM32G0 or STM32F410).
If you are using a serial flash (non-memory-mapped) to store the images and a 16-bit framebuffer (format RGB565), then you should use the L8_RGB565 format, because the color format then matches the framebuffer format and is faster to copy to the framebuffer.
The table below shows the preferred L8 format:
| Framebuffer format | Platform has DMA2D | Platform without DMA2D |
|---|---|---|
| RGB565 | L8_RGB888 | L8_RGB565 |
| RGB888 | L8_RGB888 | L8_RGB888 |
| ARGB8888 | L8_RGB888 | L8_RGB888 |
Transparent images should always be in L8_ARGB8888.
Further reading
L8 Image
Here is a typical logo image. This image only uses 16 different colors:
The size in flash of this image is significant lower than the original image in the standard 24-bit format (RGB888). The table below lists the flash usage for this concrete image for the three different palette formats and for the non L8 format
| Format | Size of pixels (bytes) | Size of palette (bytes) | Total size (bytes) | Reduction (%) |
|---|---|---|---|---|
| RGB888 | 120,000 | 0 | 120,000 | - |
| L8_RGB565 | 40,000 | 32 | 40,032 | 66.6 |
| L8_RGB888 | 40,000 | 48 | 40,048 | 66.6 |
| L8_ARGB8888 | 40,000 | 64 | 40,064 | 66.6 |
We see that the size reduction is very large, and that the size of the palette is insignificant on a medium sized image.
Using L8 Images in TouchGFX Designer
It is very easy to use the L8 image format in TouchGFX. The only thing to do is to configure the Image Converter to convert the image from PNG to L8 format. Here we will go through the whole process:
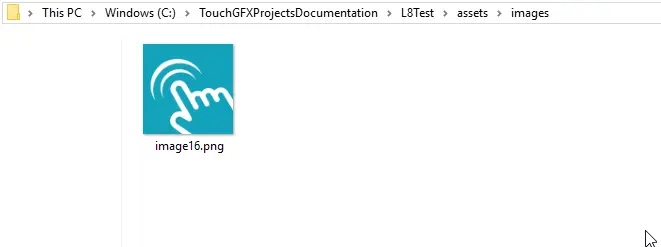
Start a new project in the TouchGFX Designer. Copy your image to the assets/images folder in the new project:
Now go to the TouchGFX Designer and click the Images tab in the top bar and select the image:
On the right side on the window, select image format L8_RGB888 (this example is running 24 bit colors).
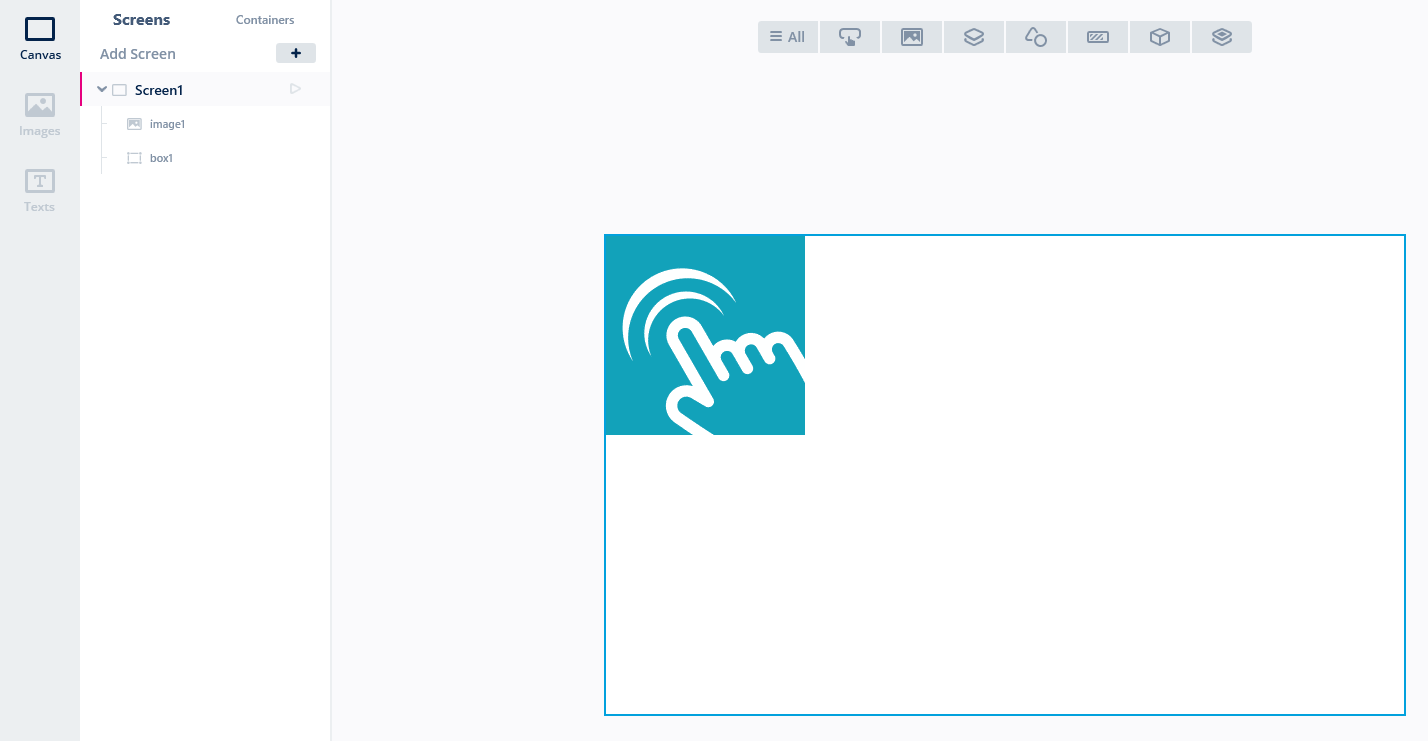
An image Widget can now be inserted on the canvas (here we inserted a Box in the background):
Nothing needs to be changed in the UI code. The Image Converter converts the PNG file and generates an image in L8 format because of the configuration we did in the Images tab.
Transparent Images
As mentioned above it is also possible to use L8 format for images with transparency.
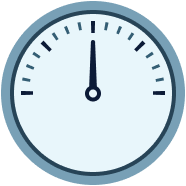
The above image uses 108 colors (many shades of blue). This image can use the format L8_ARGB8888. The size will be significantly lower:
| Format | Size of pixels (bytes) | Size of palette (bytes) | Total size (bytes) | Reduction in % |
|---|---|---|---|---|
| ARGB8888 | 40,800 | 0 | 40,800 | - |
| L8_ARGB8888 | 10,200 | 432 | 10,632 | 73.9% |
Moving the palette to internal flash
On platforms that uses non-memory-mapped flash for the images (for example the STM32G0, STM32U0, or STM32C0), it is required to move the L8 palette data to internal flash. Otherwise the L8 images will not be drawn.
The palette of an image can be moved to internal flash by changing the "Extra Section" to "IntFlashSection" in the TouchGFX Designer (Open the Images tab, find your image, and go to the right-most column).
L8 Image Compression
Memory consumption can be reduced even more by selecting L8 compression of your L8 image. The Image Converter supports 3 compression algorithms (L4, RLE, LZW9). In the TouchGFX Designer you can set the Compression value to "Auto", this will let the Image Converter select the suitable algorithm for your image, alternatively you can force a specific algorithm. The gain in reduced memory, comes in some cases with a price of increased CPU load due to decompression directly to the framebuffer when the image is drawn.
Note
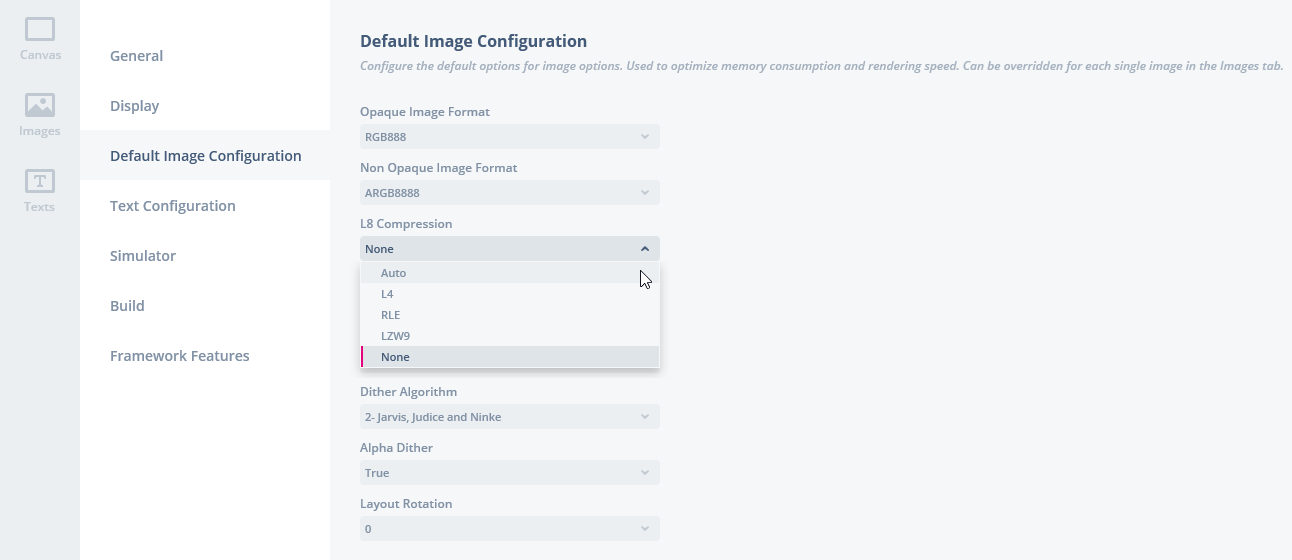
The L8 image compression has a default setting which is configurable on the Default Image Configuration tab in the TouchGFX Designer, see screenshot below. Here you select what the default setting for your entire application should be.
Caution
Further reading
In the following we will use the L8 image from previous to demonstrate the compression capabilities of each algorithm and the performance of decompression.
We use the STM32F429-DISCO with an application containing 4 screens, with different compressions:
- No compression
- L4 compression
- RLE compression
- LZW9 compression
Note
| Format | Compression | Size of pixels (bytes) | Size of palette + header (bytes) | Total size (bytes) | Reduction (%) | Performance (render time in ms) |
|---|---|---|---|---|---|---|
| RGB565 | No | 80,000 | 0 | 80,000 | 0 | - |
| L8_RGB565 | No | 40,000 | 32 + 4 | 40,036 | 50.0 | 2.12 |
| L8_RGB565 | L4 | 20,000 | 32 + 4 | 20,036 | 75.0 | 2.34 |
| L8_RGB565 | RLE | 3,197 | 32 + 164 | 3,393 | 95.7 | 1.66 |
| L8_RGB565 | LZW9 | 4,475 | 32 + 168 | 4,675 | 96.1 | 7.45 |
The above table shows both the memory reduction from compression and the performance for decompression when the image is drawn. Both the compression (reduction) and decompression (performance) highly relies on the complexity of the image and number of colors. Each algorithm has its limits of application, meaning, L4 is limited to 16 colors, RLE is limited to 64 colors and LZW9 works for all L8 images, i.e. no limits. Furthermore it is a fact that L4 and RLE performs better than LZW9, when drawing the image, but as mentioned they are not able to cover all L8 images. All algorithms will decrease in performance if the image is clipped. In general this means you always have to consider the number of colors (quality requirement), the flash memory available (reduction requirement) and the complexity of your application (animations) when you use L8 image compression. E.g. if you have an image with more than 64 colors and you use LZW9 but the performance penalty is to high, you could try and reduce the number of colors in the image to 64 or less, if your quality requirements allow it, and then select RLE. If that is not possible then your might be better of using an uncompressed L8 image. See ImageMagick for how to reduce colors in your image.
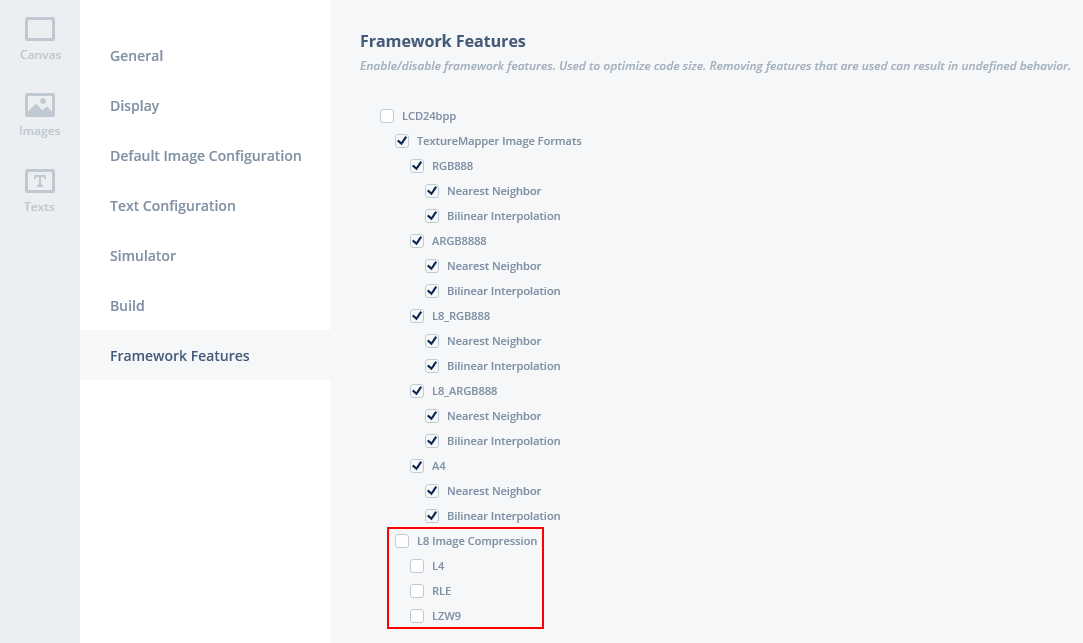
If you are not going to use L8 image compression in your application, you should disable the feature, below screenshot from the TouchGFX Designer shows you how.
Example of compressed and uncompressed L8 images in a Widget
Even though L8 image compression can't be used for all widgets, it is still possible to have some images compressed and others uncompressed in a widget composed of multiple images, e.g. Gauge and Analog Clock. Below is an example showing how the background is compressed and the needle is uncompressed in a Gauge widget.
Converting an image to 256 colors or less
Many images use more than 256 colors. This is common for images that are photo-realistic or images with gradients. These images cannot directly be converted to L8 image format in the TouchGFX Designer, because they contain to many colors.
In many cases though, it is possible to reduce the number of colors used in a specific image. Ideally, a graphics artist will convert/supply the images in 256 colors, however image manipulation tools can also perform the conversion without loosing too much of the image quality.
Paint.NET
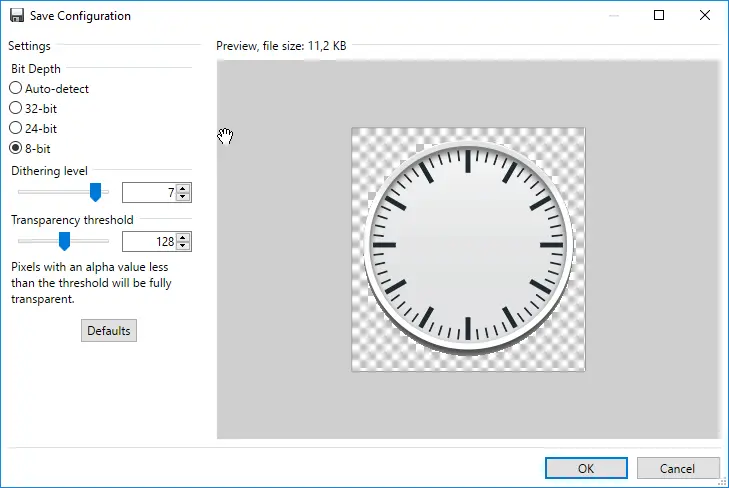
The simplest way is to use Paint.NET. Open the original image and use Save As to save the image in another file. In the Save Configuration dialog, select 8-bit, as pixel depth:
Now use the new PNG in your project. Remember to select the L8_ARGB8888 format in the Images tab in the TouchGFX Designer. Shadows are not handled very well, but icons with transparent edges looks good in many cases. It is possible to adjust the "Transparency threshold" value and in some cases improve the result.
ImageMagick
Another suitable tool, that sometimes results in better L8 images, is ImageMagick (download from www.imagemagick.org). This tool can convert images from the command line. This makes it suitable for use in scripts. To convert the clock_bg.png to an image using at most 256 colors, use the following command:
magick convert clock_bg.png -colors 256 clock_bg_l8_256.png
You can also reduce the colors to less than 256 colors, in the case of enabling the RLE or L4 compression algorithms.
magick convert clock_bg.png -colors 64 clock_bg_l8_64.png
ImageMagick can also tell you how many colors are used in an image. Use this command:
magick identify -format %k Blue_Buttons_Round_Edge_small.png
Comparison
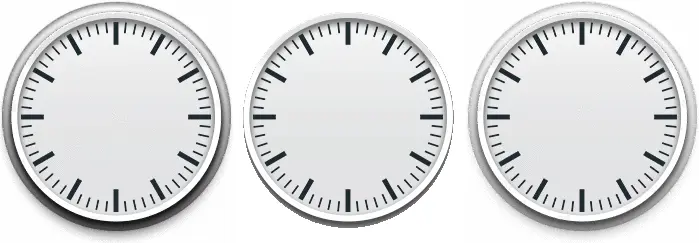
The three images (original, L8 using Paint.NET, L8 using ImageMagick) are seen below for comparison:
The middle clock lost the details in the border shadow. In both cases the central part of the clock background looks usable.
Manual Configuration
It is also possible to select image formats and compression algorithm without using the TouchGFX Designer. The settings are specified in file application.config located in the project root:
application.config
{
  "image_configuration": {
    images": {
      "Blue_Buttons_Round_Edge_small.png": {
        "format": "L8_ARGB8888",
        "l8_compression": "LZW9"
      }
    },
    "dither_algorithm": "2",
    "alpha_dither": "yes",
    "layout_rotation": "0",
    "opaque_image_format": "RGB888",
    "nonopaque_image_format": "ARGB8888",
    "section": "ExtFlashSection",
    "extra_section": "ExtFlashSection",
    "l8_compression": "yes"
  }
}
The "images" section under "image_configuration" specifies the format for individual images. If an image is not mentioned here, the image will be generated in the default format (opaque_image_format or nonopaque_image_format).
We recommend using the TouchGFX Designer for image configuration when possible.
