Custom Widgets
When creating applications you may need widgets that are not part of the TouchGFX distribution. TouchGFX have a few ways in which you can create your own graphical elements. The simplest way is to use the Custom Container approach, where you combine already existing widgets into your own. This article, however, deals with a more advanced approach where you can essentially create a widget that has full control of the framebuffer and thus is able to draw precisely what you want.
When to use the custom widget approach
Creating custom widgets is not the most typical way to create your own widget. The custom container approach is preferable if it suits your needs, but sometimes this approach is not enough. When you need full control of the framebuffer you need to use the custom widget approach.
A few examples of widgets that could and should be created using the custom widget approach are:
- A sepia filter
- A mandelbrot fractal widget
- A widget that shows data from a file, for example a gif animation.
In TouchGFX Designer
TouchGFX Designer does not currently support the creation of custom widgets. As a result, you will need to write the code for the custom widget manually (refer to the remainder of this article on how to do this) and then insert the widget in the user code portion of your View.
In code
You create your own custom widget by extending the Widget class. Doing this requires a bit more effort on the user's side, but will also give full control of all pixels drawn by the widget.
Your custom widget will not necessarily utilize any existing widgets but instead define how it should be drawn by specifying colors of pixels. The custom widget approach will in general also have a smaller memory footprint, which in some cases is of great importance.
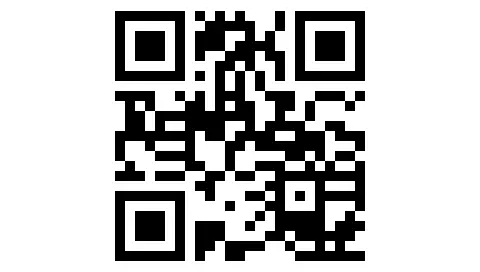
One example of a custom widget is a QR code widget. This particular widget makes for a good example, so we will walk through how to create it in the following section. In this example, a QR code widget is an NxN matrix of black and white pixels. The size of the widget and the color of each pixel will be determined at run time and depend on the information in a QR code data object.
Here are two examples of how a QR code widget might look:

QR code widget examples
Caution
Tip
touchgfx::Button (supplied with the framework) is created as a custom widget, not a custom container. This saves memory per button on your screen.Your own custom widget
In order to create your widget that extends the Widget class, you need to describe two things.
- The way your widget is drawn
- The part of your widget that is solid
Partial drawing
Any widget, and therefore also your custom widget, needs to support partial drawing. This means that your widget should be able to draw only a part of itself.
This is due to two points. It is often not necessary to redraw the entire screen but only parts of it. The algorithms of TouchGFX might split up the drawing of a screen into multiple partial drawings to minimize the global number of pixels drawn. This partial drawing of a screen, might then ask a widget to only draw itself partially.
As an example our QR code widget needs to be able to support drawing only the highlighted part of itself.

QR code widget partial drawing
The way to do this in your code is by overriding the draw method:
virtual void draw(const touchgfx::Rect& invalidatedArea) const
{
    //run through the pixels of the invalidated area
    //draw a black pixel if the qr data object has a value at this position
    //draw a white pixel otherwise
}
The invalidatedArea is the part of the widget that needs to be updated. In our QR code example the invalidated area is the highlighted area. The area is expressed in coordinates relative to the top left corner of the widget.
Caution
Tip
draw method is const because the optimized drawing algorithm might split up the drawing of a widget into multiple calls to draw. The const assures that the widget is not moved, updated etc. in between these multiple draw executions.Solid area
Furthermore, a widget needs to be able to report how large a portion of itself is solid. Solid means that you can not see the things that are behind it on the screen. For instance, a standard red box is completely solid, whereas an image with an alpha value of 50% is completely non solid; you can see everything behind it.
A solid widget will enable TouchGFX to speed up the drawing process. Since we do not have to draw the widgets below the solid widget, fewer pixels have to be drawn.
To report the solid area in your code, override the getSolidRect method.
virtual Rect getSolidRect() const;
Our QR code widget will be completely solid. You will not be able to see anything behind the black and white pixels. Therefore, we let the method return a rectangle the full size of the widget:
virtual Rect getSolidRect() const
{
    return touchgfx::Rect(0, 0, getWidth(), getHeight());
}
Example source code
We end up with an application and a widget looking like this - depending on the data supplied:
QR code widget screenshot
The complete code of the widget is shown below:
gui/include/gui/common/QRCodeWidget.hpp
#ifndef QR_CODE_WIDGET_HPP
#define QR_CODE_WIDGET_HPP

#include <touchgfx/widgets/Widget.hpp>

class QRCodeWidget : public touchgfx::Widget
{
public:
    QRCodeWidget();

    virtual void draw(const touchgfx::Rect& invalidatedArea) const;
    virtual touchgfx::Rect getSolidRect() const;

    void setQRCodeData(QRCodeData* data);
    void setScale(uint8_t s);

private:
    void updateSize();

    QRCodeData* data;
    uint8_t scale;
};
#endif
In the header file, we define the widget as an extension of the touchgfx::Widget class. We override the draw and getSolidRect methods to define how our widget is drawn.
We declare methods for setting the data of the QR code and setting the scaling factor of the QR code.
gui/src/common/QRCodeWidget.cpp
#include <gui/common/QRCodeWidget.hpp>

QRCodeWidget::QRCodeWidget() :
    data(0),
    scale(1)
{
}

void QRCodeWidget::draw(const touchgfx::Rect& invalidatedArea) const
{
    if (!data)
    {
        return;
    }

    touchgfx::Rect absolute = getAbsoluteRect();

    uint16_t* framebuffer = touchgfx::HAL::getInstance()->lockFrameBuffer();

    for (int y = invalidatedArea.y; y < invalidatedArea.bottom(); y++)
    {
        for (int x = invalidatedArea.x; x < invalidatedArea.right(); x++)
        {
            framebuffer[absolute.x + x + (absolute.y + y) * touchgfx::HAL::DISPLAY_WIDTH] =
              data->at(x / scale, y / scale) ? 0x0000 : 0xffff;
        }
    }

    touchgfx::HAL::getInstance()->unlockFrameBuffer();
}

touchgfx::Rect QRCodeWidget::getSolidRect() const
{
    return touchgfx::Rect(0, 0, getWidth(), getHeight());
}

void QRCodeWidget::setQRCodeData(QRCodeData* qrCode)
{
    data = qrCode;
    updateSize();
}

void QRCodeWidget::setScale(uint8_t s)
{
    scale = s;
    updateSize();
}

void QRCodeWidget::updateSize()
{
    if (data)
    {
        setWidth(data->getSize() * scale);
        setHeight(data->getSize() * scale);
    }
}
The source file defines the draw method. This method steps through each of the pixels in the invalidated area and determines the color of the framebuffer based on the contents of the data object and the scaling factor.
The getSolidRect method reports the widget as completely solid.
Caution
draw method. This is to make sure that the DMA is done drawing when we start drawing.The code also uses a small class/interface to access the data of the QR code:
class QRCodeData
{
public:
    uint8_t getSize();
    bool at(uint8_t x, uint8_t y);
};
Things to try
Modifying standard widgets/containers
The source code for the standard widgets are included when installing TouchGFX. These can also be modified to fit with the needs of an application. The source code for the standard widgets and containers is located in the folder:
Middlewares\ST\touchgfx\framework\source\touchgfx\widgets
In order to maintain backwards compatibility, the core library contains compiled versions of the standard widgets and containers. It is therefore not necessary to compile these files in your project.
Caution
The source code is primarily intended as inspiration and a way to learn about the inner workings of TouchGFX widgets. If you want something to behave differently than the standard implementation, it is possible to achieve this by either subclassing or creating custom containers, which is also the recommended approach.
The reason for this recommendation is two-fold:
- First, you will make it more difficult to upgrade to newer TouchGFX versions, since you must manually merge any changes you did.
- Second, you risk breaking the standard widgets and containers that are dependent on specific behavior.
Therefore, if it is necessary to modify a standard widget/container, we recommend you take a copy of it, rename it and use that instead of directly modifying the source code.
That being said, you are free to do whatever you judge is right. If you add the source code for a standard widget into your project, your linker will choose this version instead of the one in the core library. As a result, you have access to modification of the standard widgets by adding the source code to your compilation.