Board Bring Up Introduction
Project activity
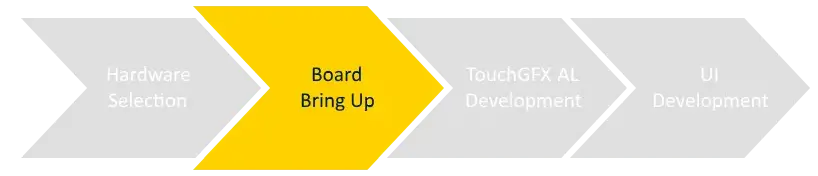
This chapter will help you through the board bring up phase of starting TouchGFX programming on a new platform. Bringing up the board means making sure that all necessary parts of the board and corresponding drivers are working correctly before TouchGFX is added to the mix.
If you already have a working board with a display, many of the activities in this phase will be easy. If you have a completely new custom made board, you should expect that this phase will take some days to complete. The work does normally pay off as an unstable platform makes it difficult to write good applications. A stable and proven platform on the other hand allows you to concentrate on the application.
This chapter is for you if are a developer with the task of ensuring that your hardware and low-level software components on the board are working as expected. This chapter is not for you if you are concerned only with developing the actual UI of your application.
In bringing up your board, you should have a thorough understanding of the components and peripherals on your board, the connections between all these, the protocols they communicate via and the driver code available and/or needed for each one.
📄️ 1. Create Project
📄️ 2. CPU Running
📄️ 3. Display with framebuffer in internal RAM
📄️ 4. External RAM
📄️ 5. Display with framebuffer in external RAM
📄️ 6. External addressable flash
📄️ 7. External flash in block mode
📄️ 8. Hardware acceleration
📄️ 9. Touch Controller
📄️ 10. Physical Buttons
📄️ 11. Flash Loader
The next chapter TouchGFX AL Development discusses how to create the abstraction layer that allows TouchGFX to run on top of your hardware and drivers.
Tools of the trade
Some important tools when bringing up an STM32 based board are listed in the table below.
| Tool | Description |
|---|---|
| STM32CubeMX | An easy to use tool for configuration of the MCU and generation of initialization source code for a project and internal peripherals. |
| STM32Cube Firmware Package | The STM32Cube Firmware for your MCU family contains many example projects and applications that show how to use various peripherals. |
| Vendor datasheets | The datasheets for your external devices, like the display or flash, contain important information such as timing and voltage for correct initialisation of both MCU (e.g. through STM32CubeMX) and the external device. |
| Vendor driver code | To save time you should request example code for your external devices from the vendor. The driver code often needs to be ported to your STM32 MCU, but this is often simpler than writing driver code from scratch. |
All the work done in board bring up phase is not dependent on TouchGFX and should not involve any TouchGFX code. Instead the work and the resulting code will serve as a solid foundation for developing the TouchGFX Abstraction Layer.
The primary goal is to make sure that your hardware and lower-level software is in fact working in accordance with your expectations for the final application.
Verification of Functionality
The code produced during the board bring up, in form of one or more test projects will serve two purposes:
| Abstraction Layer | The board initialization code is the foundation upon which we will build the TouchGFX AL and ultimately the working UI application |
| Test code | The verification code written accompanying the board initialization code, will be the ultimate place to go to if/when things do not act as expected. During the board bring up phase you will create a number of small verification programs ensuring that the board and each particular component are working as expected. These verification programs will be of great value when progressing, they can be revisited and enhanced if/when things become uncertain. |
Due to the above two reasons it can be very beneficial to save the verification programs systematically. This will allow you to use the test programs again later. For example to test new revisions of your hardware or to find the root cause, when your larger applications are unexpectedly failing. It is also recommended to make systematic notes of any measurements, e.g. memory bandwidth, done during development.

Board Initialisation Code is the bases for the TouchGFX AL
Overall Process
Since we cannot know the concrete makeup of your hardware the following How To guide will be a general step-by-step guide to bring up and prepare boards to run TouchGFX.
Each step of the guide will be concerned with one particular part of your hardware and/or software components and the bring up of this. One example of a custom component part of your hardware could be the touch controller. The overall goal is to communicate with the touch controller to get information on any touches on the display. The specific commands to send to the touch controller depends on the specific controller you are using on your hardware, so the guide cannot provide the complete driver. For this you need to combine the guide with the information in your touch controller datasheet.
Note
- do one step at the time
- verify each step thoroughly before moving on
- use the guide as a means for debugging, when something is not working as intended, or go back and revisit previous steps to make sure you did not break those steps
- do not be alarmed if you experience unexpected behaviour - bringing up a board is a non trivial task
Each step in the guide will follow the following structure:
- Motivation This part will explain the step and motivate why the step is an important step in preparing for running TouchGFX on your hardware.
- Goal The goal part lists the goals for this step. A list of verification points details the specific tests that you should perform. These verification points ensures that your software implements the requirements needed to running TouchGFX sucessfully on your hardware.
- Prerequisites Here we list items that are required to perform the tasks.
- Do This part explains as concrete as possible how to write the software required to configure and use the hardware. For some steps it is not possible to be very precise as the software depends a lot on the hardware you use. In that case this part lists the steps on a higher level and you must find the details relevant for your hardware yourself.
The individual how-to steps are:
| Step | Content |
|---|---|
| Create Project | Create an empty project in STM32CubeMX |
| CPU Running | Ensure that the MCU is running at the desired speed |
| Display with framebuffer in internal RAM | Allocate a framebuffer in internal RAM and transmit it to the display |
| External RAM | Enable the external RAM |
| Display with framebuffer in external RAM | Move the framebuffer to external RAM and transmit it to the display |
| External addressable flash | Enable external memory-mapped flash |
| External block mode flash | Enable external block-mode flash |
| Hardware acceleration | Enable the Chrom-ART graphics accelerator |
| Touch controller | Setup communication to the touch controller |
| Physical buttons | Configure access to physical buttons |
| Flash loader | Develop a way to write data to the external flash |