Tutorial 5: Creating Custom Triggers and Actions
With TouchGFX Designer it is possible to define your own interaction components with custom triggers and actions. Each Screen in your application can contain a collection of actions (these are simply void methods in C++) that you can call from within TouchGFX Designer as well as in code, while custom containers can also have a collection of triggers (which is equal to a callback in C++) which your application can react to.
In this tutorial, we will go through this functionality to learn the possibilities this gives us to create more clean and dynamic TouchGFX applications.
This tutorial is not suitable for new users of TouchGFX. It is recommended to revisit the tutorial later.
Adding a Custom Action to a Screen
In this section we will:
- Create a new application with a background box and a button
- Add a custom action to the application
- Change the background color using the custom action when the button is pressed
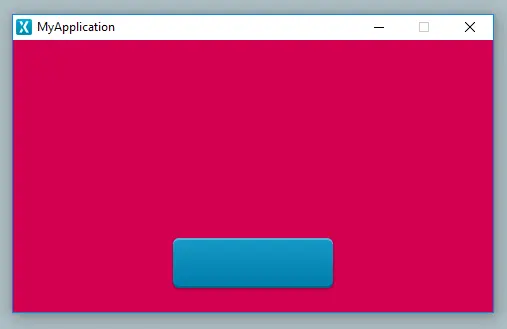
Let's start out by creating a new blank application with dimensions 480x272 (for example for STM32F746 or the simulator) and inserting a Box for the background (let's name this "background") and a Button (name this one "button"). You should have something similar to the image below:

Adding a white background Box and a Button
Next, let's add a custom action to our Screen. You can do this from the properties tab of the Screen by selecting the Screen and pressing the + button in the "Actions" group (1 above). Name the action "setBackgroundColor" and give it a description like "Sets the background color". Do not set a type for this Action.
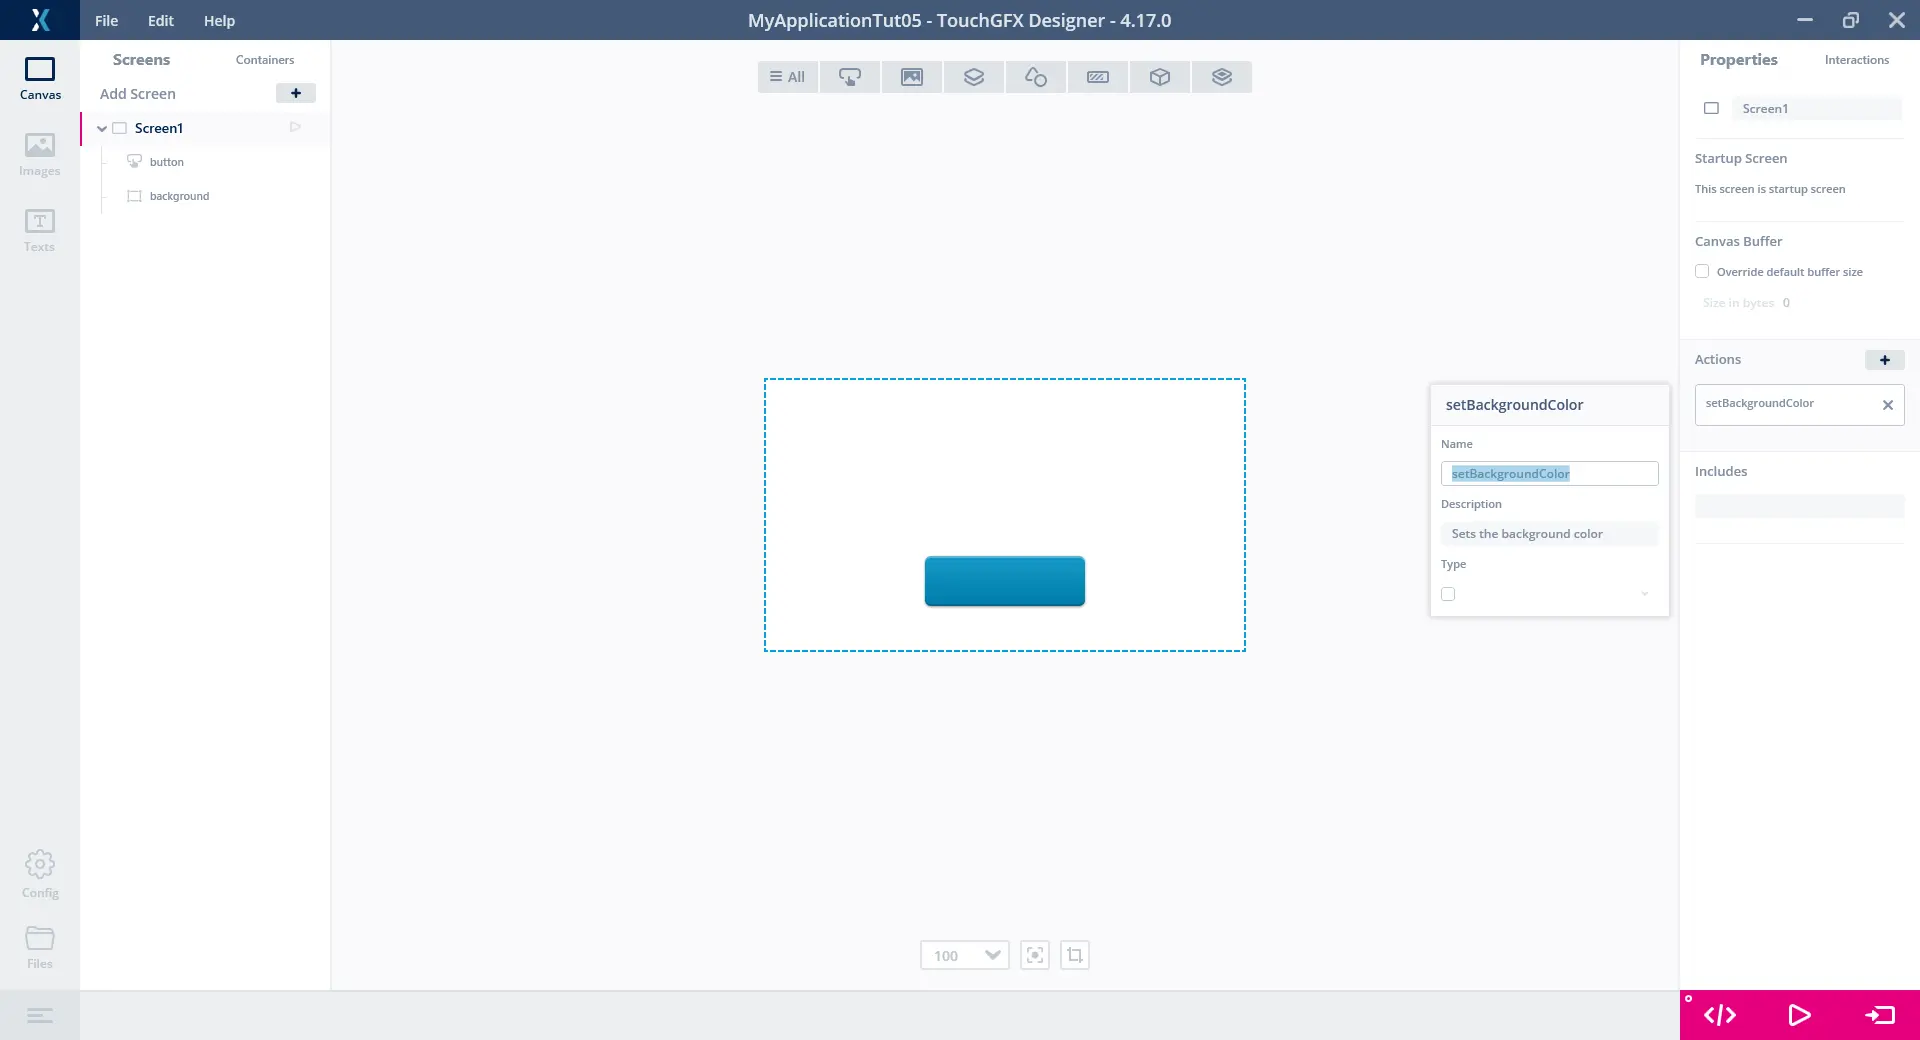
Adding a new custom action to a Screen
Press F4 to generate the code for the project. This generates a virtual method in TouchGFX/generated/gui_generated/include/gui_generated/screen1_screen/Screen1ViewBase.hpp called setBackgroundColor() with an empty implementation in Screen1ViewBase.cpp.
You can add functionality to this method by overriding it in user code in the Screen1View.cpp file or by creating interactions through TouchGFX Designer.
Let's try out the latter by going to the interactions tab for the screen and adding an interaction that calls our new method when our button is clicked.
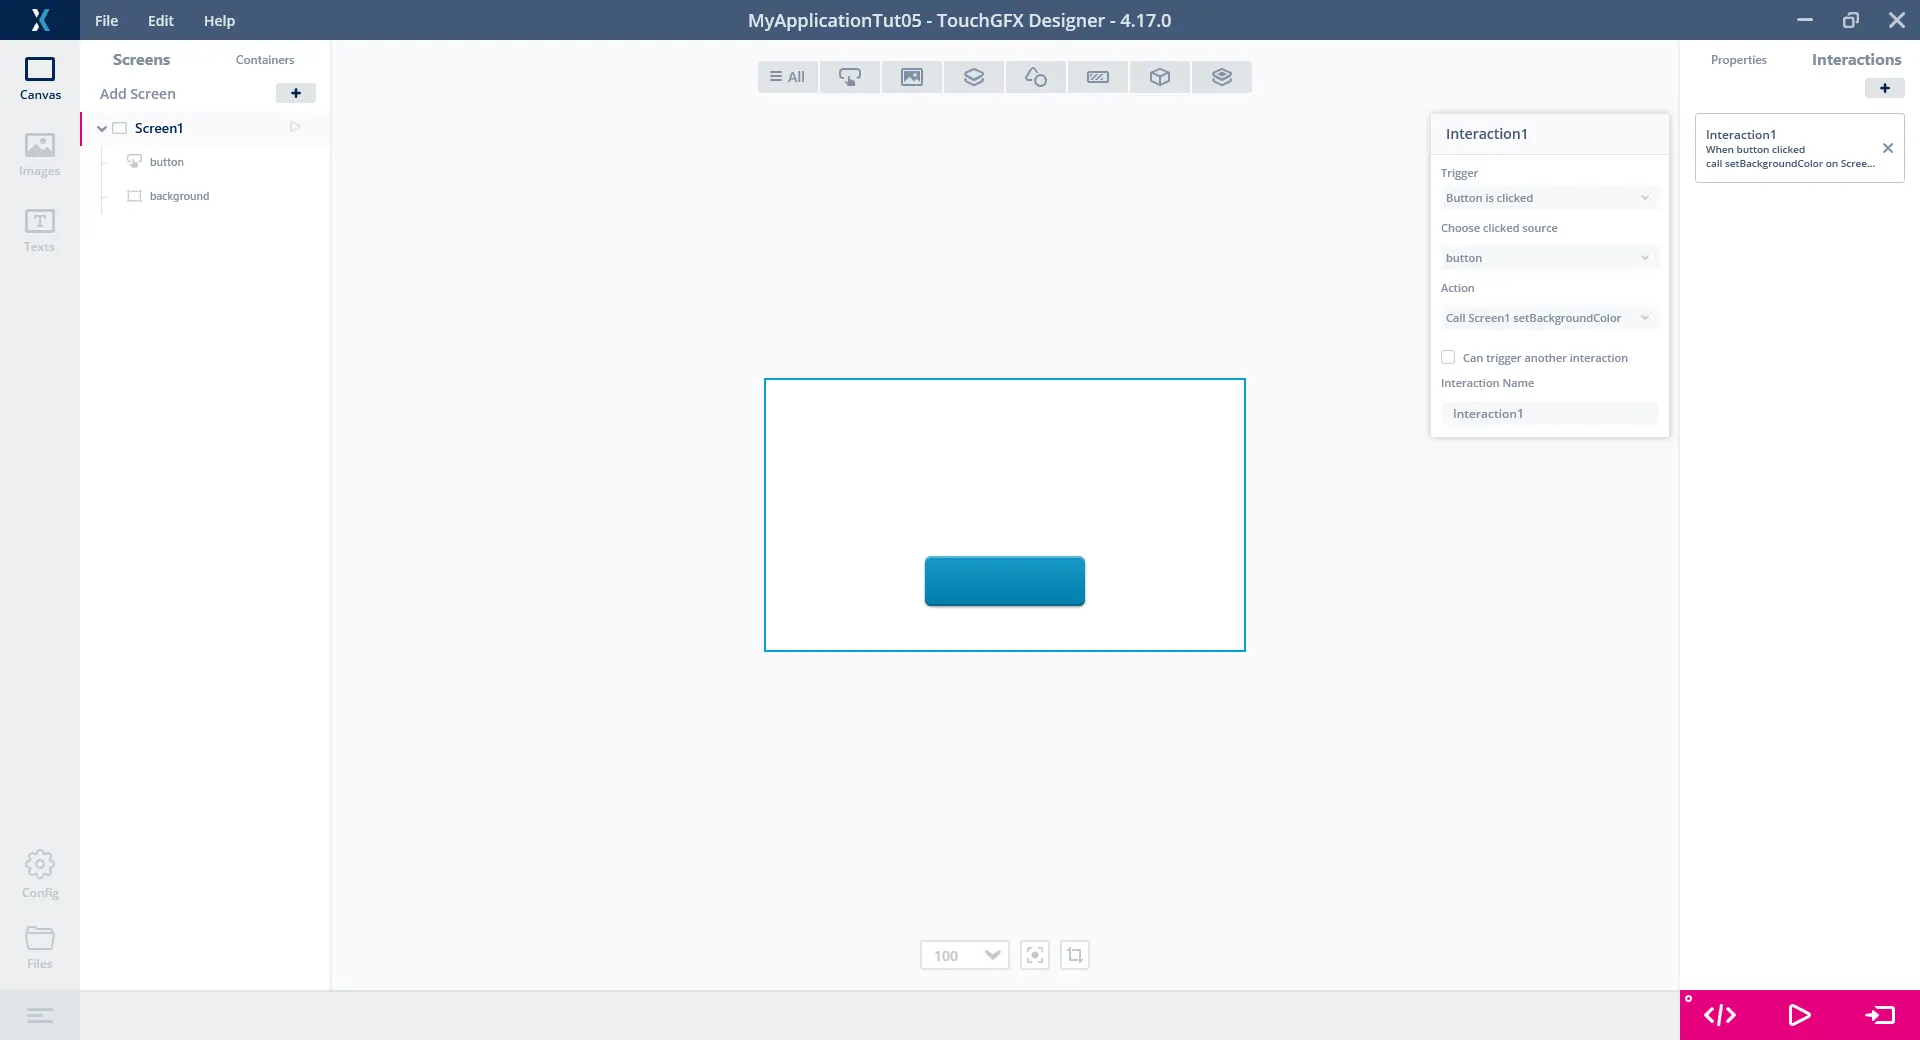
Call setBackgroundColor when button is clicked
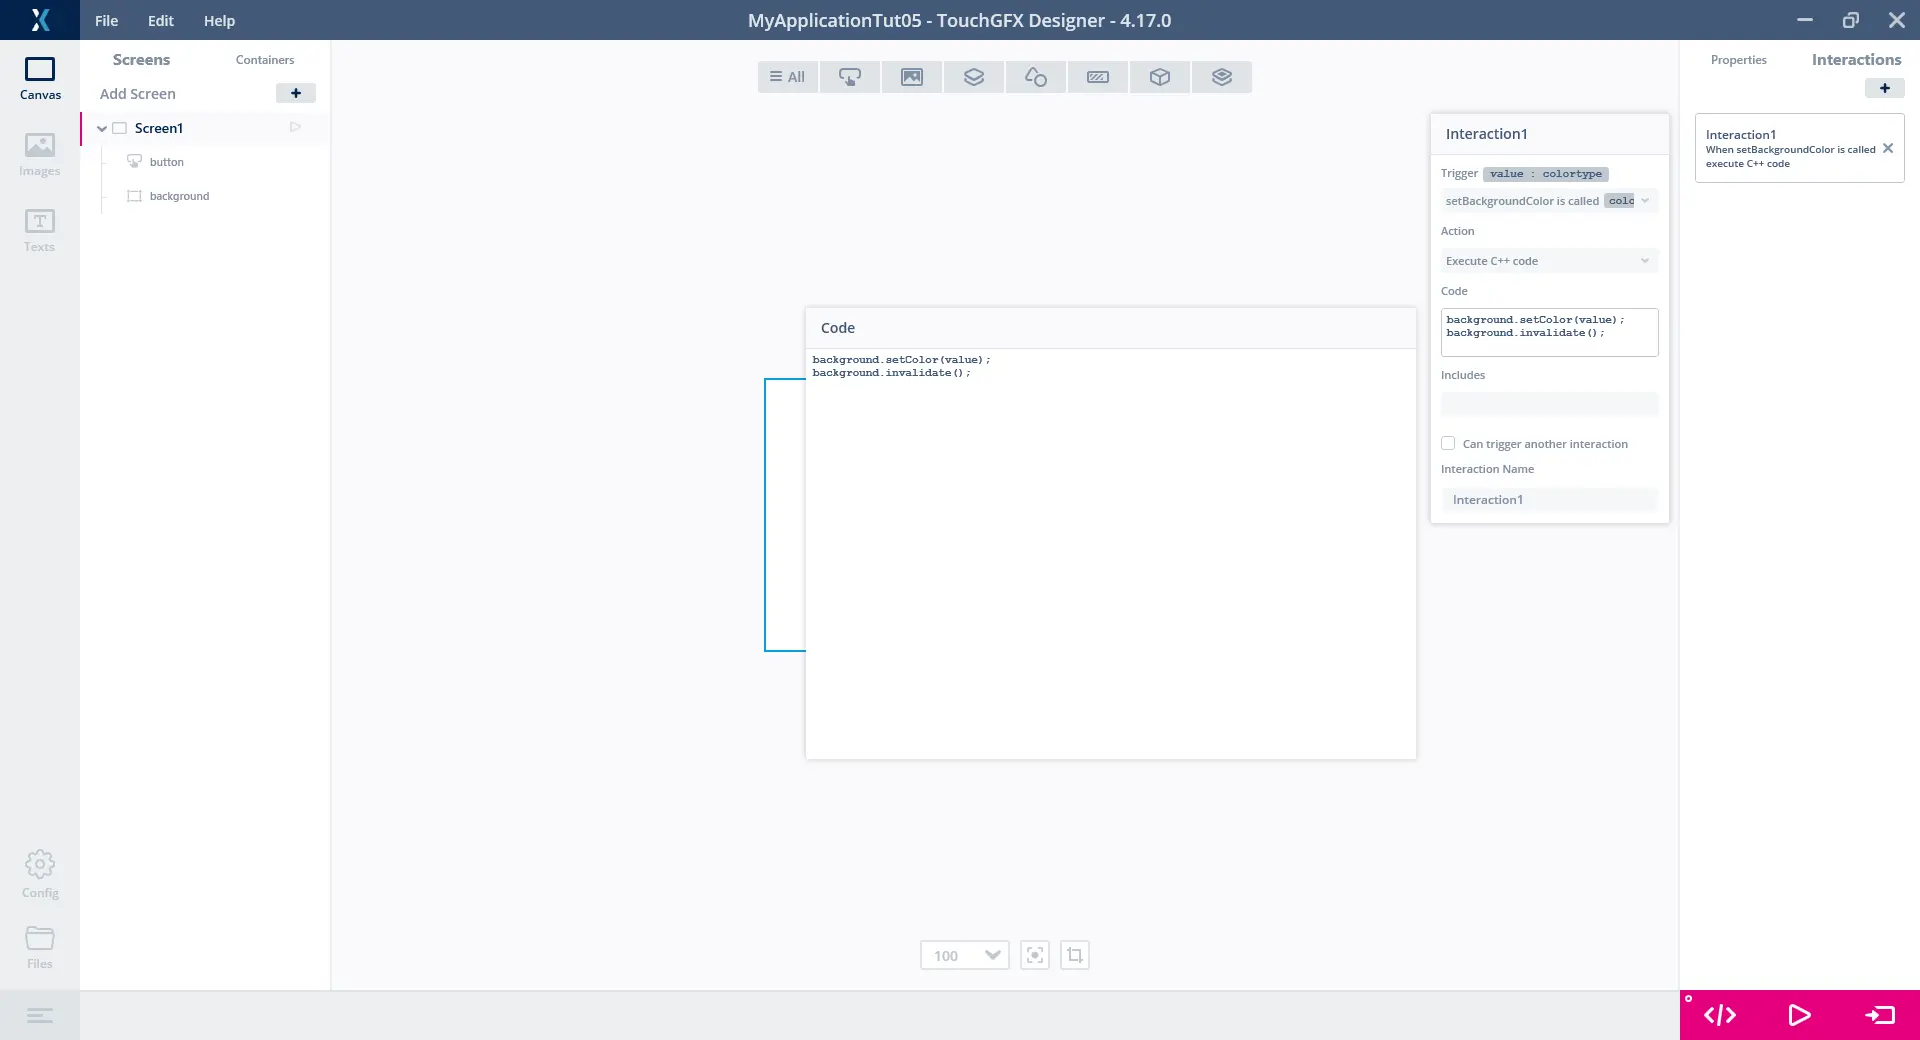
Now we must specify what actually happens when setBackgroundColor is called. This is done by using our new custom action (1) as a trigger in another interaction. Let's start out by simply setting the background Box color to black by using the action "Change box color" (2) when the trigger "setBackgroundColor is called" happens.
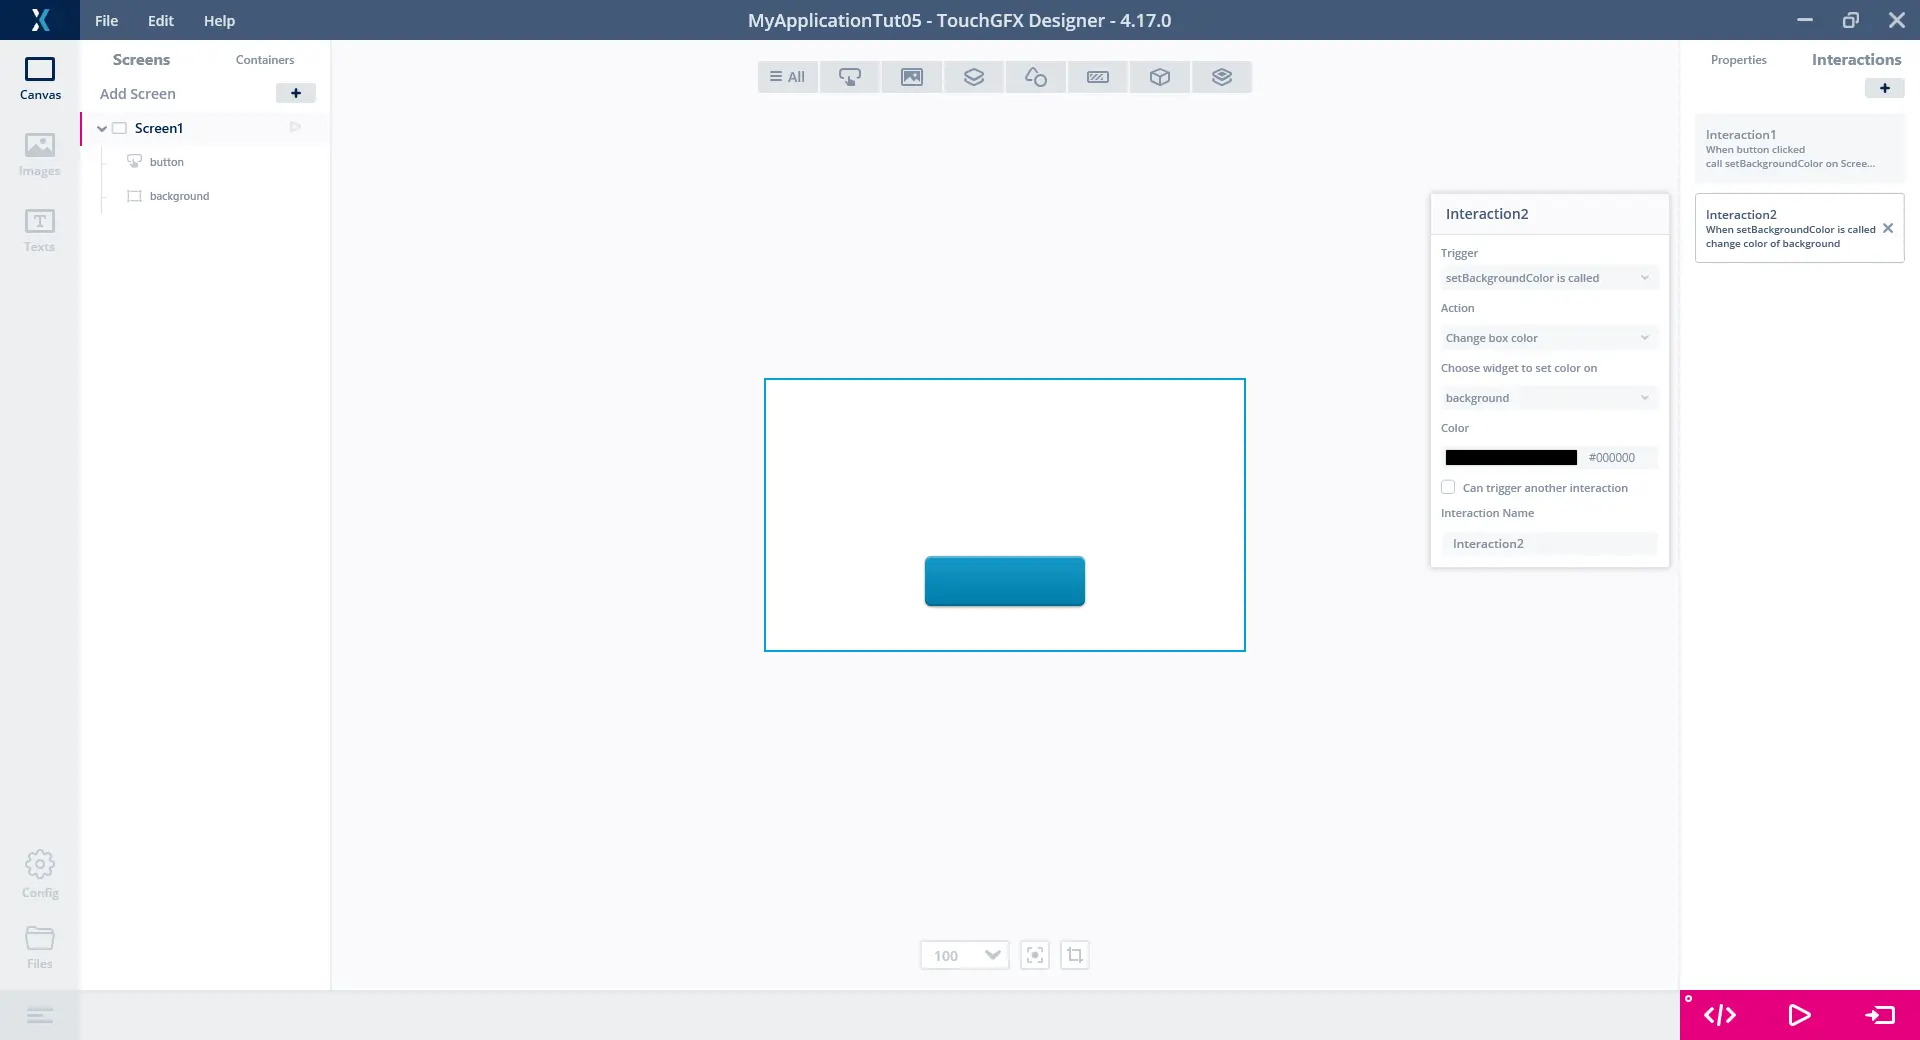
Implementing functionality for custom action setBackgroundColor
Now run the simulator and press the button; the background should turn black. You have successfully created your first custom action.
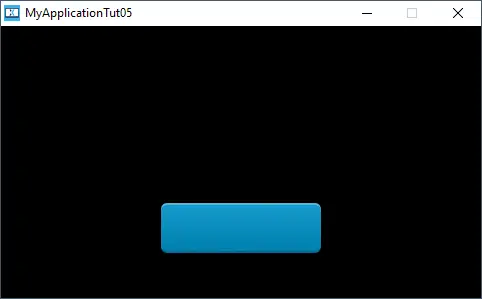
Pressing button turns background black
Passing a Value to a Custom Action
Building upon the application we have just created, this section will expand upon the custom action concept by:
- Adding a parameter to the setBackgroundColor custom action
- Passing a random color to setBackgroundColor
- Using this to change the background to random colors when pressing the button
Let's make this application a little more interesting by passing a value to our setBackgroundColor custom action to make it more dynamic.
Goto the interactions tab for the Screen and delete the two current interactions by pressing the x button for each of them, as we will be setting up new ones.
Go to the properties tab for the Screen to the custom action called setBackgroundColor and check off the checkbox for type and input "colortype" which will be the type of the parameter we are going to pass to the action (colortype is the built-in TouchGFX type for describing colors). It is not possible to name the parameter, it will be named "value".

Setting up a parameter for a custom action
Next let's setup an interaction which uses our newly added parameter value. We do this by using the trigger "setBackgroundColor is called" and the action "Execute C++ code". We want to use our new parameter to set the color of our background Box, so the code to execute should be:
background.setColor(value);
background.invalidate();
The second line forces a redraw of the background with the new color.
Using the passed value to change color of background
Notice that the trigger displays the name and type of the parameter "value : colortype".
Next, let's set up the interaction that actually calls setBackgroundColor when our button is clicked. Add another interaction with trigger "Button is clicked" and action "Call Screen1 setBackgroundColor" and notice that the value property also displays which type it expects. Let's pass a random color to setBackgroundColor by utilizing the randomization method rand() in stdlib.h to get three random numbers between 0 and 255 and using those to specify the color. To gain access to rand() we need to include it into our application. It is also possible to supply your own includes from within TouchGFX Designer for both screens and custom containers, which we need to do for this example. Go to the properties tab for the screen and under the "INCLUDES" group, input:
#include <stdlib.h>
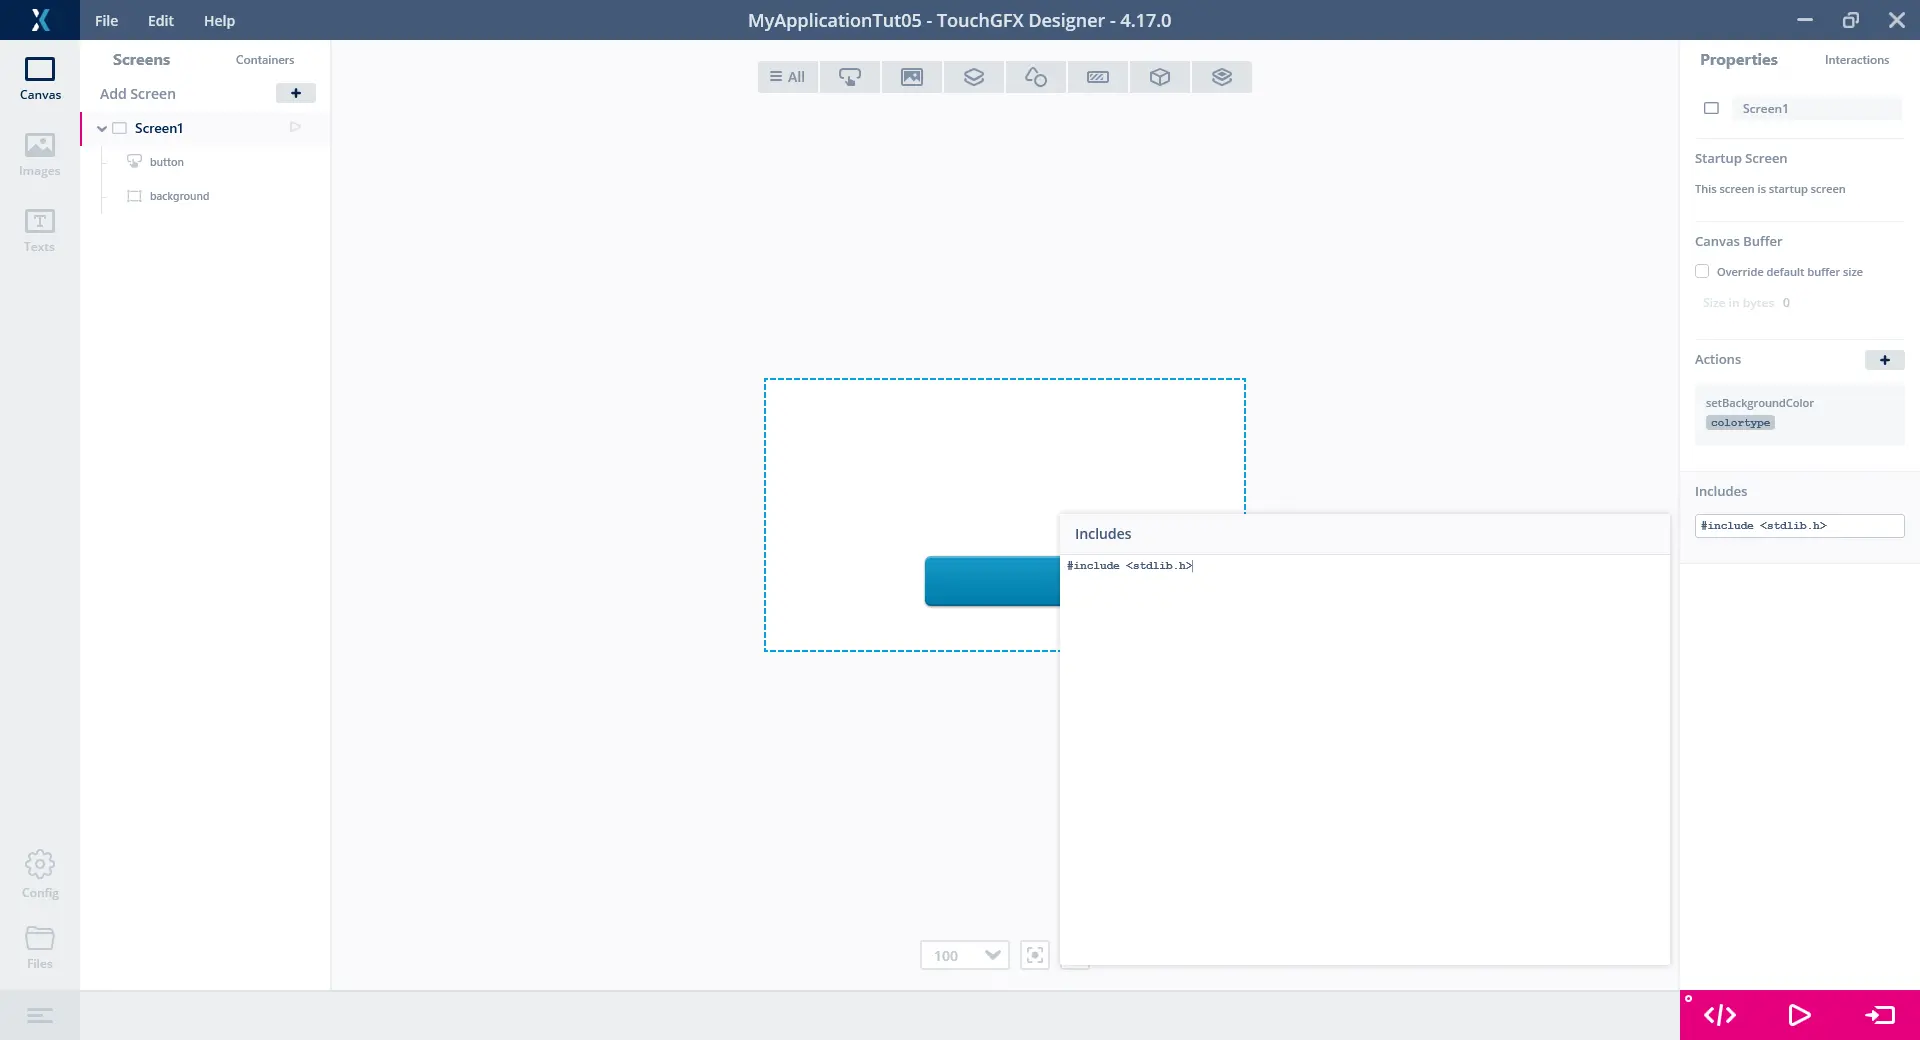
Including stdlib to gain access to rand()
Next, for the value property we are going to input (1):
touchgfx::Color::getColorFromRGB(rand()%256, rand()%256, rand()%256)

Passing a random color value when button is clicked
Now run the simulator and try pressing the button a couple of times. You should see the background changing to random colors.
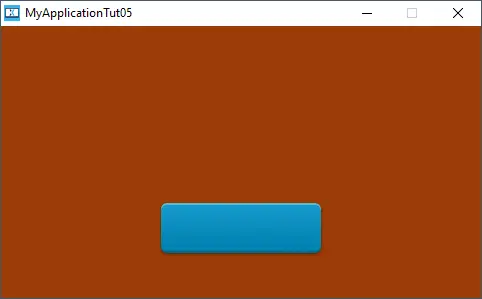
Resulting random color when clicking the button
Using Custom Triggers in Custom Containers
Finally, Custom Containers can also define a collection of custom triggers so in this section we will expand upon the application by doing the following:
- Create a new custom container called ColorEmitter
- Add a custom trigger to ColorEmitter called "colorChanged"
- Use the colorChanged trigger to signal out random colors to the application when the button is pressed
- Set up interactions in the screen to listen for the colorChanged trigger
- Use whatever color the ColorEmitter sends out to set the color of the background box
Let's try using a custom trigger to signal some event in our application. Instead of our button interaction passing the random color to setBackgroundColor, let's try and make a custom container send out the random color to our Screen, and then let the Screen use whatever value the custom container communicated. This should end up being a simple example of different UI components communicating with each other in an application to make smaller, more reusable components.
First, let's create a new custom container and call it "ColorEmitter". Insert a button and call it "button". You should have something similar to the image below:
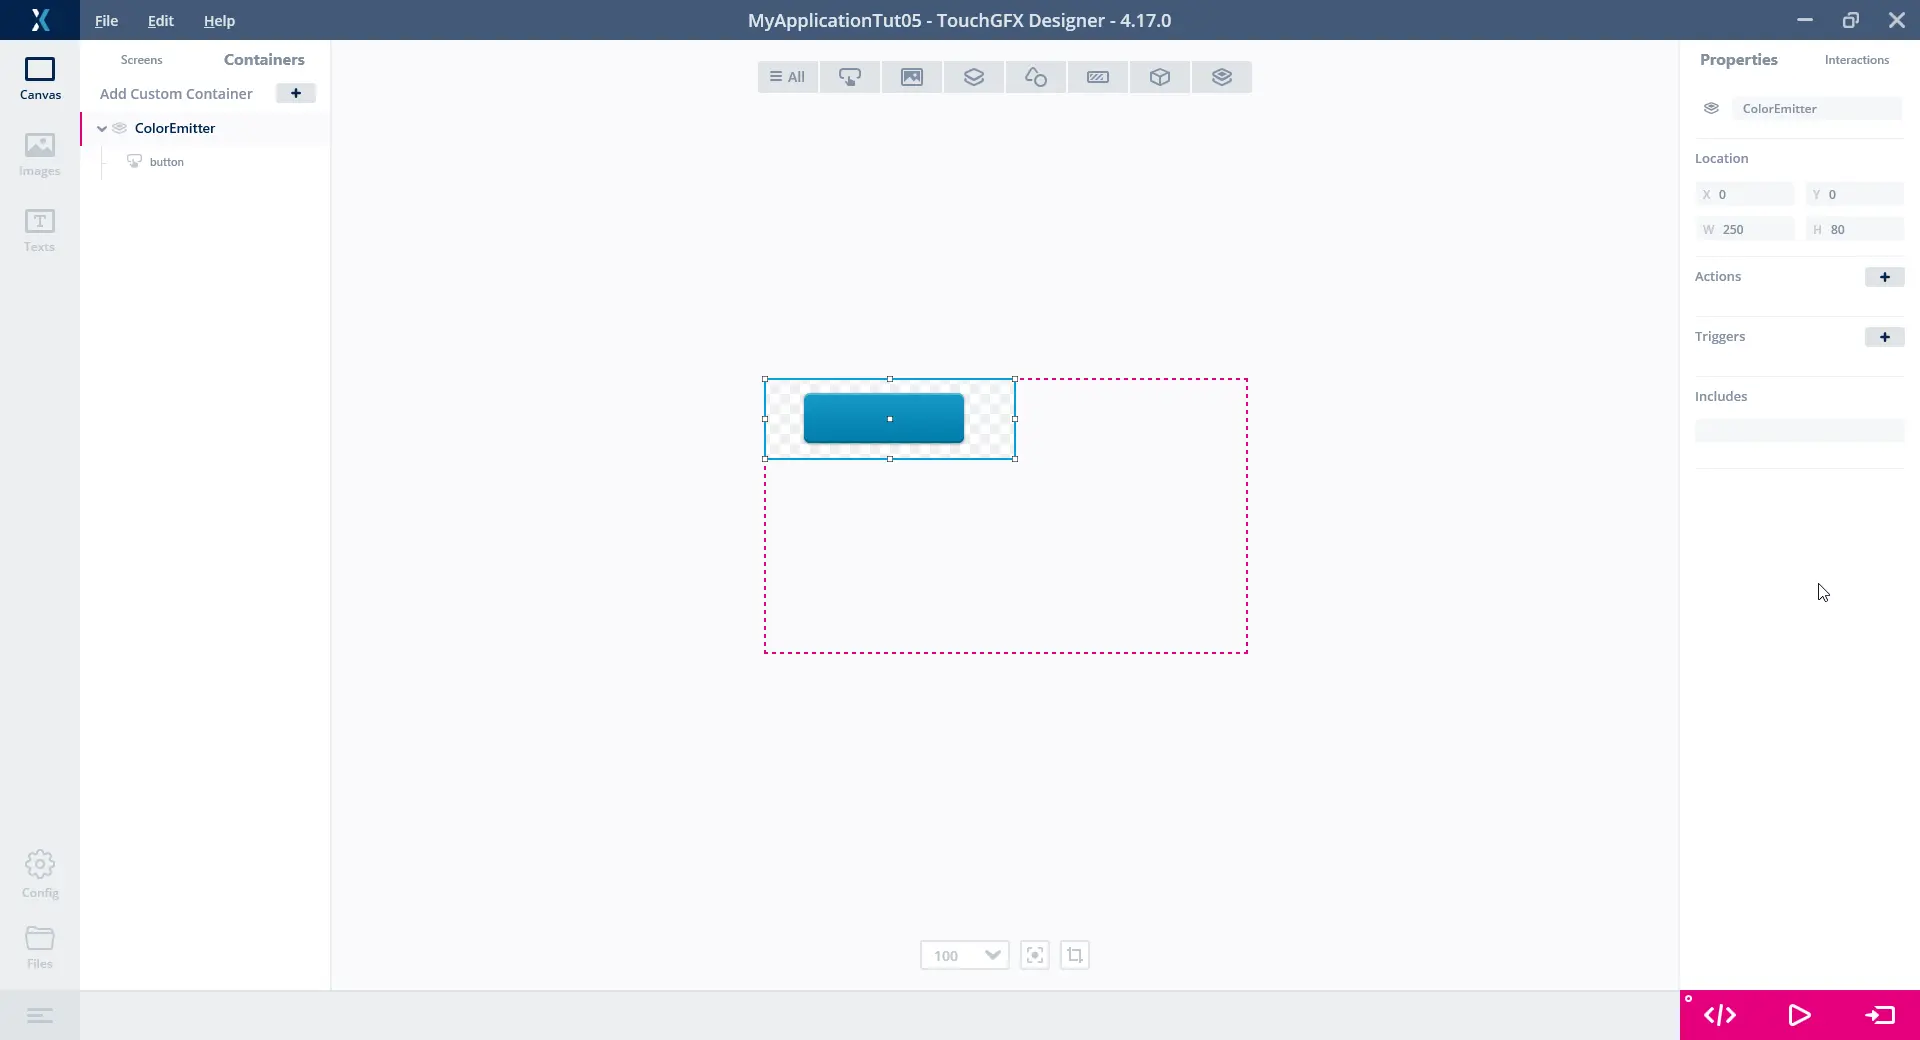
ColorEmitter custom container
Now, let's make it so that whenever the button is clicked, the ColorEmitter will emit a random color to the world. Anyone can then decide to listen for this emit and use the color for something. In our case, we just want to mimic the behavior we had before by using the color to set the background color.
To make the custom container emit a color, first we need to create a custom trigger. Go to the properties tab for the custom container and press the + button in the "Triggers" group (1). Name the trigger "colorChanged", give it description "The color has changed" and give it the type "colortype".
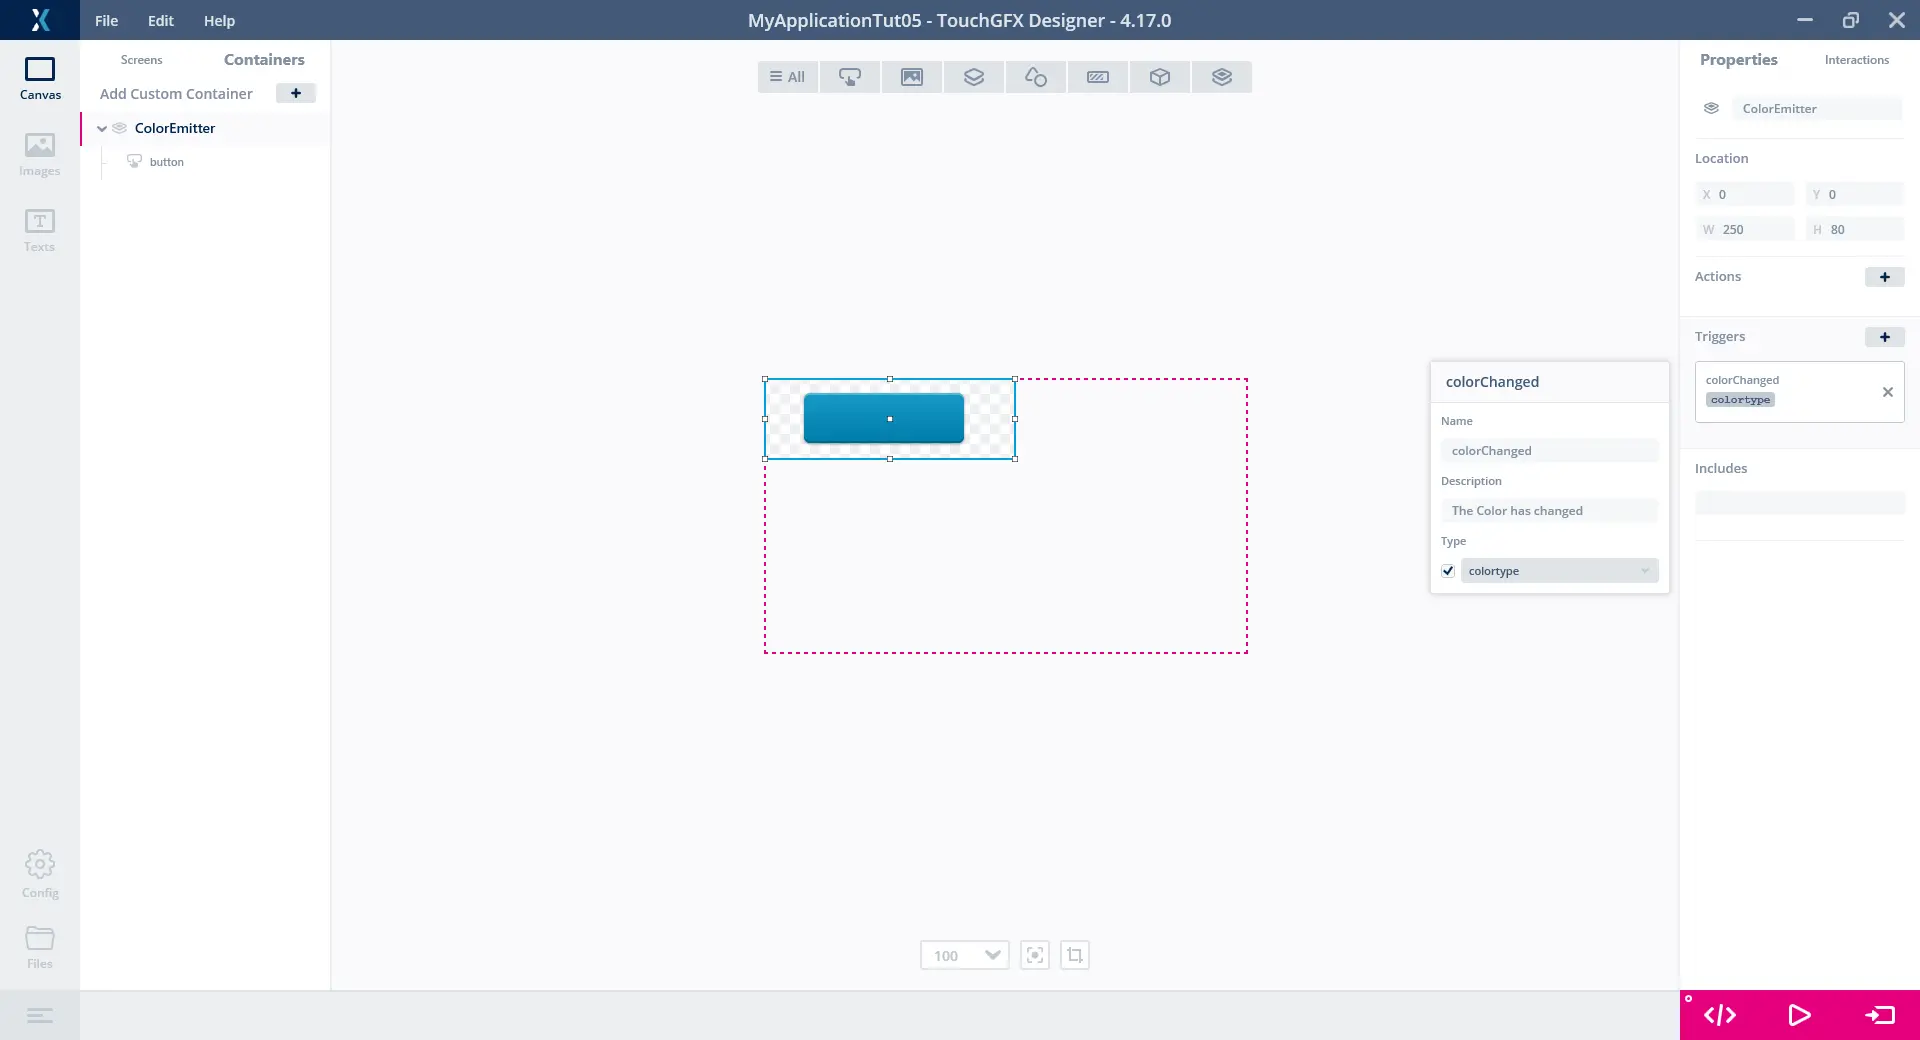
Adding a custom trigger to a custom container
Next, go to the interactions tab for the custom container and create a new interaction. Use trigger "Button is clicked" and action "Emit colorChanged". Now we want to communicate a random color, so use the same code from earlier for the value property:
touchgfx::Color::getColorFromRGB(rand()%256, rand()%256, rand()%256)
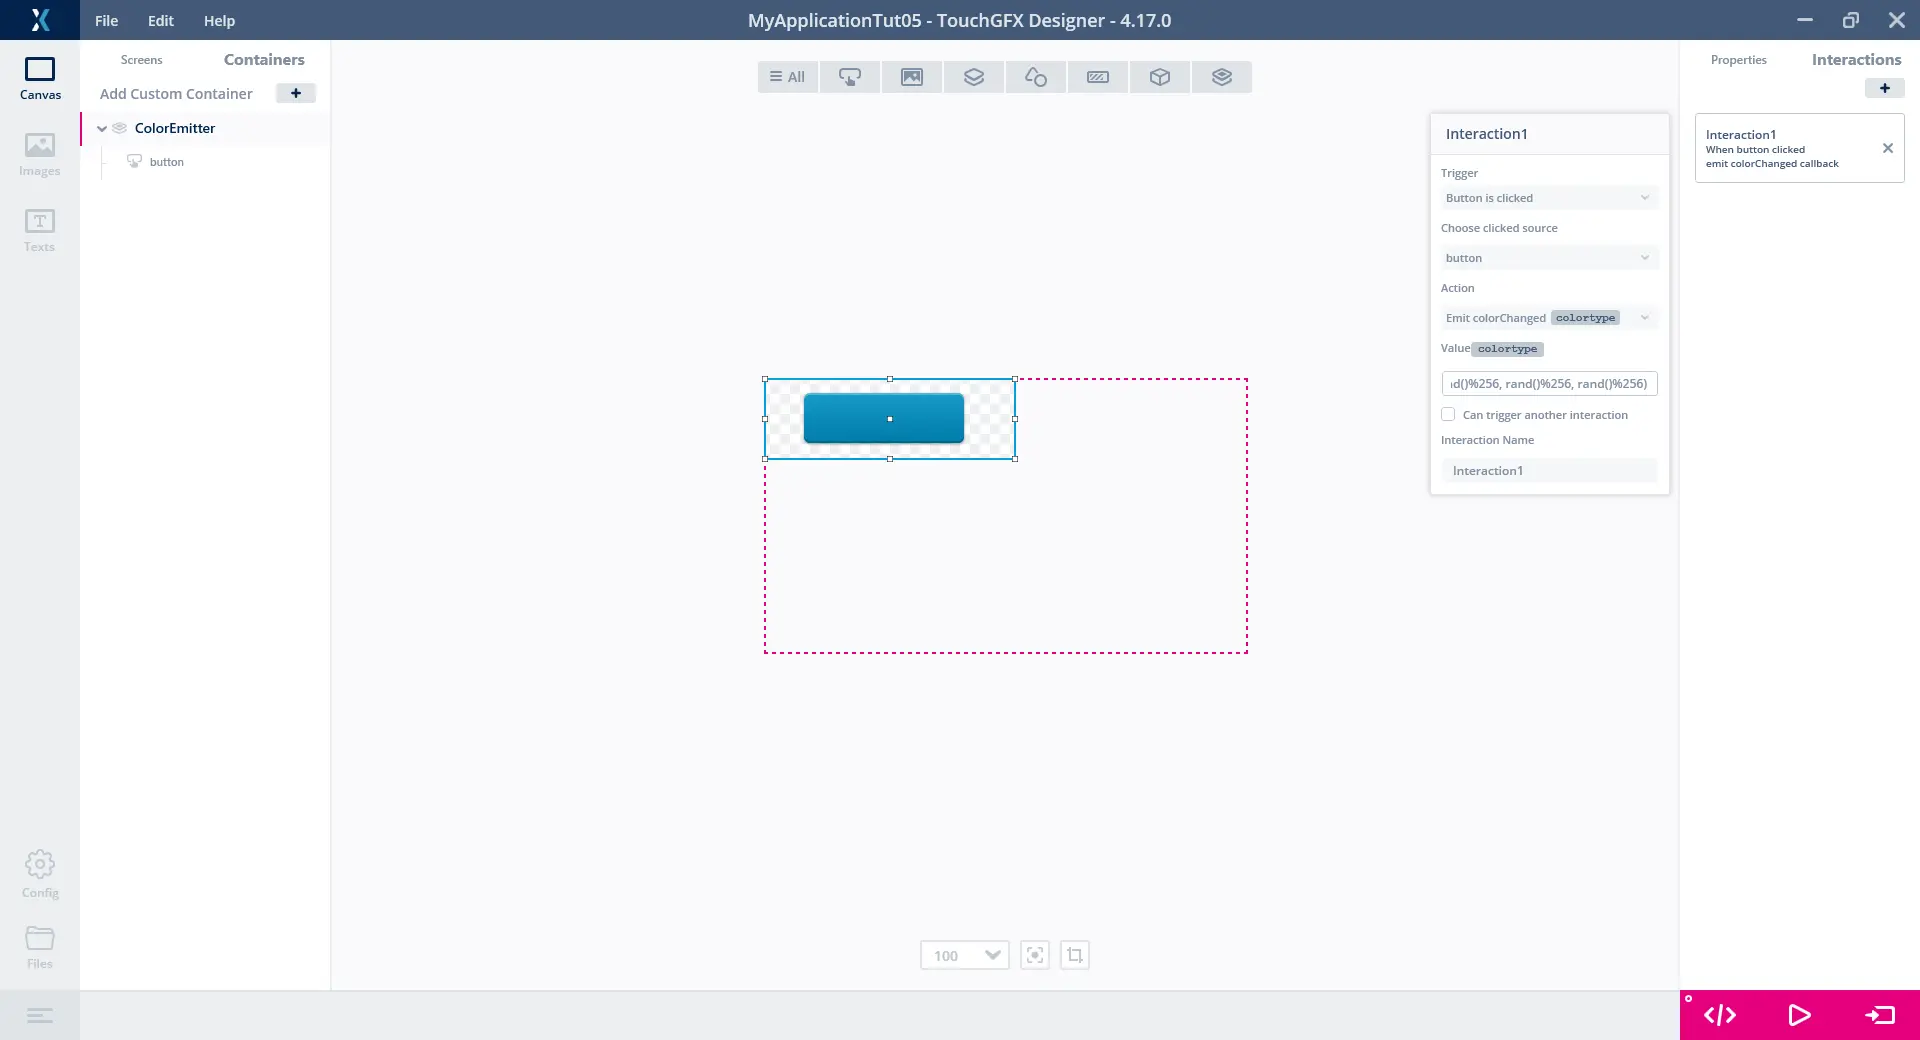
Emitting a custom trigger
However, this won't work initially since the touchgfx::Color namespace is not automatically included within our custom container. So like earlier, we are going to supply our own include for the custom container. Go to the properties tab for the custom container and under the "Includes" group (1), input:
#include <touchgfx/Color.hpp>
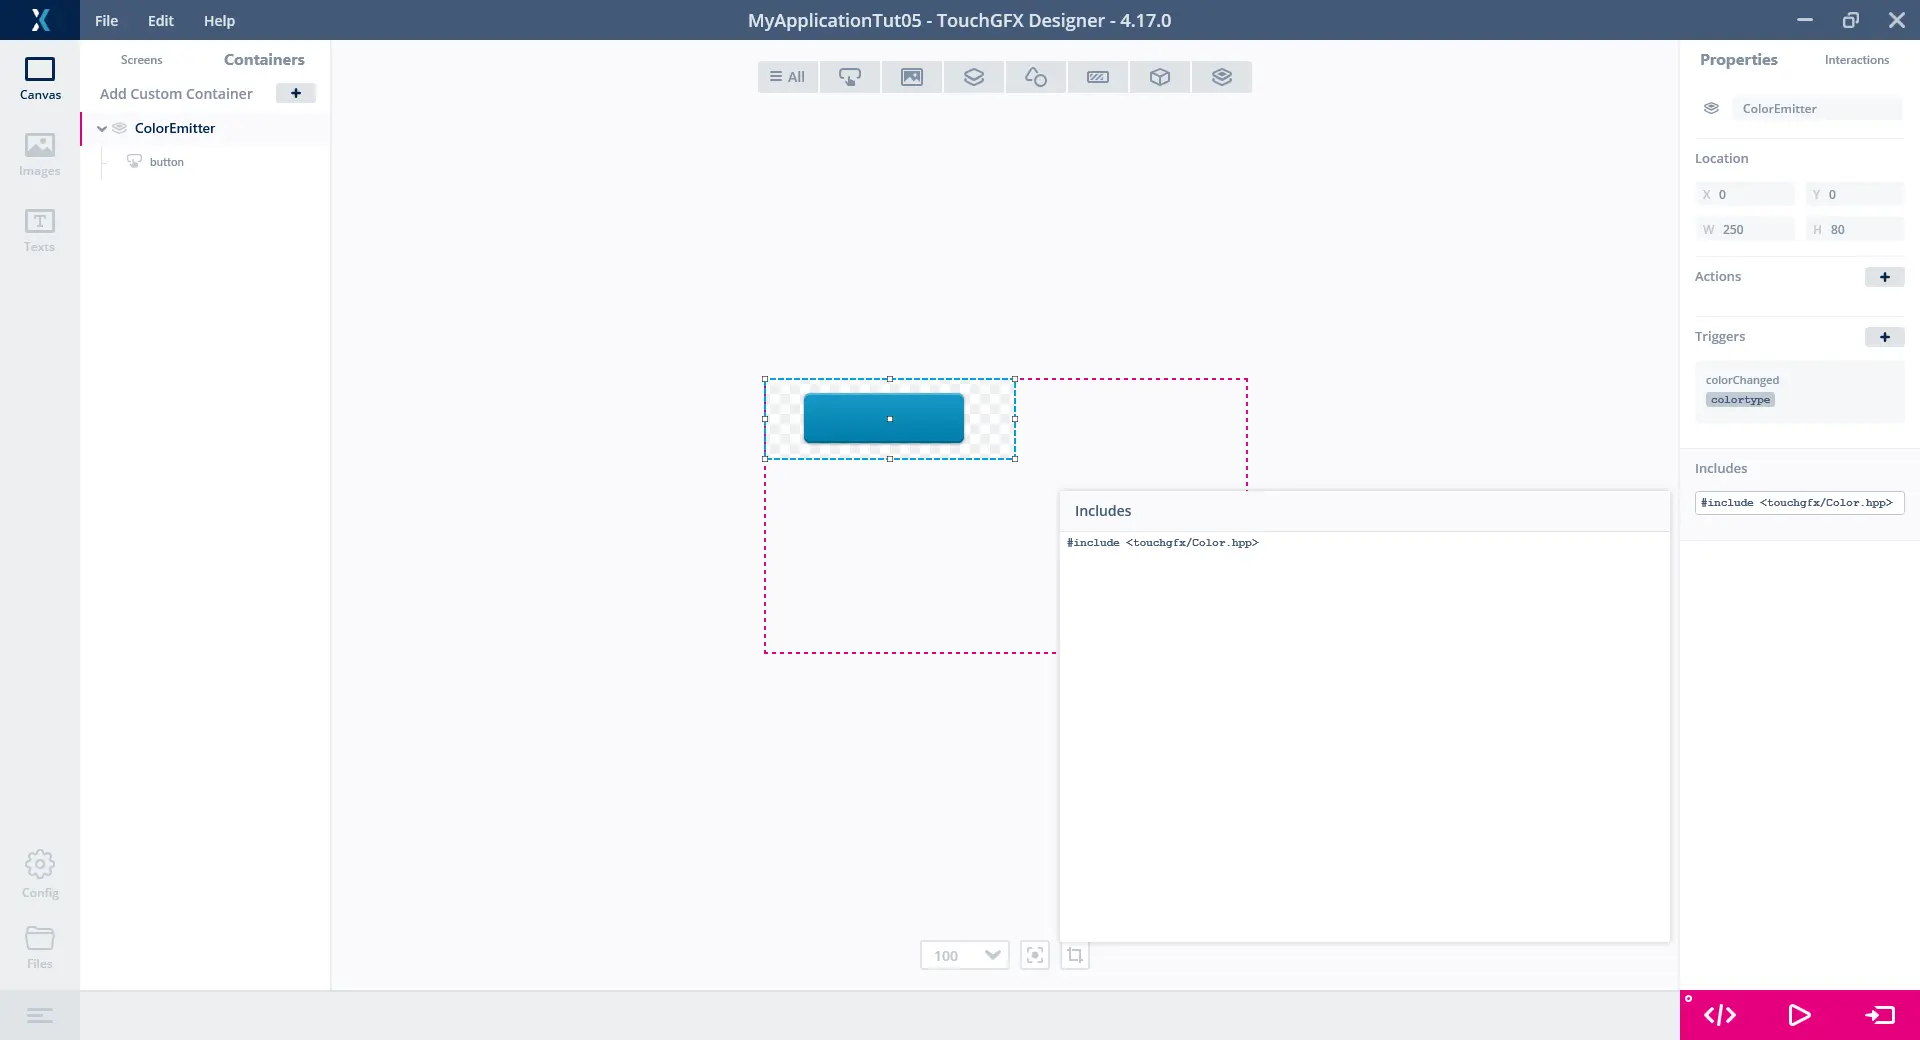
Supplying extra includes
Now we want to replace our old button with the new ColorEmitter custom container we have created. Select Screen1 and delete the button here. This should give a domain error in the interaction that was using this button, so delete that interaction also as we will create a new one for the ColorEmitter. Now insert an instance of our ColorEmitter on Screen1, then create a new interaction on Screen1. For the trigger, you should see an option called "ColorEmitter colorChanged happens". Select that one and for the action use "Call Screen1 setBackgroundColor". Now we need to use the value from the colorChanged emit, which will always be named "value" (like discussed earlier in this article). Therefore, input "value" into the value property.
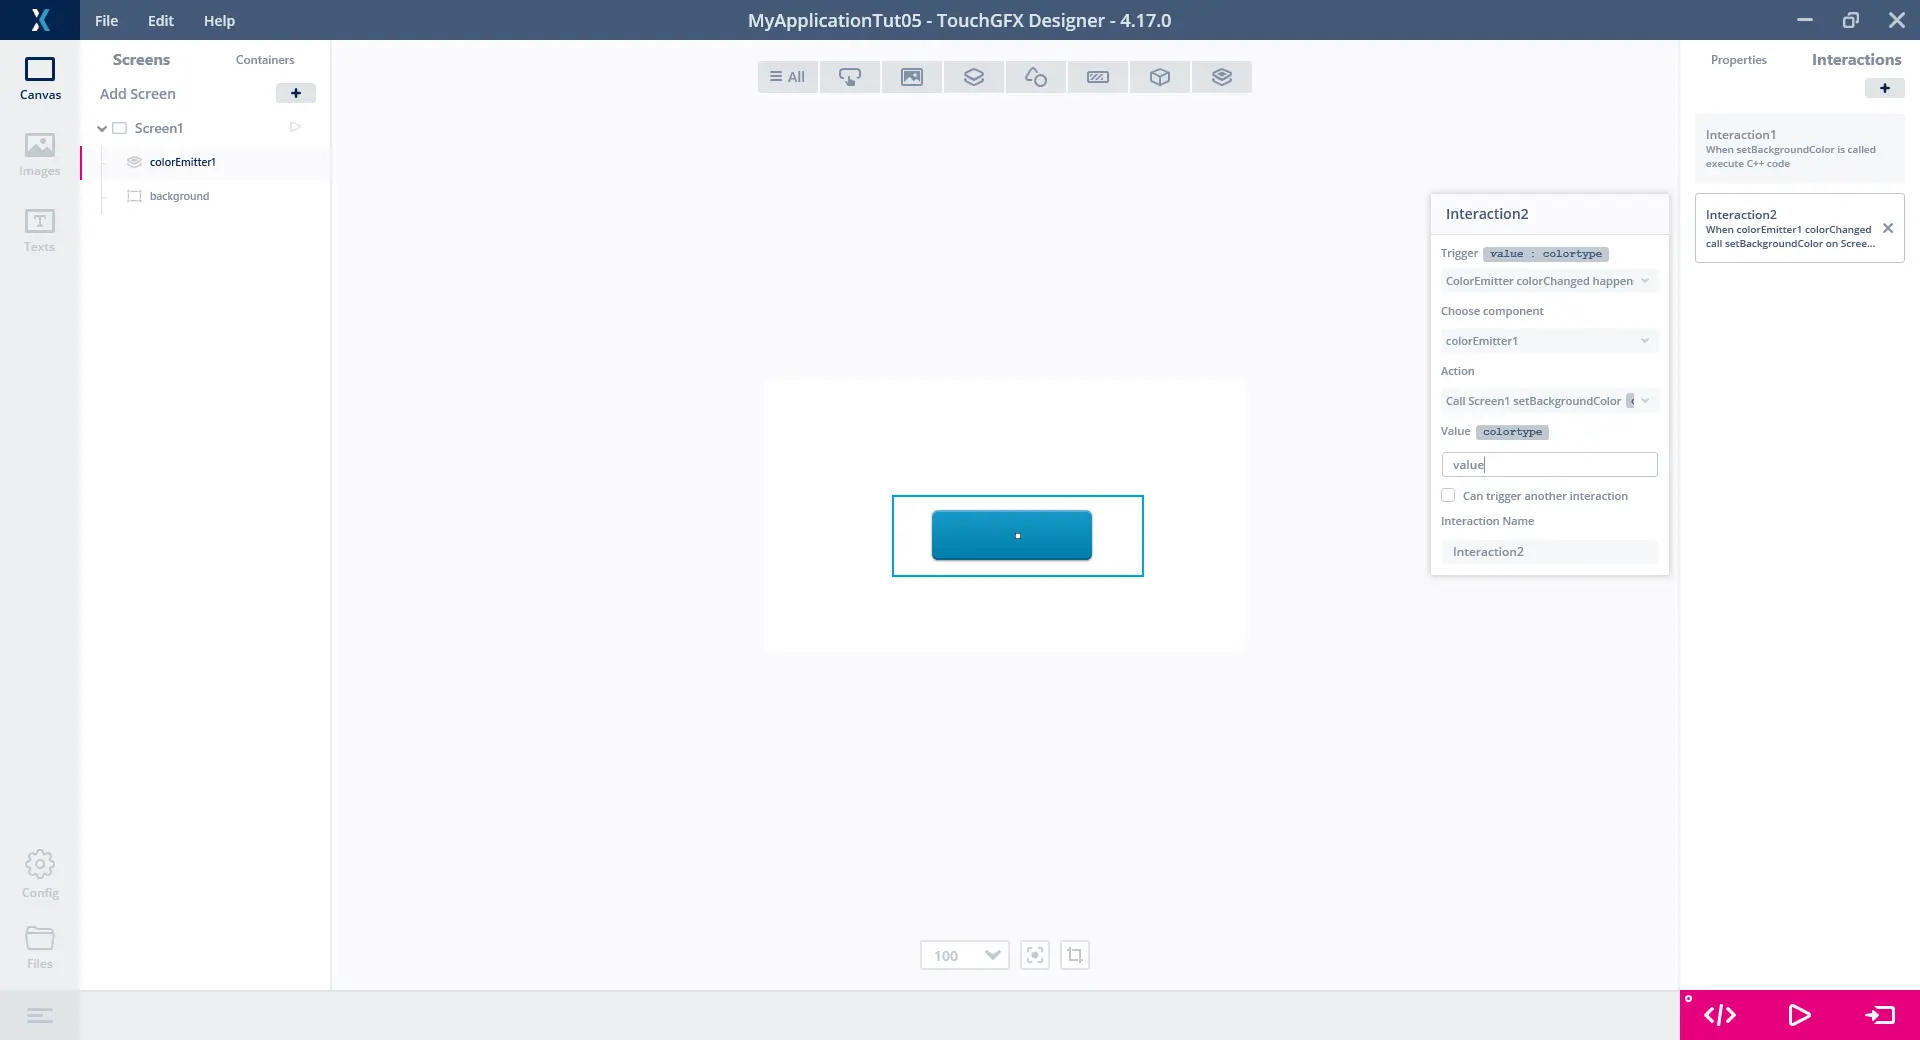
Setting up an interaction to listen for colorChanged custom trigger
Now run simulator and try pressing the button again. The same behavior should be present, with the background changing to random colors. But now, instead of just having all the functionality implemented in the Screen, we've successfully created our own communication between the Screen and some of its smaller, reusable components, namely our simple ColorEmitter.
Resulting random color when button is clicked