Tutorial 1: Trying Out the Examples
Follow this tutorial to learn the very basics of TouchGFX. You will see how to install TouchGFX and how to run the provided examples on TouchGFX Simulator and on an STM32 Evaluation Kit.
Getting Started
First of all make sure you have TouchGFX Designer installed. Read more on how to download and install TouchGFX here.
Running an Example Using TouchGFX Simulator
TouchGFX has a lot of UI examples available through TouchGFX Designer. These examples can help you learn more about specific TouchGFX topics, as they all focus on one particular TouchGFX topic or widget.
Selecting a UI Template
You can use the examples as starting points for your own projects or use them as reference examples. The examples can run either on your PC using TouchGFX Simulator, on a STM32 Evaluation Kit or even on your custom STM32 based hardware.
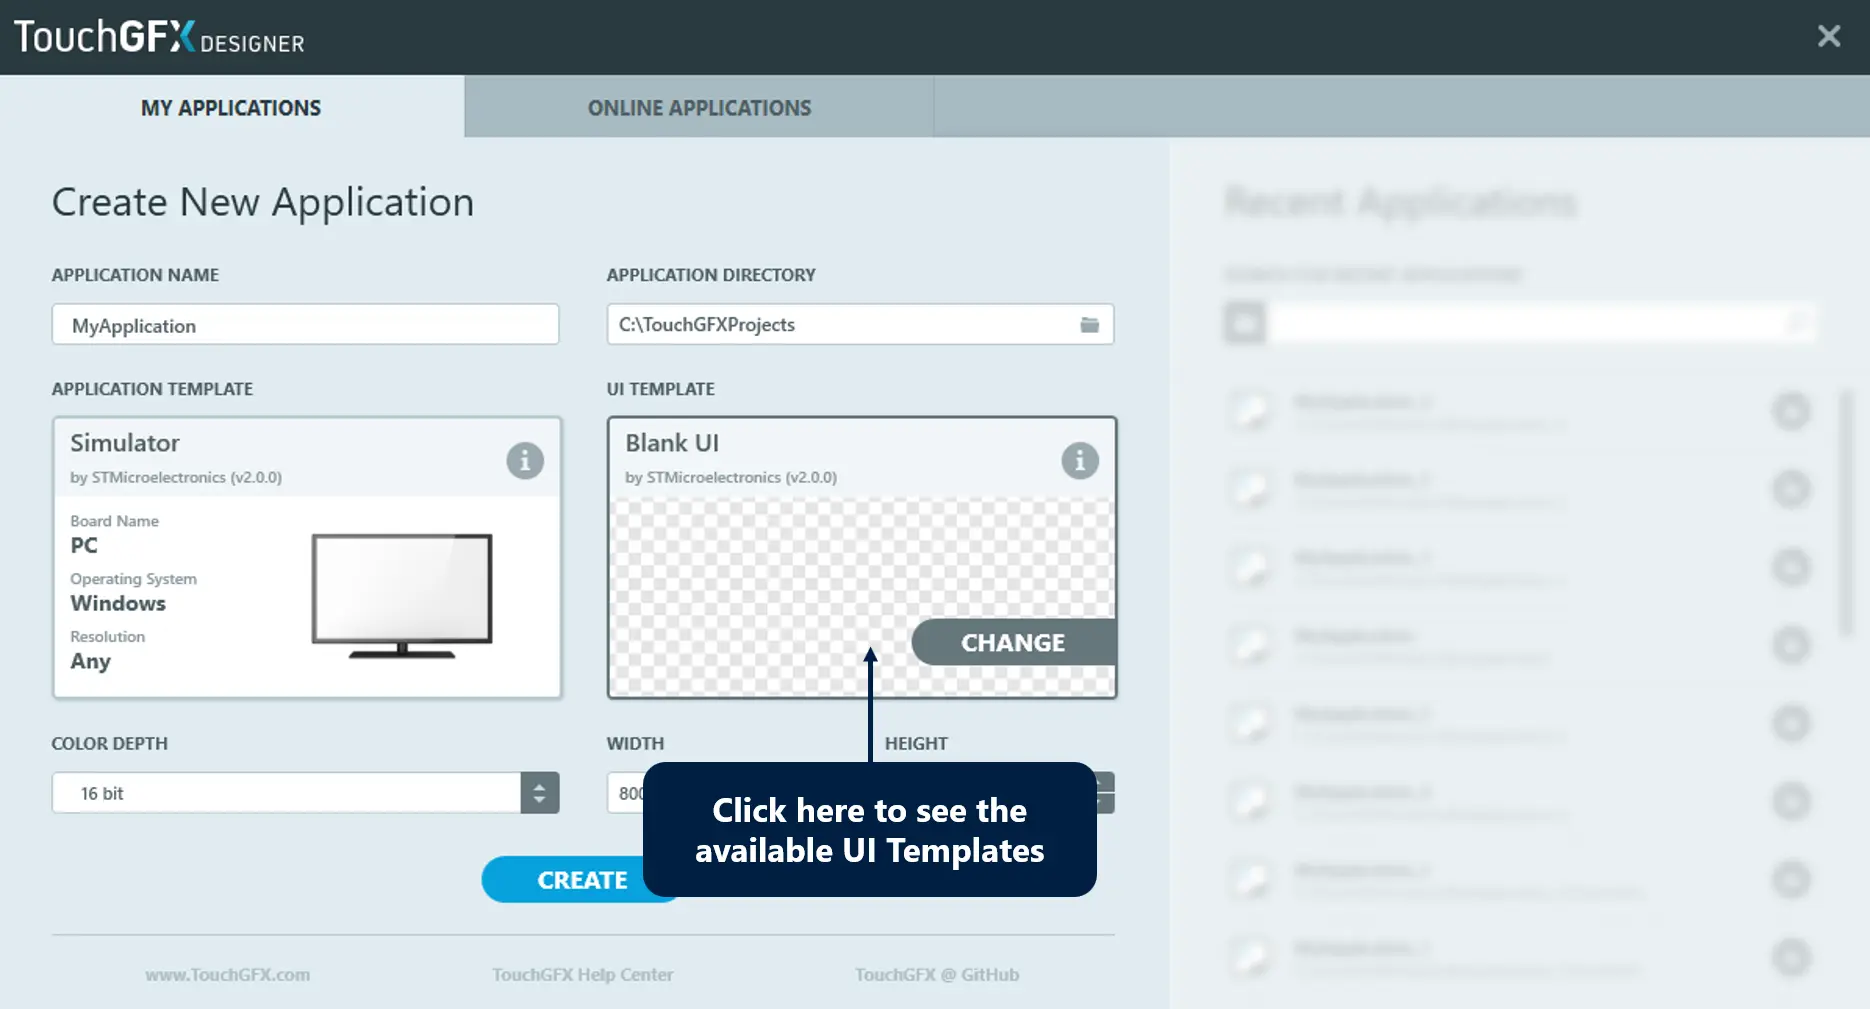
- To create a new example project simply select "File -> New" in the top bar menu in TouchGFX Designer or
CTRL + Non your keyboard. - Click the "Change" button in the "UI Template" section to select between all the available examples.
Selecting a UI Template
For this step in the tutorial, we will try out the examples in the Simulator, so leave the "Application Template" unchanged (with the "Simulator" Application Template selected).
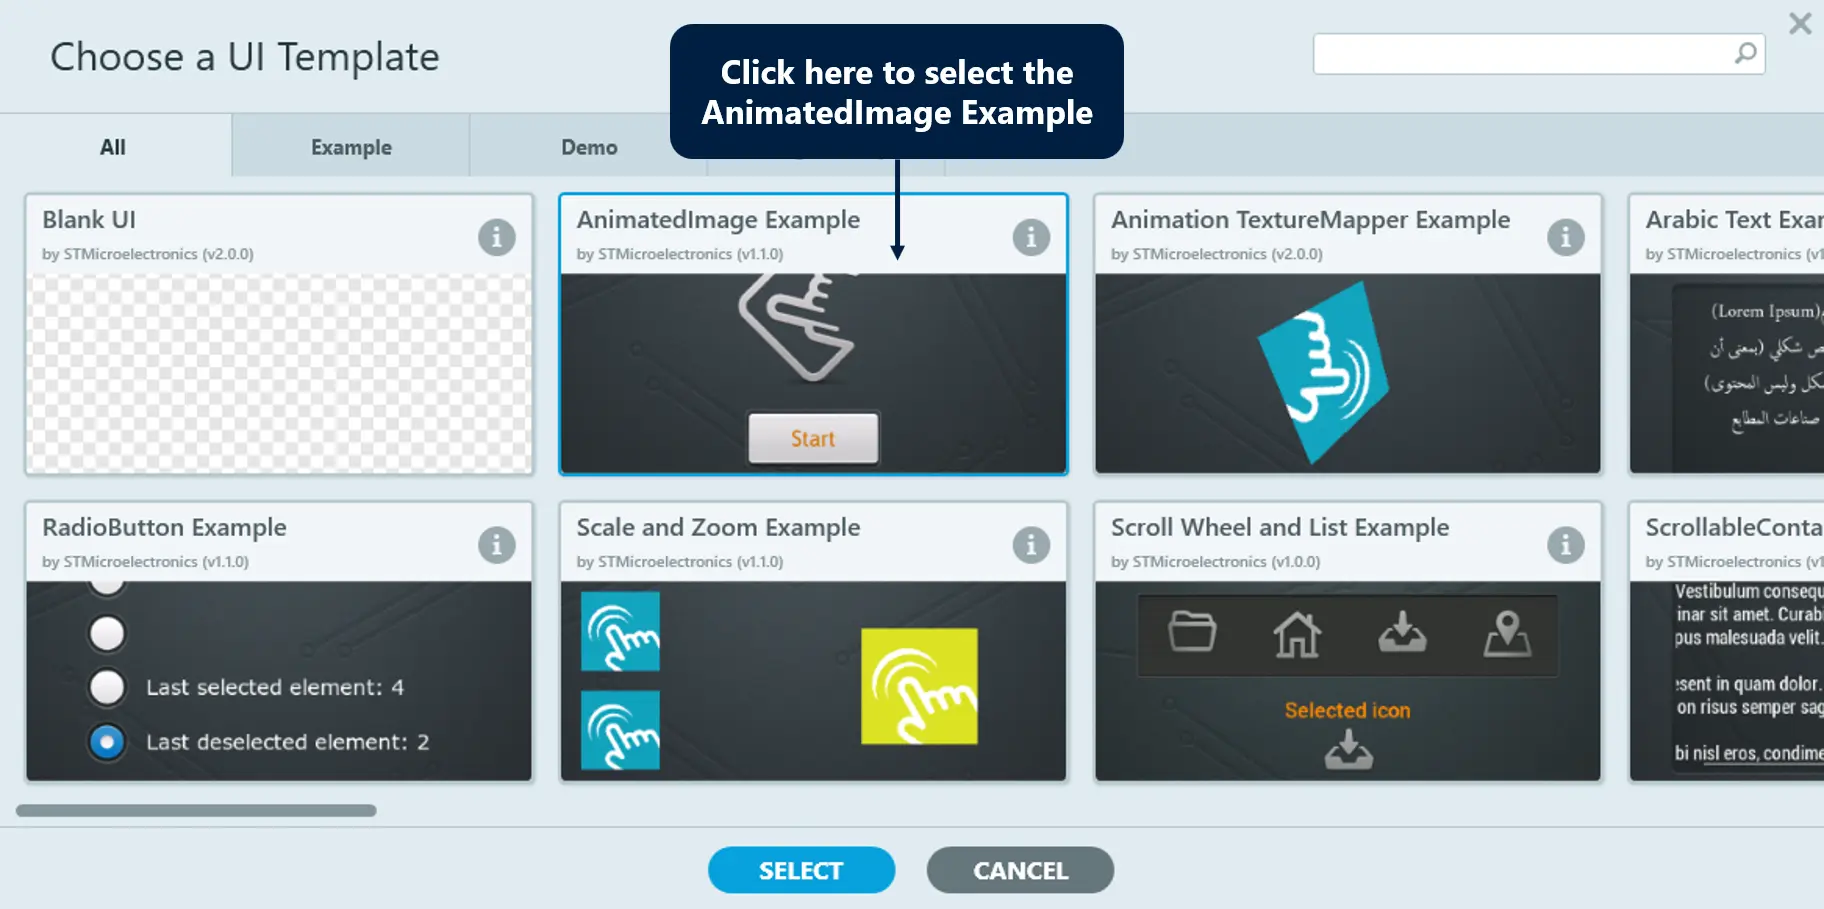
TouchGFX Designer will now show you a window with the available UI examples.
- Select the "AnimatedImage Example".
- Click the blue "Select" button in the bottom.
Selecting AnimatedImage Example
Creating a Project
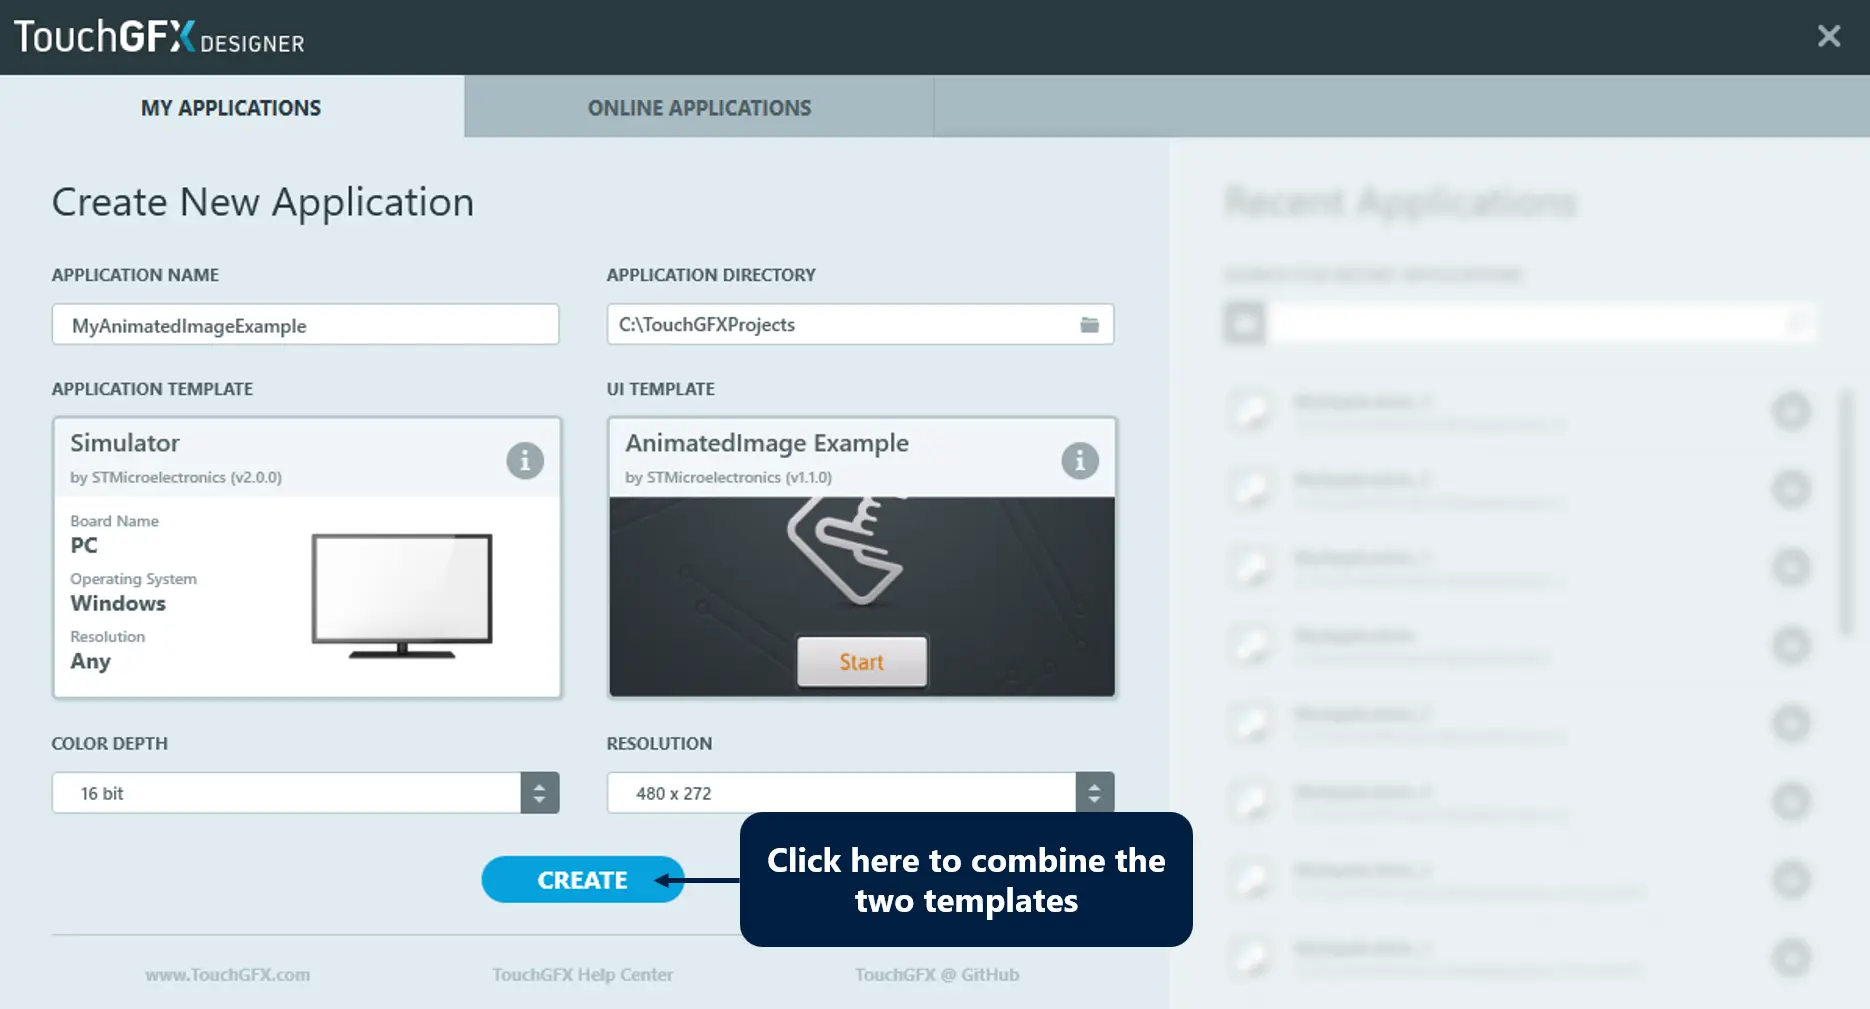
After you have clicked "Select", TouchGFX Designer is ready to create a project for you. Here we have given the project the name "MyAnimatedImageExample".
Click "Create" to create the project. TouchGFX Designer will now combine the UI Template you selected with the "Simulator" Application Template to create a complete project. This process takes various amounts of time, depending on your download speed.
Creating the project
Running TouchGFX Simulator
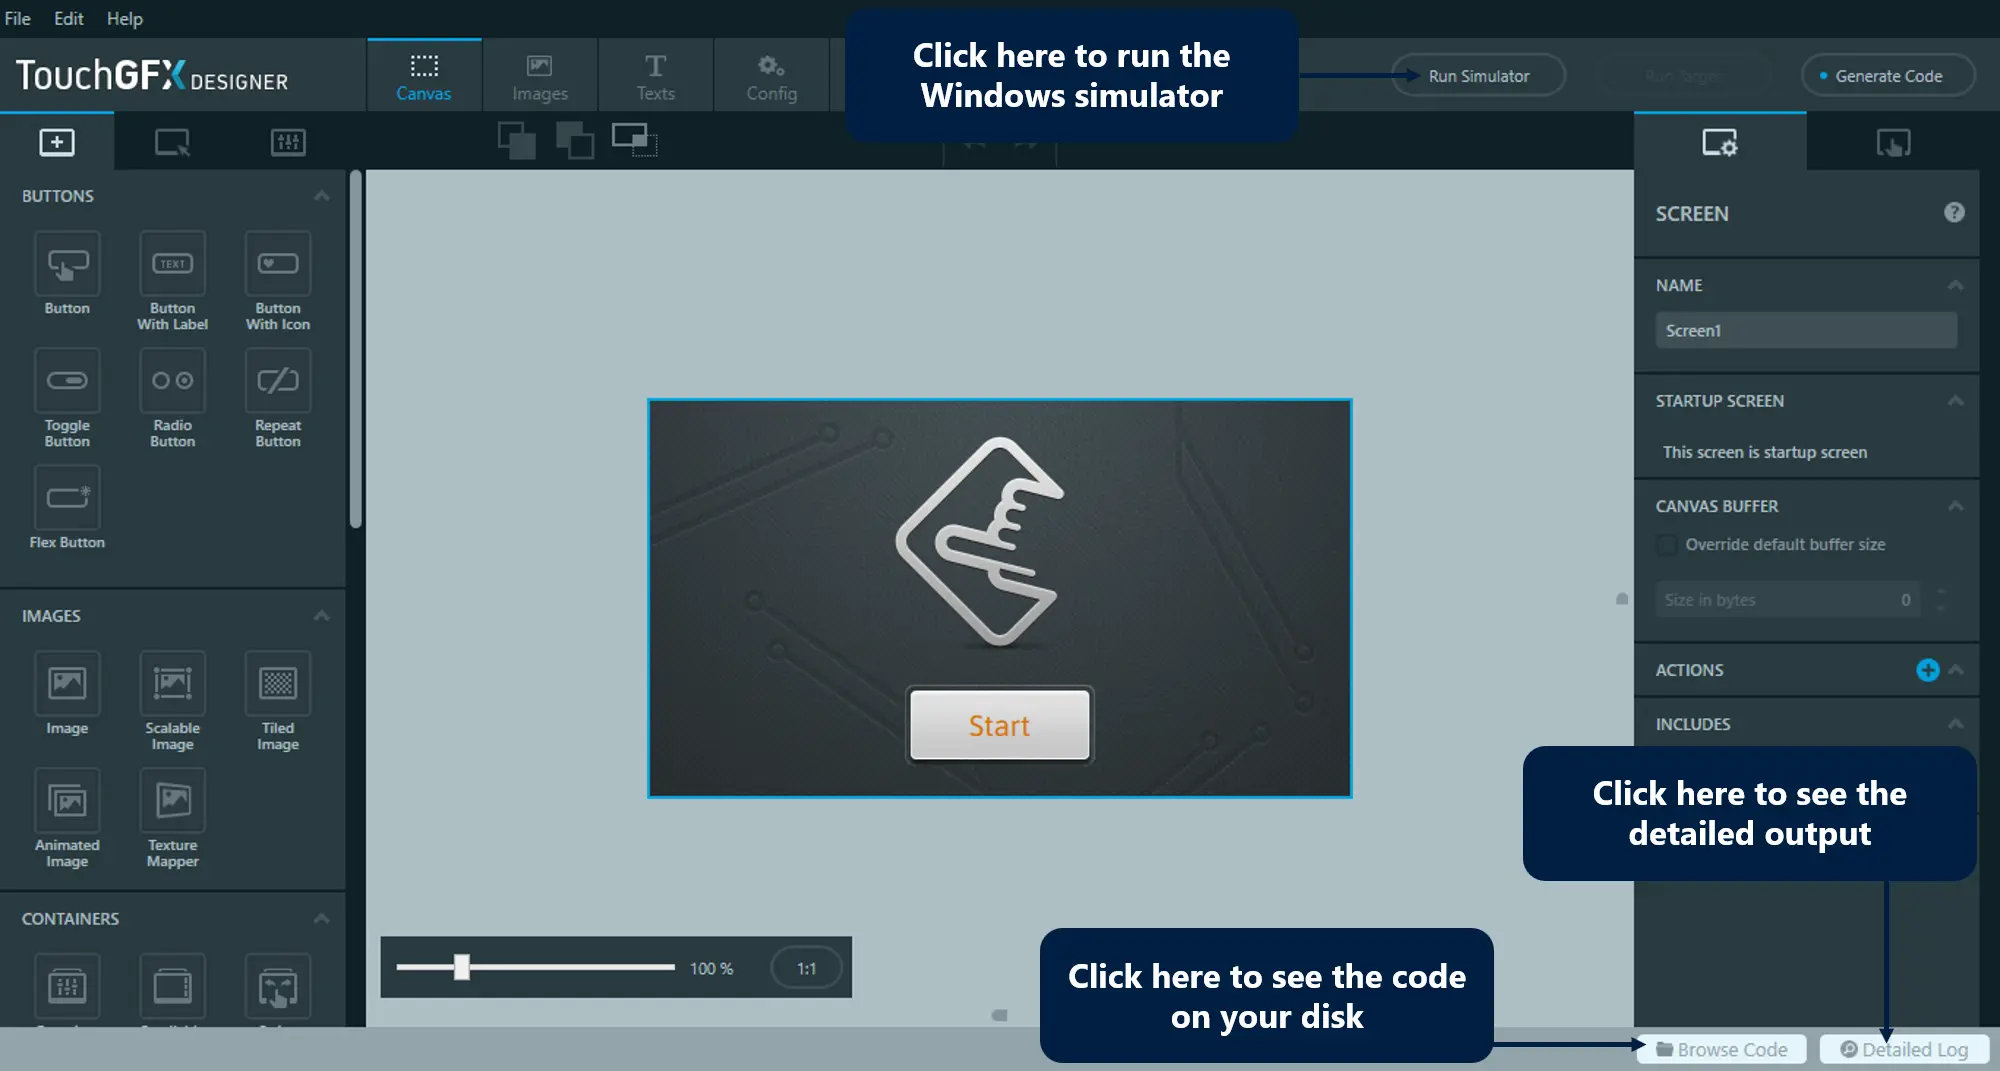
TouchGFX Designer is now showing the combined project. To run the Windows simulator, click the "Run Simulator" button in the upper right part or F5 on your keyboard.
The project is ready
TouchGFX Simulator is now showing as a regular Windows application. The titlebar shows the application name. Click the "Start" button to interact with the example.
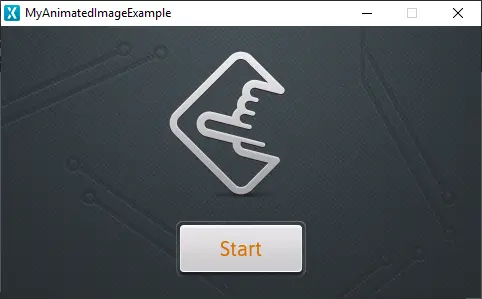
The TouchGFX Simulator
Before moving on with the tutorial you can try out some more examples if you want. Just create a new project and select a new UI Template as before.
Running an Example on an STM32 Evaluation Kit
In this step you will learn how to start a project for a STM32F746-Disco board and how to run one of the TouchGFX examples on that board. If you have no STM32 Evaluation Kit you can simply skip this step. If you have a different SMT32 Evaluation Kit have a look at the list of supported boards and see if you can find it there.
TouchGFX Designer comes with a list of premade Application Templates that matches a wide range of STM32 Evaluation Kit. To base your project on such a template, start out by creating a new project in TouchGFX Designer, by clicking "File -> New" in the top bar menu or CTRL + N on your keyboard.
Select the "AnimatedImage Example" as UI Template (if it is not already selected). Click the "Application Template" section to select another Application Template. The default Application Template "Simulator" will only allow you to run on Windows.
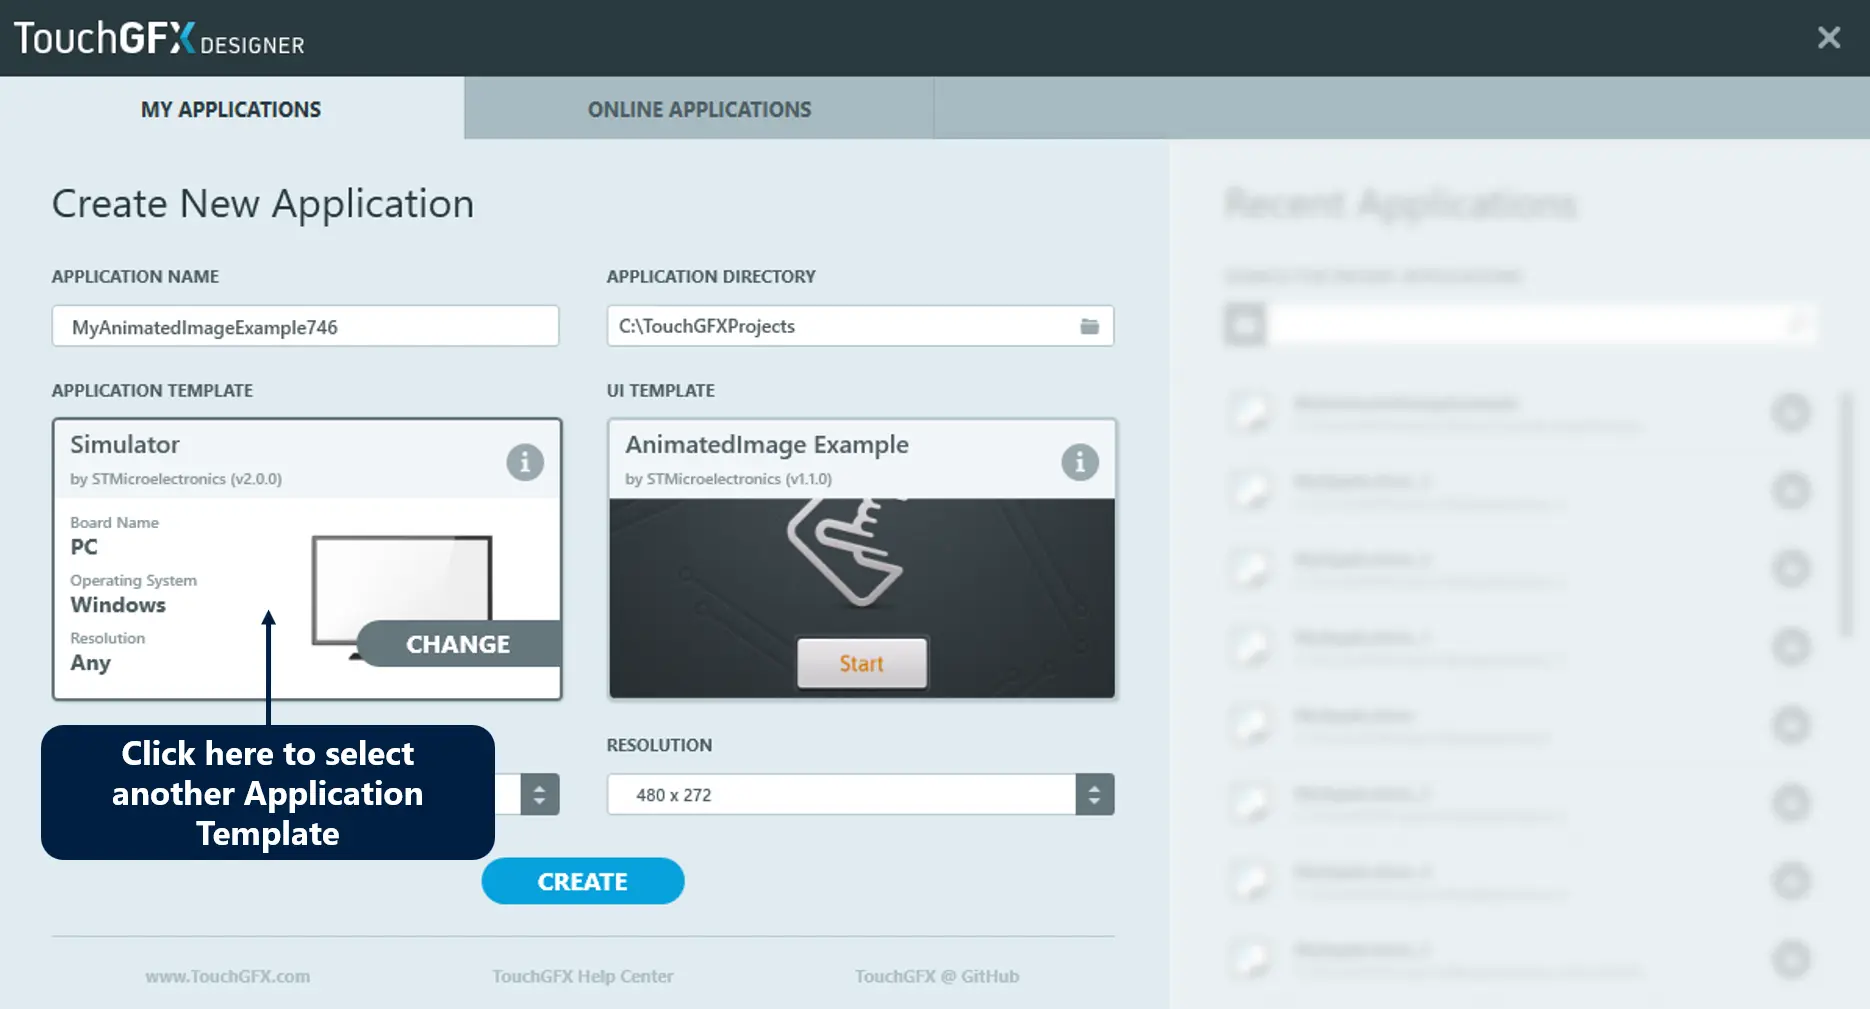
Selecting an Application Template
For this step we will use the STM32F746-Disco board, so click on the "STM32F746G Discovery Kit" and click "Select".
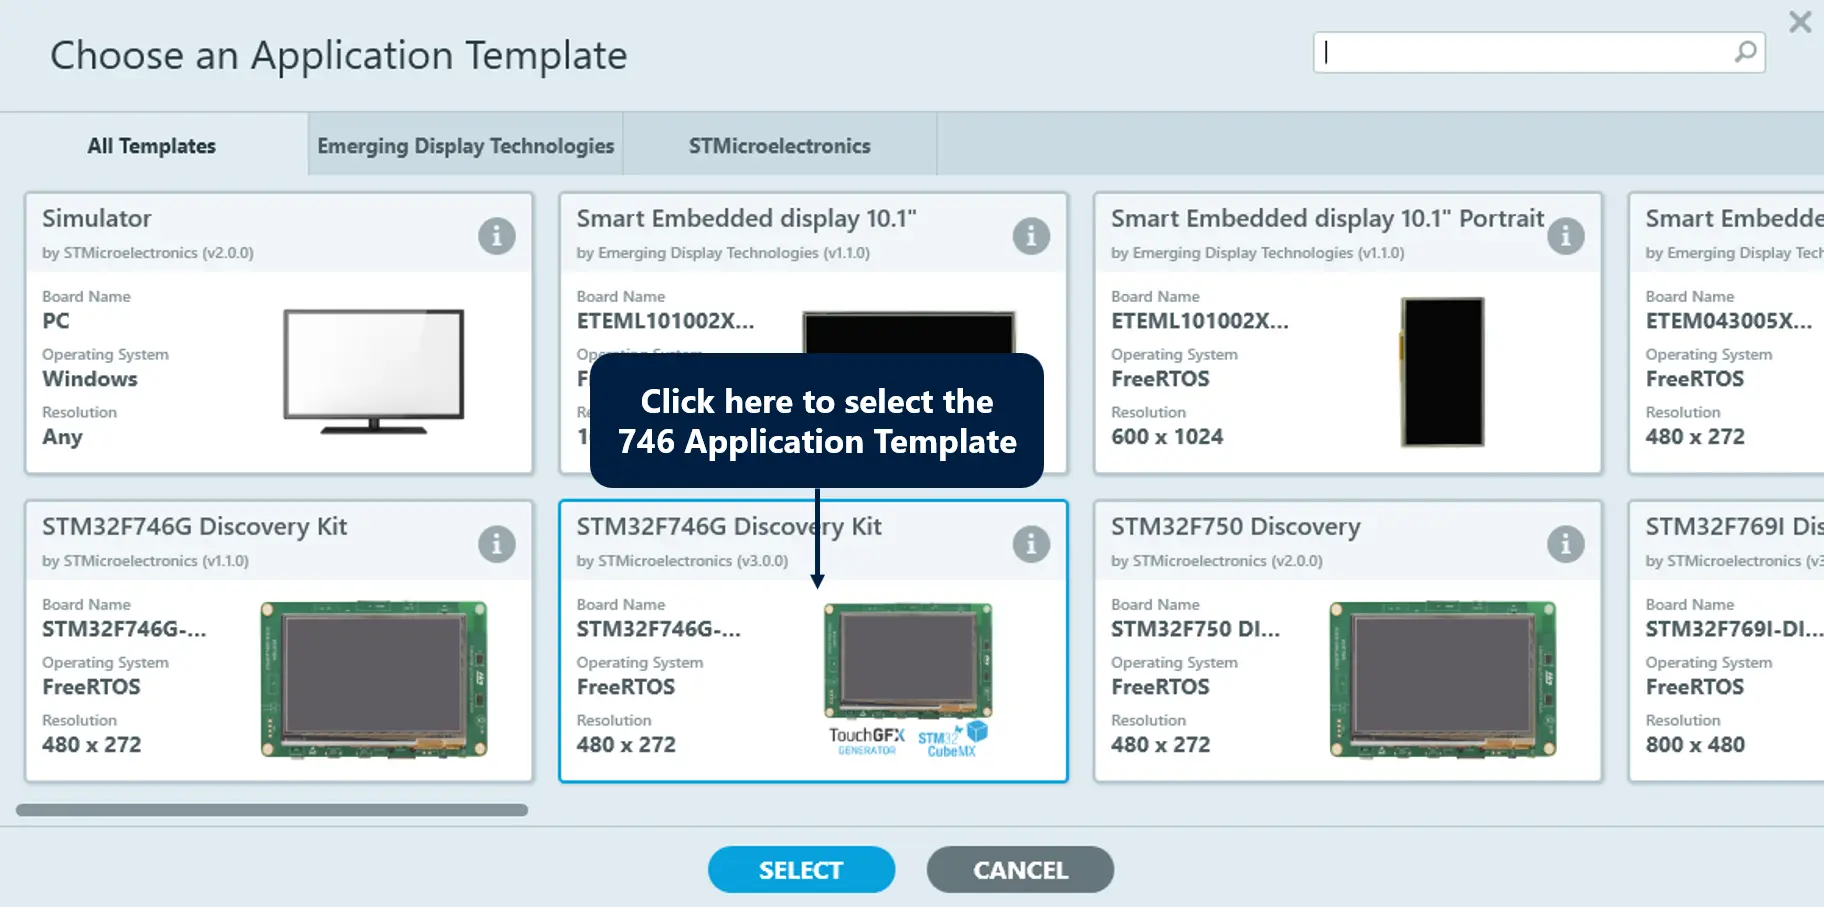
Select Discovery kit
You are now ready to create the project. You can change the application name if you like. Here we have changed it to "MyAnimatedImageExample746". Click the "Create" button to continue.
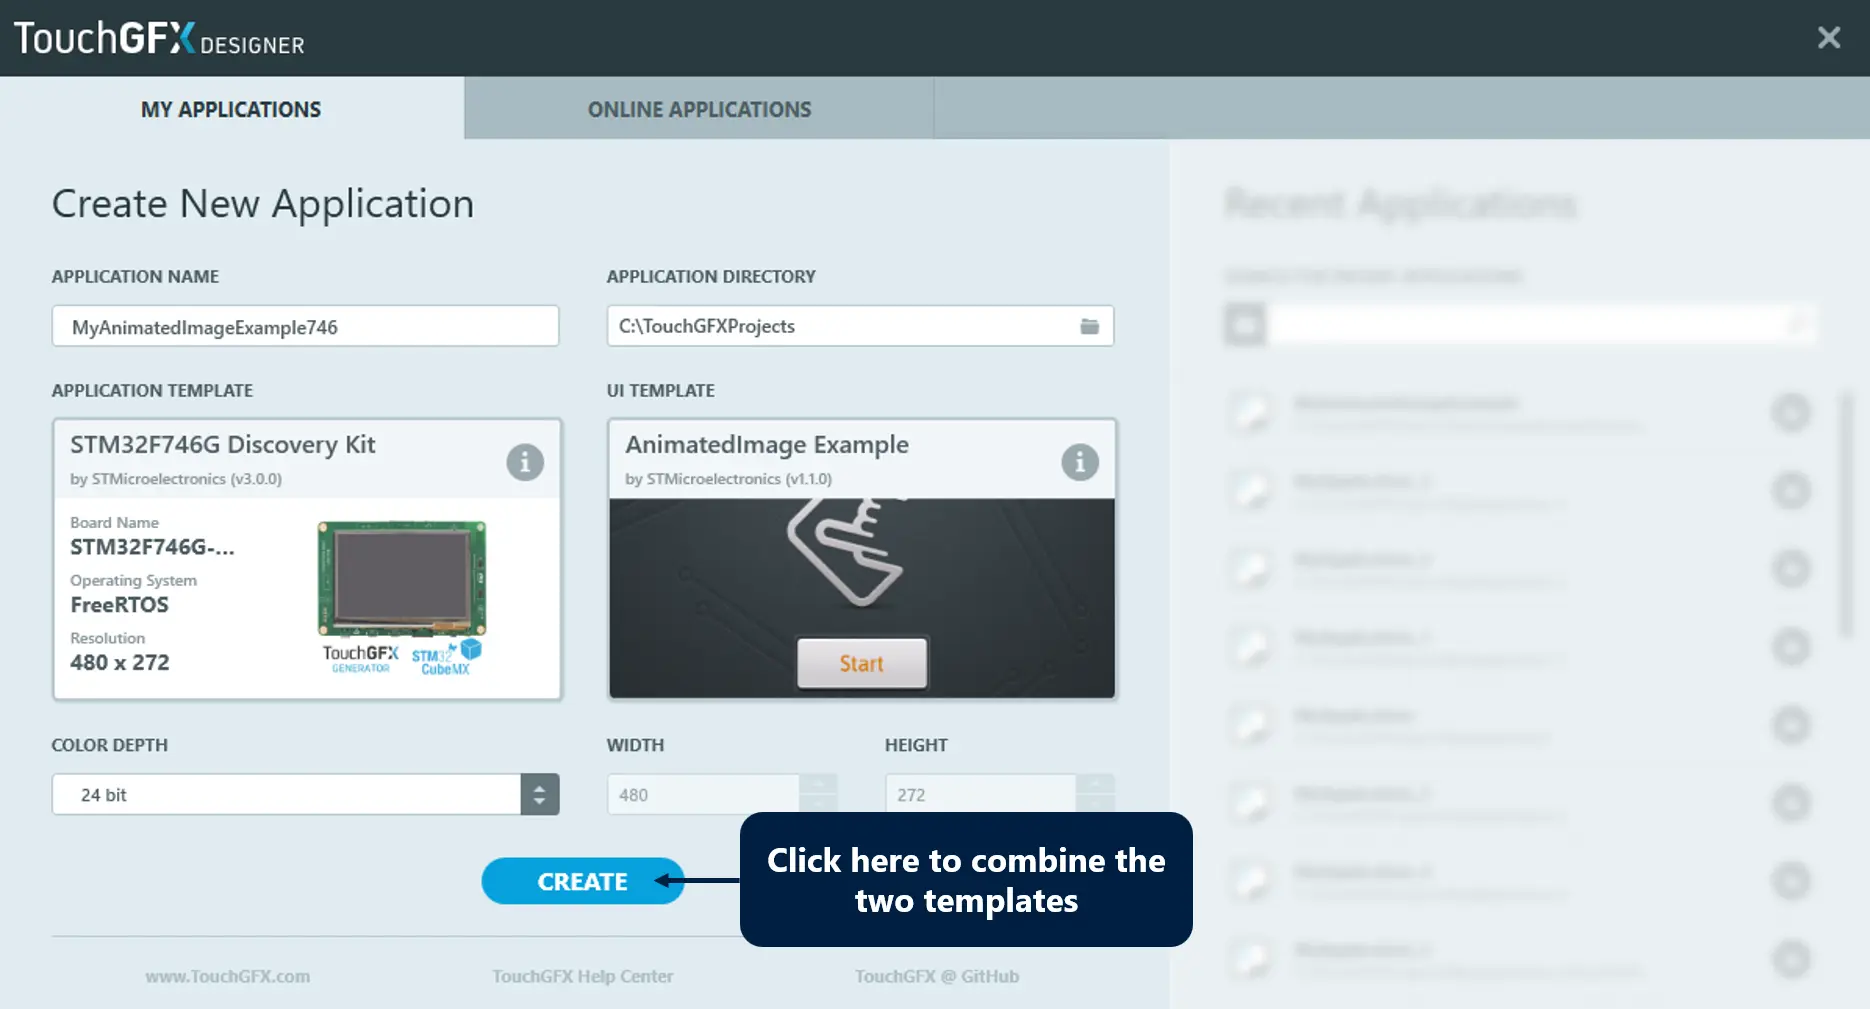
Create the project
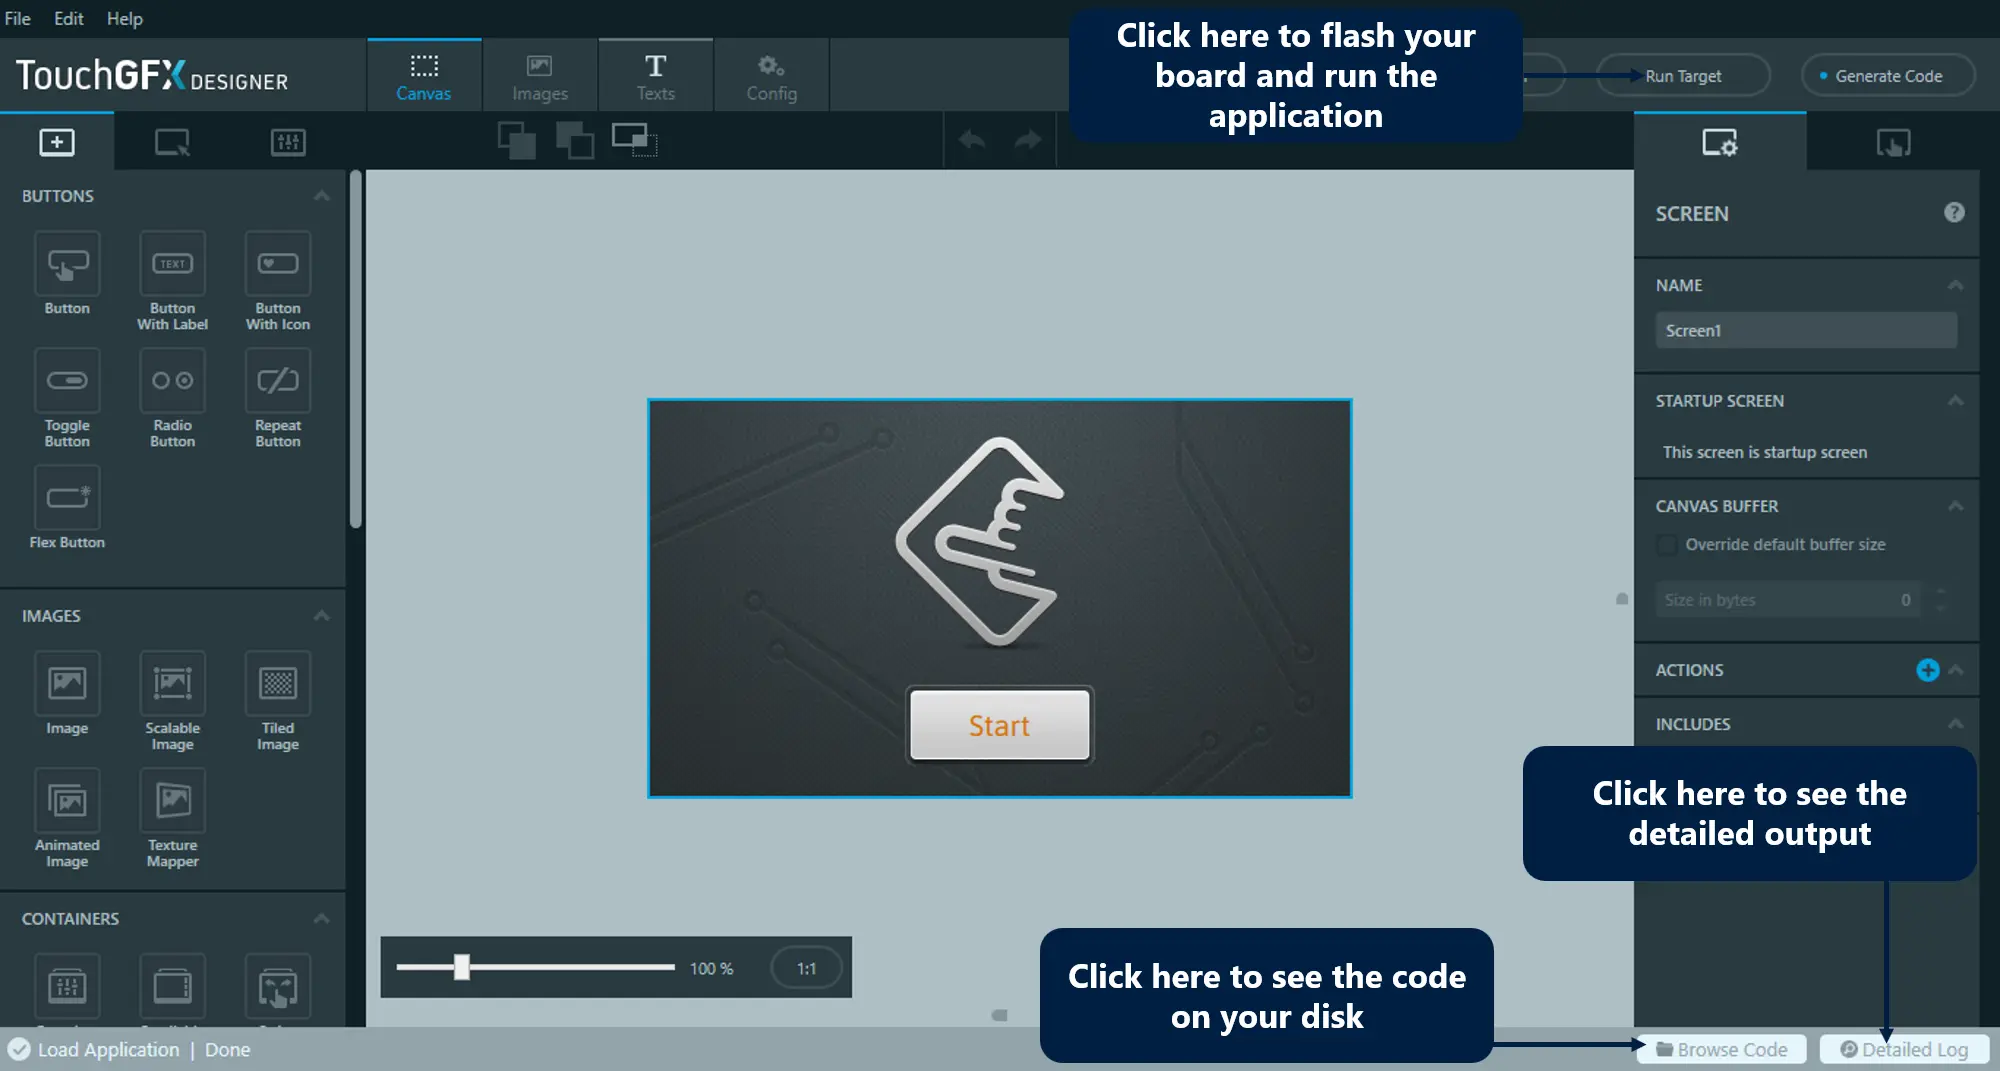
The look of the project is similar to what we saw in the previous step. The only difference is that we now also have a "Run Target" button next to the "Run Simulator" button. When you press this button (or F6 on your keyboard), TouchGFX Designer compiles your project using the GNU ARM C-compiler and flashes the application to your target. This process can take minutes, depending on your computer speed and the complexity of the application. The progress will be output in the status bar in the bottom of TouchGFX Designer. You can press the "Detailed Log" (or ALT + L on your keyboard) button if you want more details on the build and flashing step.
The project is ready
TouchGFX Designer will write "Flashing Done" in the status bar when flashing is completed. You should now see the application running on your board.
Note
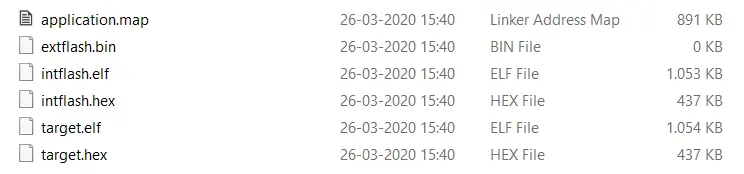
If you click the "Browse Code" button in the bottom right, TouchGFX Designer will open a file browser showing the directory where the new project is located. Navigating to build\bin you can see the following files:
The binary files of the project
The target.hex file is the STM32 application for your board. This is the file TouchGFX Designer just programmed to your board.
You can also manually flash your board using Cube Programmer or ST-Link Utility. See the Compiling & Flashing page for more details.