Driver
The driver section allows developers to select drivers for various responsibilities of a TouchGFX AL.
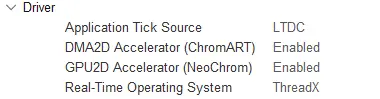
TouchGFX Generator Driver settings
Application Tick Source
The application tick source for an application defines how to drive an application forward. The developer has the following options:
- LTDC - If LTDC is selected as the interface in the "Display" group the Application Tick Source can be "LTDC". This means that TouchGFX Generator will generate a driver function (LTDC interrupt handler) in
TouchGFXGeneratedHALclass that drives the application forward by callingOSWrappers::signalVSync(). - Custom and FMC - In this case, the developer is required to implement a handler that drives the application forward by calling
OSWrappers::signalVSync()repeatedly.
Further reading
DMA2D Accelerator (ChromART)
The developer has three options when it comes to DMA2D graphics acceleration:
- None - The application renders using only the CPU.
- DMA2D Accelerator (ChromART) - The application uses the ChromART chip when possible to move and blend pixels, freeing up CPU cycles. The driver is generated by TouchGFX Generator and does not require any action from the developer.
- Custom - TouchGFX Generator generates a generic TouchGFX DMA class that inherits from the DMA interface in the TouchGFX Engine with member functions that the developer must implement for a custom graphics accelerator.
To be able to select DMA2D Accelerator in TouchGFX Generator it must be enabled in the Multimedia category in STM32CubeMX:
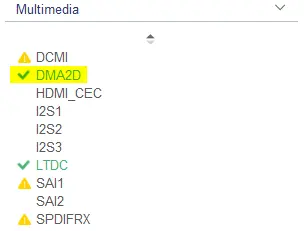
DMA2D is enabled in the Multimedia category in STM32CubeMX, for MCUs that support it.
The DMA2D (ChromART) driver generated by TouchGFX Generator supports two ways of receiving a TransferCompleteInterrupt:
- Uses the STM32Cube HAL driver where it registers a callback function to the dma2d handle
hdma2d.XferCpltCallback. - Uses the
DMA2D_IRQHandler()interrupt handler directly.
Switching between these two is done by enabling or disabling the DMA2D global interrupt in the NVIC Settings in STM32CubeMX for DMA2D IP:
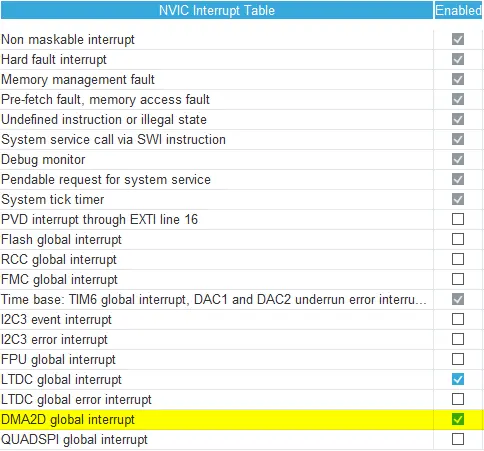
DMA2D global interrupt is enabled/disabled in the NVIC settings under System Core category in STM32CubeMX
Enabling the global interrupt generates code for option 1), disabling the global interrupt generates code for option 2).
Note
GPU2D Accelerator (NeoChrom)
GPU2D (NeoChrom) is a graphics accelerator capable of accelerating many of the drawing operations in TouchGFX, including texture mapping and Vector Rendering. It supports framebuffers in RGB565, RGB888, and ARGB8888 formats.
The developer has two options when it comes to GPU2D graphics acceleration:
- Disabled - The application draws using only the CPU.
- GPU2D Accelerator (NeoChrom) - The application uses the NeoChrom chip when possible to accelerate many drawing operations done by TouchGFX. The driver is generated by TouchGFX Generator and does not require any action from the developer.
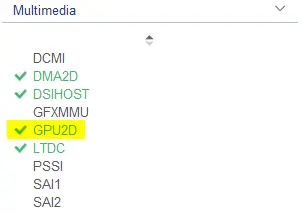
GPU2D is enabled in the Multimedia category in CubeMX, for MCUs that support it.
Note
When enabled, a new section (GPU2D Driver) will appear in the TouchGFX Generator:

GPU2D Driver settings
The setting GPU2D Command List Size sets the size in bytes of the command list used by the GPU2D.
The GPU2D Memory Pool Location setting allows user to configure the location of the memory pool used by the GPU2D. The buffer must be 8-byte aligned in memory. The following options are available:
- By Allocation - Lets the linker place the memory pool in a 8-byte aligned address.
- By Address - Allows the user to define a start address of the memory pool. If the entered address is not 8-byte aligned, an error in the TouchGFX Generator will appear.
Note
- If Vector Rendering is Disabled the total size of the memory pool is: 1kb ring buffer + GPU2D Command List Size + 5kb extra margin.
- If Vector Rendering is Enabled the total size of the memory pool is: 1kb ring buffer + GPU2D Command List Size + (Display Width * Display Height bytes) + 256bytes LUT + 512bytes Gradient + 5kb extra margin.
Real-Time Operating System
Developers can use any RTOS with TouchGFX (even No OS). As described in Abstraction Layer Architecture the
TouchGFX Engine uses the OSWrappers interface to synchronize its main event loop as well as framebuffer(s) access with the users choice
of RTOS. When developers choose an operating system in TouchGFX Generator, code will be generated to synchronize internally via primitives
for the OS of choice. The operating system still has to be configured through STM32CubeMX to determine stack size, among other things.
FreeRTOS (CMSIS OS V1 and V2) and ThreadX (Native Middleware or Azure RTOS Software Packs) can be configured directly from within STM32CubeMX and TouchGFX Generator provides the user with generated code for both task definitions and TouchGFX RTOS driver. TouchGFX Generator can generate CMSIS V1 and CMSIS V2 compliant RTOS drivers which work with any CMSIS compliant RTOS, a driver for ThreadX, and a driver for running bare metal without an operating system (No OS).
No OS
If it is desired to run TouchGFX with no operating system the No OS option in TouchGFX Generator becomes available if no operating system is enabled in the Middleware category or selected as an X-CUBE in STM32CubeMX.
Further reading
FreeRTOS
To be able to select CMSIS_RTOS_V1 or CMSIS_RTOS_V2 in TouchGFX Generator, FreeRTOS must be enabled in the Middleware category in STM32CubeMX:
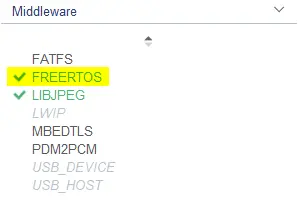
FreeRTOS enabled in STM32CubeMX project
Further reading
ThreadX
ThreadX can be enabled either by selecting an X-CUBE Software Pack or by enabling the Native ThreadX Middleware from STM32CubeMX, if available for the selected MCU device.
The developer should find out if ThreadX is configured as an X-CUBE Software Pack or as Native ThreadX Middleware for their specific MCU family.
Note
The following sections will show how to enable ThreadX as a Middleware or as an AZRTOS Software Pack for your application.
Enabling ThreadX from Middleware category
To be able to select ThreadX in TouchGFX Generator ThreadX must be enabled in the Middleware category in STM32CubeMX.
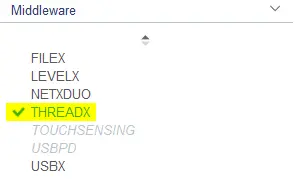
ThreadX from Middleware enabled in STM32CubeMX project
Once enabled the ThreadX option becomes available in TouchGFX Generator.
Further reading
Enabling ThreadX from X-CUBE Software Pack
To be able to select ThreadX in TouchGFX Generator the AZRTOS Software Pack must be enabled in the Software Packs Component Selector in STM32CubeMX.
In your project click the "Select Components" button or Alt + o in the project menu in STM32CubeMX.
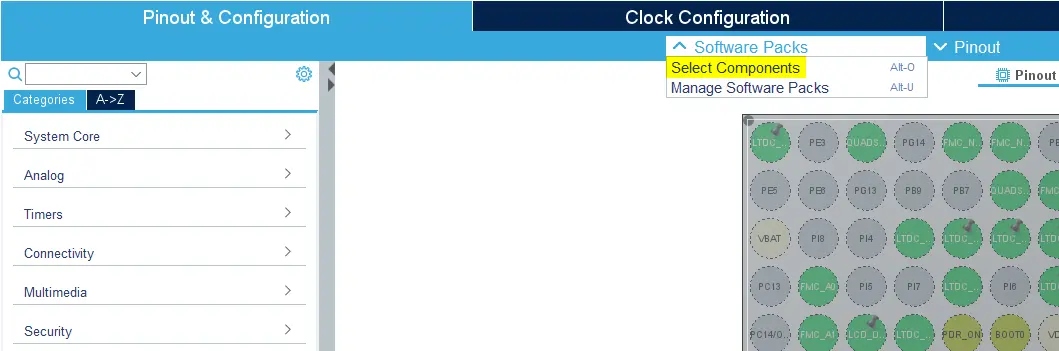
Selecting Additional Software in STM32CubeMX
The following figure shows how AZRTOS Software Pack can be enabled for a project. Select RTOS ThreadX and tick the Core check box to enable ThreadX. Download and Install the package if not already done.

Enabling ThreadX from an X-CUBE-AZRTOS Software Pack
Having added ThreadX Software Pack to the project the X-CUBE should be visible in the "Catagories" menu on the left side of the project menu in STM32CubeMX under Software Packs where it can be enabled.
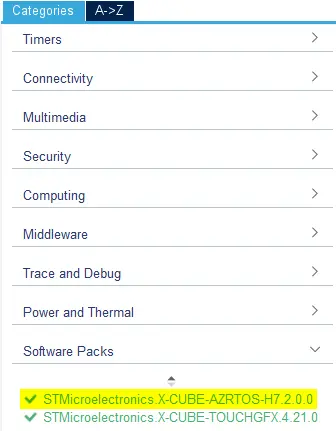
ThreadX from X-CUBE-AZRTOS enabled in STM32CubeMX project
Once enabled the ThreadX option becomes available in TouchGFX Generator.
Further reading
Other CMSIS compliant OS
When developers require a different CMSIS compliant OS than what STM32CubeMX can offer (FreeRTOS and ThreadX)
they must perform RTOS configuration and task definition manually. TouchGFX Generator will generate an empty
OSWrappers interface that the developer must implement. Generally, the following manual steps are required:
- Configure the RTOS
- Implement
OSWrappersinterface - Define a task to run TouchGFX (
MX_TouchGFX_Process) - Start the scheduler
Call MX_TouchGFX_Process to start the TouchGFX Engine Main Loop inside the task handler.
void MX_TouchGFX_Process(void);