Using TouchGFX with STM32CubeMX2
Using TouchGFX with STM32CubeMX2 is currently less straightforward than with the original STM32CubeMX, because the X-CUBE-TOUCHGFX generator is not available in STM32CubeMX2. This article describes some guidelines for integrating TouchGFX into an STM32CubeMX2 project, with CMake as the preferred toolchain.
Create the STM32CubeMX2 project
The first step is to create an STM32CubeMX2 project for the relevant MCU and set up the clock configuration and peripherals. Which peripherals are needed and how they should be configured depend heavily on the hardware configuration, such as the display interface, etc.
Examples of peripherals typically needed in TouchGFX applications:
- Display interface:
- LTDC
- DSI
- SPI
- XSPI
- FMC
- Display control/synchronization:
- GPIO
- EXT interrupt
- Timer
- User input:
- I2C
- GPIO
- Graphics acceleration:
- DMA2D
- GPU2D
- JPEG
- External memories:
- SPI
- XSPI
- FMC
- System:
- CRC (needed for TouchGFX initialization)
It is recommended to verify that the basic project and peripheral configuration work as intended before proceeding to add TouchGFX to the project. This should be done by generating, compiling, and running the project on the target hardware platform, and testing that the peripherals and interfaces are functioning as intended.
Note
At the time of writing, only STM32C5 MCUs are supported in STM32CubeMX2. These MCUs only include a subset of the peripherals listed above.
Add TouchGFX files to the project
TouchGFX is added to a project as a set of files that are typically placed in a folder called TouchGFX with a structure like this:
TouchGFX
├─ App
|  ├─ app_touchgfx.c
|  └─ app_touchgfx.h
├─ target
|  ├─ generated
|  |  ├─ TouchGFXGeneratedHAL.cpp
|  |  ├─ TouchGFXGeneratedHAL.hpp
|  |  └─ ...
|  ├─ TouchGFXHAL.cpp
|  ├─ TouchGFXHAL.hpp
|  └─ ...
├─ MyTGFXApp.touchgfx
└─ ...
These files are normally initially generated by the X-CUBE-TOUCHGFX middleware available in the original STM32CubeMX. Since this generator is not available in STM32CubeMX2, these files must be manually added to the project. They can be written from scratch, but the recommended approach is to copy them from an existing TouchGFX project and modify them as needed. The TouchGFX folder can be placed anywhere in the project file structure; the "ProjectFile" path described in the TouchGFX Designer project file just needs to be set accordingly.
Some good example projects to copy from can be found by opening TouchGFX Designer, clicking "Create" and searching for "STM32CubeMX2":
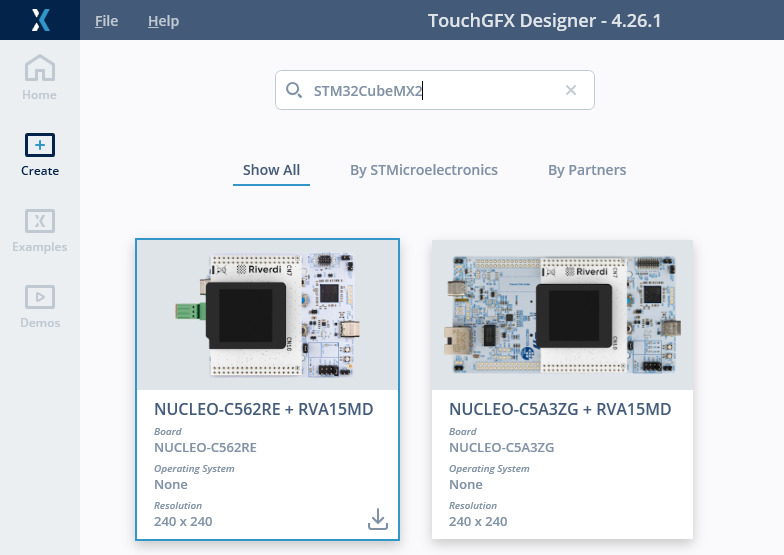
Example of STM32CubeMX2 based TBSs available in TouchGFX Designer
Note
TouchGFX projects based on the original STM32CubeMX can also be used as references, but they will require more modifications to convert them to use STM32 HAL2 drivers.
TouchGFX Hardware Abstraction Layer files
The App and target folders contain source and header files that are directly included in the build of the target application. These files set up the rendering and framebuffer strategy and implement the hardware abstraction between TouchGFX and the display interface, touchcontroller, etc.
At the time of writing, only two example projects for STM32C5 are available. Both are examples of the following TouchGFX configuration:
- SPI display interface
- Partial framebuffer strategy
- 16-bit color depth
- External SPI flash (unmapped)
- No RTOS
As more MCUs and configurations become available in STM32CubeMX2, more example projects with different configurations will also become available in TouchGFX Designer.
TouchGFX Designer project files
The .touchgfx file is the project file for TouchGFX Designer. In addition to the GUI design, this file also holds project information that is used when clicking "Generate code" in TouchGFX Designer. This information must be manually changed to fit the project. Besides the obvious fields like resolution and MCU family etc., it is very important to specify the "ProjectFile" correctly to make sure that TouchGFX Designer updates the correct project file when generating code. "ProjectFile" must specify the path to the project file generated by STM32CubeMX2 relative to the .touchgfx file.
When clicking Generate code in TouchGFX Designer and "ProjectFile" is set to a CMakeLists.txt file, TouchGFX Designer will generate its own CMakeLists.txt file (listing all TouchGFX files and libraries) and add this to the specified project CMakeLists.txt using add_subdirectory.
When generating code in TouchGFX Designer, it will normally output the framework library files to ../Middlewares/ST/touchgfx_components to integrate it with the files generated by the original STM32CubeMX. But when using TouchGFX in an STM32CubeMX2 project, it is recommended to keep the TouchGFX component libraries inside the TouchGFX folder (e.g. "OptionalComponentsRoot": "lib/touchgfx_components") so they are not mixed with STM32CubeMX2-generated files.
The "CompileTargetCommandOverride" and "FlashTargetCommandOverride" fields are optional and only needed to enable build and programming inside TouchGFX Designer using the "Run Target" button.
An example on how the .touchgfx file could look for NUCLEO-C5A3ZG is shown below.
MyTGFXApp.touchgfx
...
"Resolution": {
    "Width": 240,
    "Height": 240
},
"SelectedColorDepth": 16,
"AvailableColorDepths": [
    16
],
"AvailableLCDs": {
    "16": "LCD16bppSerialFlash"
},
"AvailableResolutions": [
    {
    "Width": 240,
    "Height": 240
    }
],
"FrameworkFeatures": {
    "LCD16bppSerialFlash": {
    "Id": "LCD16bppSerialFlash",
    "IsEnabled": true
    }
},
"GenerateAssetsCommand": "make -f simulator/gcc/Makefile assets -j8",
"PostGenerateCommand": "touchgfx update_project --project-file=simulator/msvs/Application.vcxproj",
"PostGenerateTargetCommand": "touchgfx update_project",
"CompileSimulatorCommand": "make -f simulator/gcc/Makefile -j8",
"RunSimulatorCommand": "build\\bin\\simulator.exe",
"CompileTargetCommandOverride": "cmake ../MyTGFXApp_cmake --preset debug_GCC_STM32C5A3ZGT6 & cmake --build ../MyTGFXApp_cmake/build/debug_GCC_STM32C5A3ZGT6",
"FlashTargetCommandOverride": "\"C:/Program Files/STMicroelectronics/STM32Cube/STM32CubeProgrammer/bin/STM32_Programmer_CLI.exe\" -c port=SWD -d ../MyTGFXApp_cmake/build/debug_GCC_STM32C5A3ZGT6/MyTGFXApp.elf -el ../MX25L6433F_STM32C5A3ZG-NUCLEO.stldr -hardRst",
"Family": "STM32C5",
"SubFamily": "STM32C5A3",
"Platform": "m33",
"ProjectFile": "../MyTGFXApp_cmake/CMakeLists.txt",
"OptionalComponentsRoot": "lib/touchgfx_components",
...
Integrate TouchGFX in the application execution
After adding all the needed TouchGFX files to the project, the application code generated by STM32CubeMX2 needs to be modified to execute the TouchGFX code. When running a bare-metal application (without any RTOS), the TouchGFX code can be integrated directly into the main function like this:
main.c
#include "main.h"
#include "app_touchgfx.h"

int main(void)
{
  if (mx_system_init() != SYSTEM_OK)
  {
    return (-1);
  }
  else
  {
    MX_TouchGFX_Init();

    while (1)
    {
      MX_TouchGFX_Process();
    }
  }
}
Using different compilers and IDEs
STM32CubeMX2 supports multiple formats for IDE project generation. The default format is CMake, which can be used with a wide range of IDEs and toolchains. Alternatively, STM32CubeMX2 can also generate other IDE project formats, e.g. for IAR EWARM. The generated project format can be selected in the "Project Settings" tab in STM32CubeMX2. The generated project format determines how the TouchGFX files should be added to the IDE project and how they should be built and flashed. This will be described in the following sections.
Note
The original STM32CubeMX supports generation of multiple IDE projects working with the same source code files. STM32CubeMX2 will instead generate separate source code folders for each IDE format, e.g. MyTGFXApp_cmake and MyTGFXApp_ewarm. So if you want to support multiple IDE formats in the same project, you need to manually modify main.c, etc., in each of the project folders.
STM32CubeIDE for Visual Studio Code
The CMake project generated by STM32CubeMX2 can be imported in Visual Studio Code using the "STM32CubeIDE for Visual Studio Code" extension. This allows you to build, flash and debug the project directly from Visual Studio Code. For more information on how to install and use the extension, refer to its user guide.
STM32CubeIDE
STM32CubeIDE can be used natively to flash and debug CMake projects generated with STM32CubeMX2. It requires STM32CubeIDE 2.1.1 or newer. To import the project in STM32CubeIDE, follow this procedure:
- Go to
File→STM32 Project Create/Import. - Press
Select STM32CubeMX2 Project→Next. - Enter the project name and location of the STM32CubeIDE project.
- Set the source directory. This should be the *_cmake directory in your project.
- Press
Next. - Select the toolchain (this should correspond to the selected toolchain in STM32CubeMX2).
- Select the correct MCU.
- Press
Finish
Now, the project works as a normal STM32CubeIDE project. That means that it is possible to flash and debug the board.
Note
If external flash is used, the external loader needs to be added to the debug configuration to enable flashing of external flash when starting the debug session.
Tip
More information on how to use STM32CubeIDE with STM32CubeMX2 projects can be found in this Knowledge Base article.
IAR EWARM
It is also possible to use EWARM for TouchGFX projects based on STM32CubeMX2. However, an EWARM project is not shipped with the TBSs available in TouchGFX Designer. It requires some tweaking to get it working. The following steps guide you through enabling EWARM in TouchGFX + STM32CubeMX2 projects, assuming you already have a working CMake project.
In STM32CubeMX2, generate code for the IAR/EWARM toolchain.
Open the project in a file explorer and navigate to the
projectfolder inside the EWARM folder.Create an empty
.ipcffile with a meaningful name.Open the
.touchgfxfile in a text editor and locate theProjectFileproperty.Set
"ProjectFile"to the path of the.ipcffile just created. For example that could be:"ProjectFile": "../MyTGFXApp_ewarm/project/MyTGFXApp.ipcf",Generate code in TouchGFX Designer. This will update the
.ipcffile with the GUI files and libraries generated by TouchGFX Designer.The TouchGFXHAL-related files will not be added to the project automatically since they are not generated by TouchGFX Designer. These files need to be added manually to the EWARM project. This can be done by creating a separate
.ipcffile for the TouchGFXHAL files. This could, for example, look like this:<?xml version="1.0"?>
<iarProjectConnection name="TouchGFX_files" oneShot="false">
<includePath>
<path>$PROJ_DIR$/../../TouchGFX/App</path>
<path>$PROJ_DIR$/../../TouchGFX/target</path>
<path>$PROJ_DIR$/../../TouchGFX/target/generated</path>
</includePath>
<asmIncludePath></asmIncludePath>
<defines></defines>
<asmDefines></asmDefines>
<files>
<group name="TouchGFX">
<group name="App">
<path>$PROJ_DIR$/../../TouchGFX/App/app_touchgfx.c</path>
<path>$PROJ_DIR$/../../TouchGFX/App/app_touchgfx.h</path>
</group>
<group name="target">
<group name="generated">
<path>$PROJ_DIR$/../../TouchGFX/target/generated/OSWrappers.cpp</path>
<path>$PROJ_DIR$/../../TouchGFX/target/generated/STM32DMA.cpp</path>
<path>$PROJ_DIR$/../../TouchGFX/target/generated/STM32DMA.hpp</path>
<path>$PROJ_DIR$/../../TouchGFX/target/generated/TouchGFXConfiguration.cpp</path>
<path>$PROJ_DIR$/../../TouchGFX/target/generated/TouchGFXGeneratedHAL.cpp</path>
<path>$PROJ_DIR$/../../TouchGFX/target/generated/TouchGFXGeneratedHAL.hpp</path>
<path>$PROJ_DIR$/../../TouchGFX/target/generated/TouchGFXGeneratedDataReader.cpp</path>
<path>$PROJ_DIR$/../../TouchGFX/target/generated/TouchGFXGeneratedDataReader.hpp</path>
</group>
<path>$PROJ_DIR$/../../TouchGFX/target/KeySampler.cpp</path>
<path>$PROJ_DIR$/../../TouchGFX/target/KeySampler.hpp</path>
<path>$PROJ_DIR$/../../TouchGFX/target/STM32TouchController.cpp</path>
<path>$PROJ_DIR$/../../TouchGFX/target/STM32TouchController.hpp</path>
<path>$PROJ_DIR$/../../TouchGFX/target/TouchGFXDataReader.cpp</path>
<path>$PROJ_DIR$/../../TouchGFX/target/TouchGFXDataReader.hpp</path>
<path>$PROJ_DIR$/../../TouchGFX/target/TouchGFXGPIO.cpp</path>
<path>$PROJ_DIR$/../../TouchGFX/target/TouchGFXHAL.cpp</path>
<path>$PROJ_DIR$/../../TouchGFX/target/TouchGFXHAL.hpp</path>
</group>
</group>
</files>
</iarProjectConnection>Use the same approach as described above for any other driver or board-specific files needed (e.g. a display driver).
Open the project in EWARM.
Make sure all the
.ipcffiles are added to the EWARM project.In EWARM, go to
Project→Options...→C/C++ Compiler→Language 1and ensure that the language is set toAuto.Make sure the EWARM linker script is correctly set up.
Integrate TouchGFX in the application code, as previously described.
After these steps the project should be ready to be built and run.
Note
If 'Run Target' is enabled in TouchGFX Designer based on CMake, this will not work properly anymore, since the ProjectFile parameter is changed.
Conclusion
Using the steps above you can integrate TouchGFX into STM32CubeMX2 projects despite the current lack of a generator.
The recommended approach is to use the example projects available in TouchGFX Designer as a starting point and modify them as needed.
Tip
- It is also possible to do an HAL2-only integration without STM32CubeMX2.
- Improved integration of TouchGFX with STM32CubeMX2 is planned in the future.